


 Welcome to Deves Technet.com Forums. I encourage everyone to register so we can get a better idea of the traffic and its usefulness. Please leave a word or two describing your stay and what we can do to make it more enjoyable. Thanks!
 Tweet
Tweet
Note: As with all of the content on this website, you can simply click on any picture to get its largest size. In this way, we can maintain the clearest definition to make it easier for you to see the detail. If the picture is so big you can't see all of it on your screen, all you have to do is hold down CONTROL and move the mouse wheel up and down to resize!
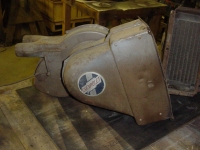
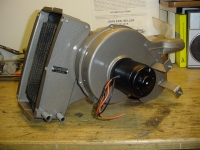
 Here is the heater just taken out of the truck. Where to start? We have a few issues to consider. The two main issues are making it look like new and making it work like new. In this case it will be better than new since we will also use a 12 volt motor to run it. In addition, the unit must not in any way look as if it is not 100% original.
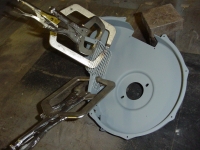
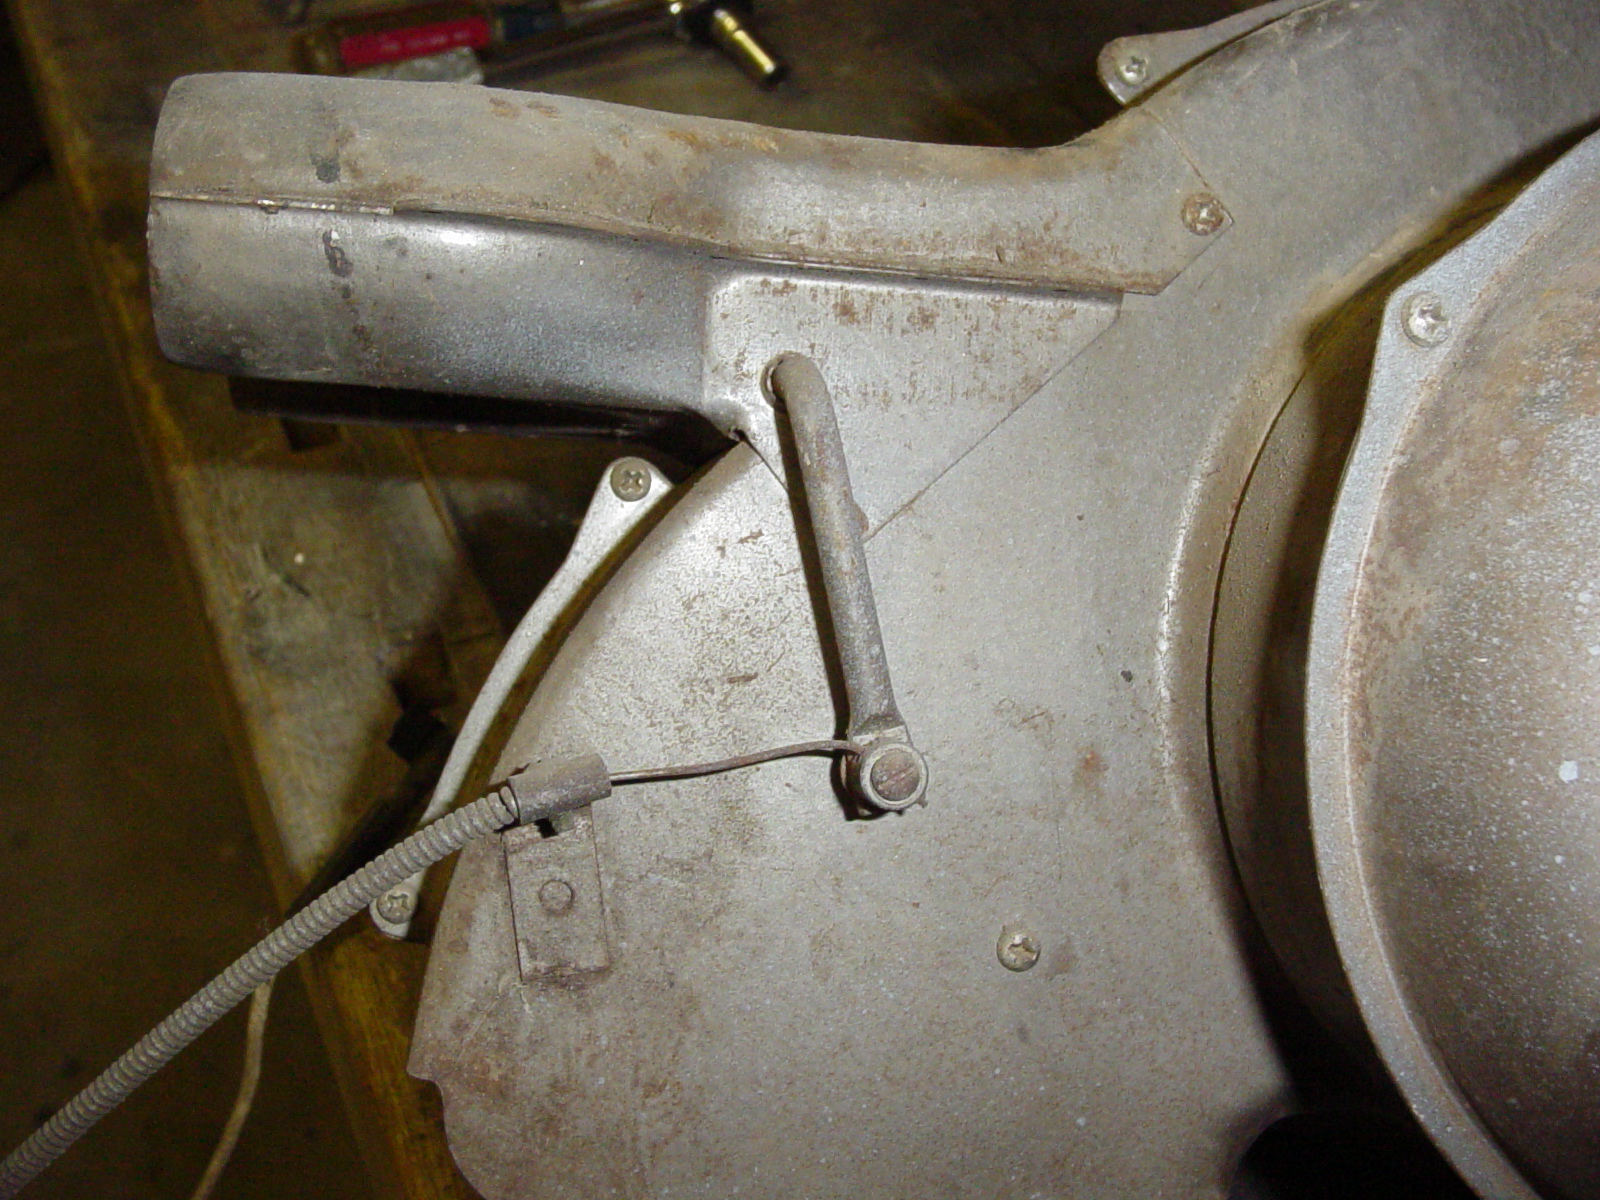
Let's get a few shots of the heater still fully assembled so that we don't forget how it goes back together. This picture shows not only how the ducts are arranged, but how much play in the defroster cable is normal. This will help during re-assembly.

 This one will help us figure out the relationship of the parts during re-assembly. Once you have it apart, it becomes apparent how important the before pictures can be.
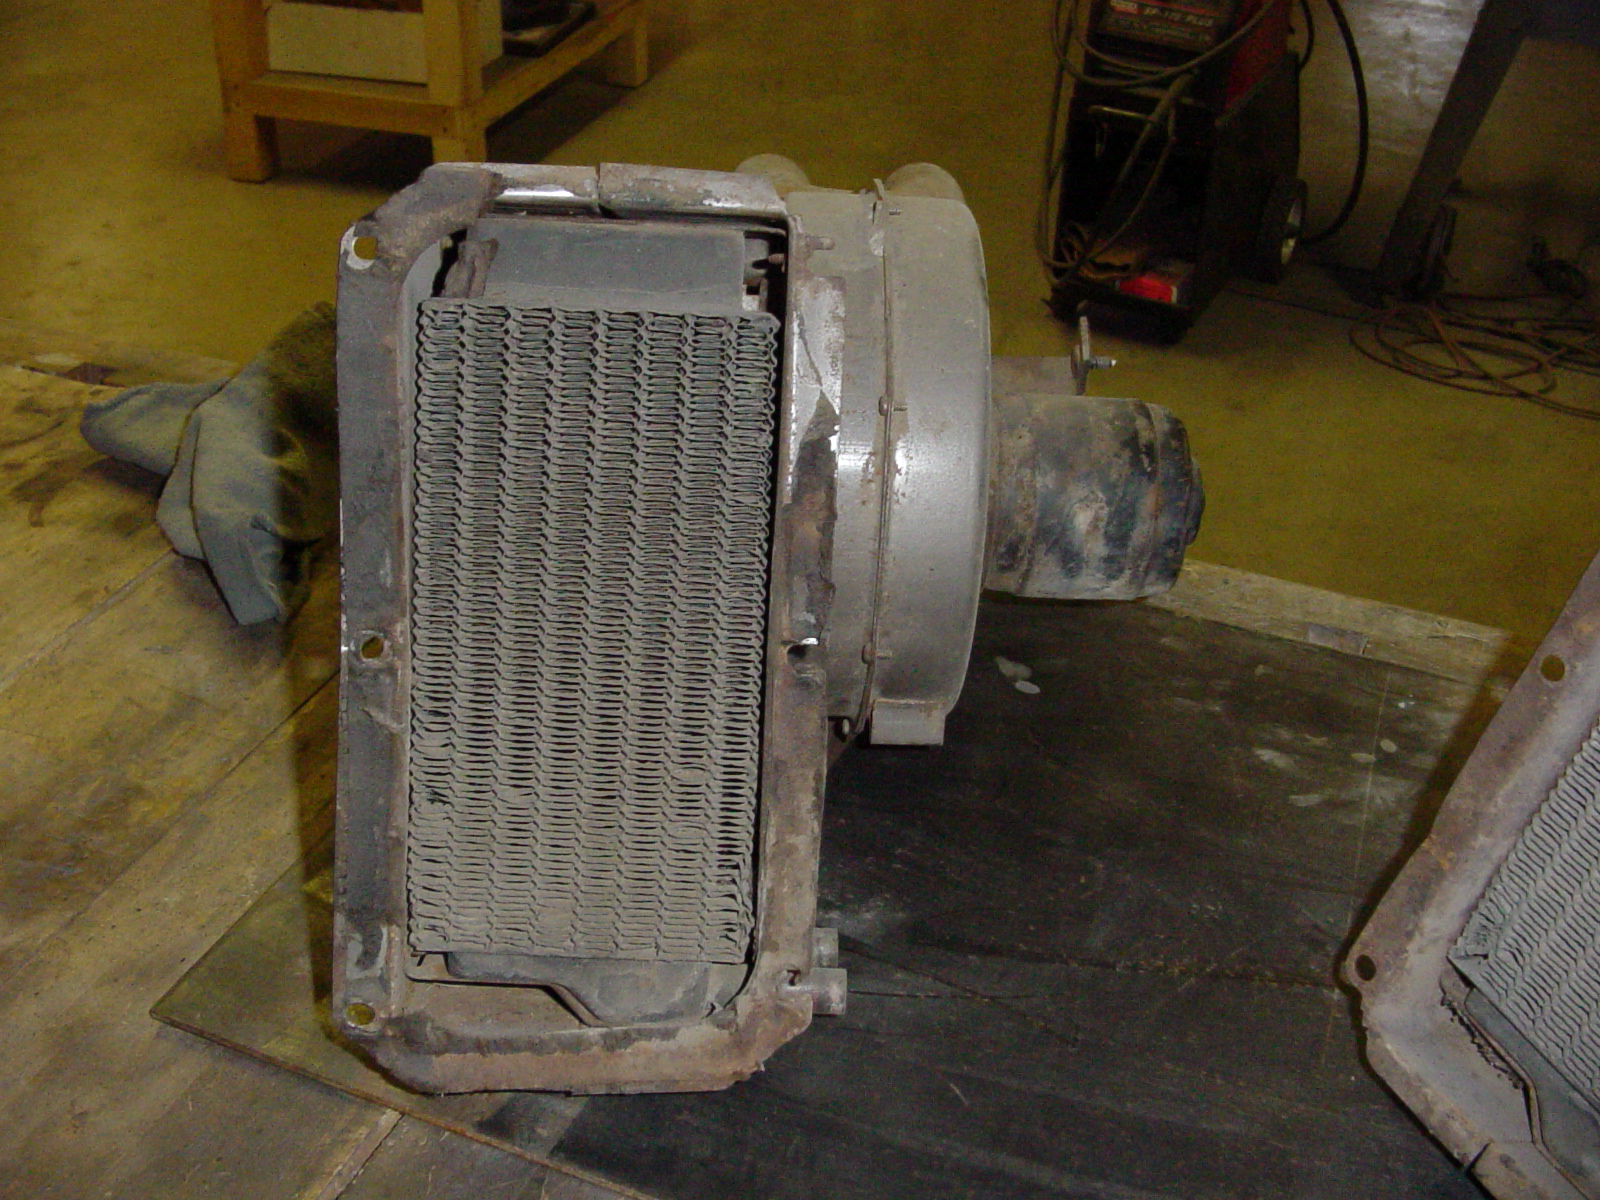
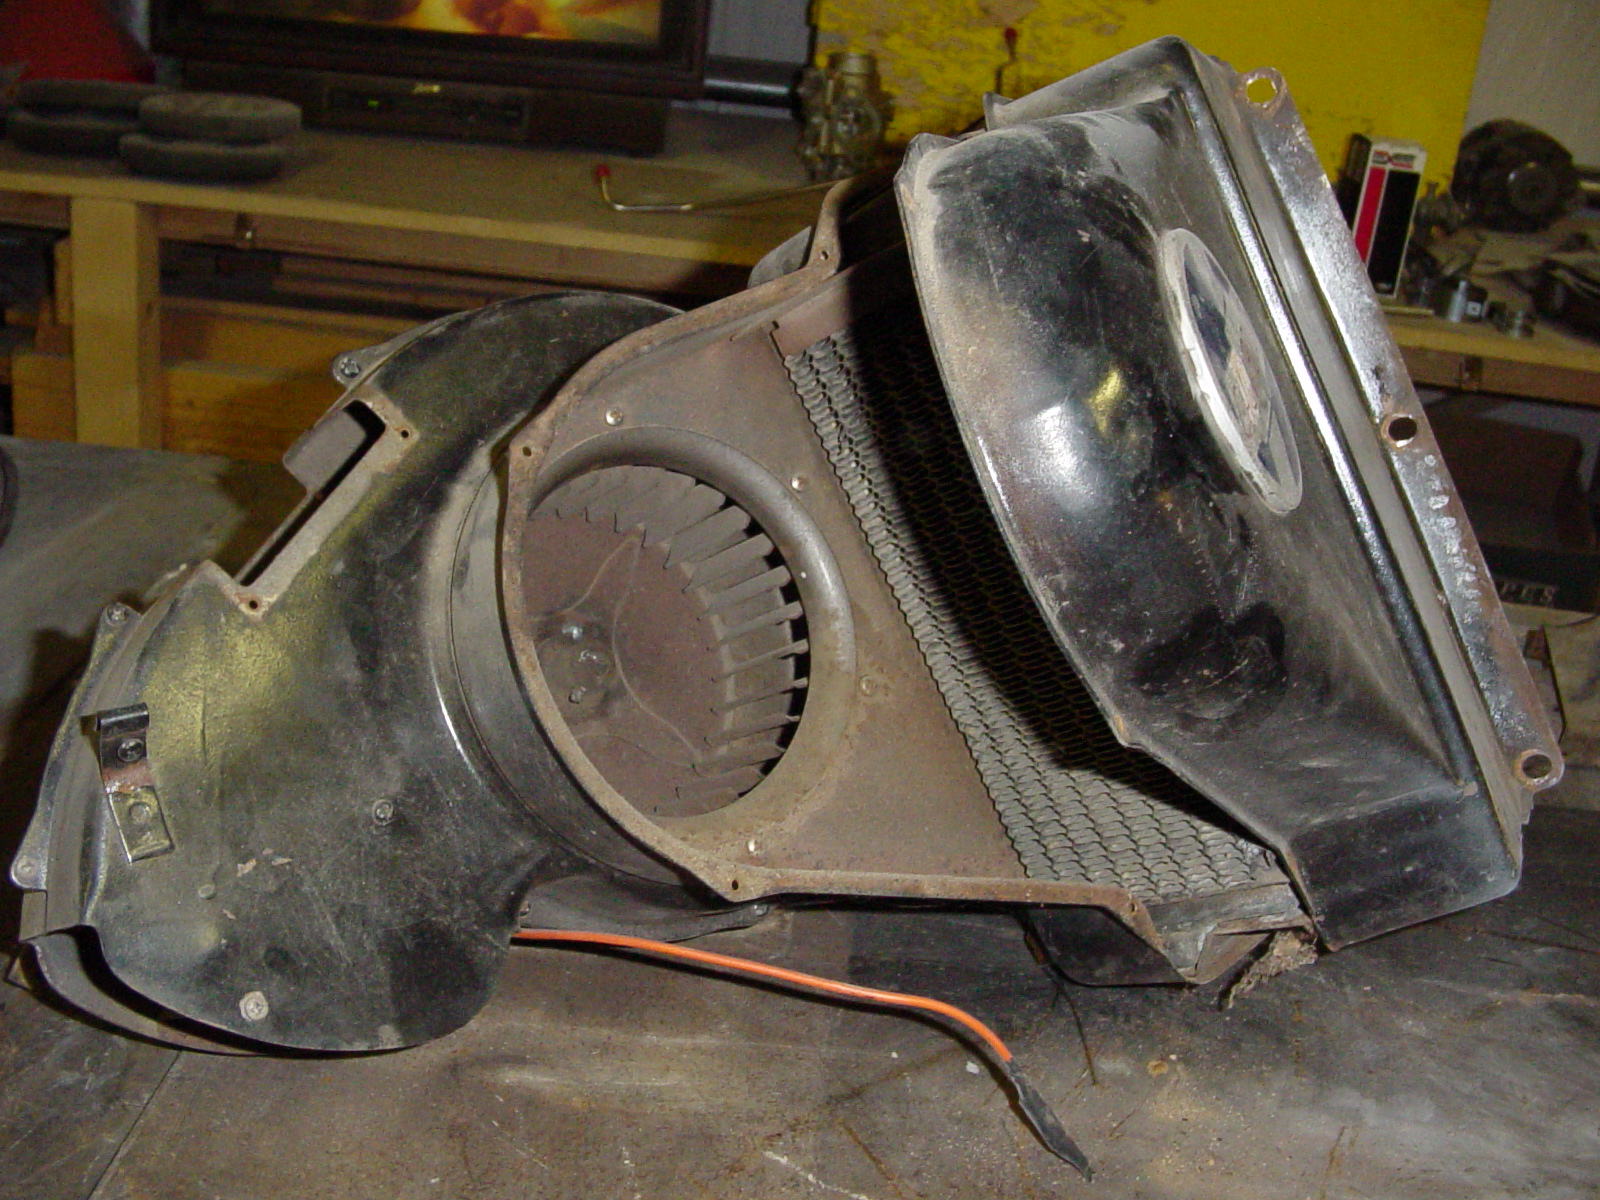
Here's a shot of the heater core and how it's installed in the housing. Turns out this core is good.

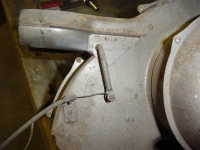
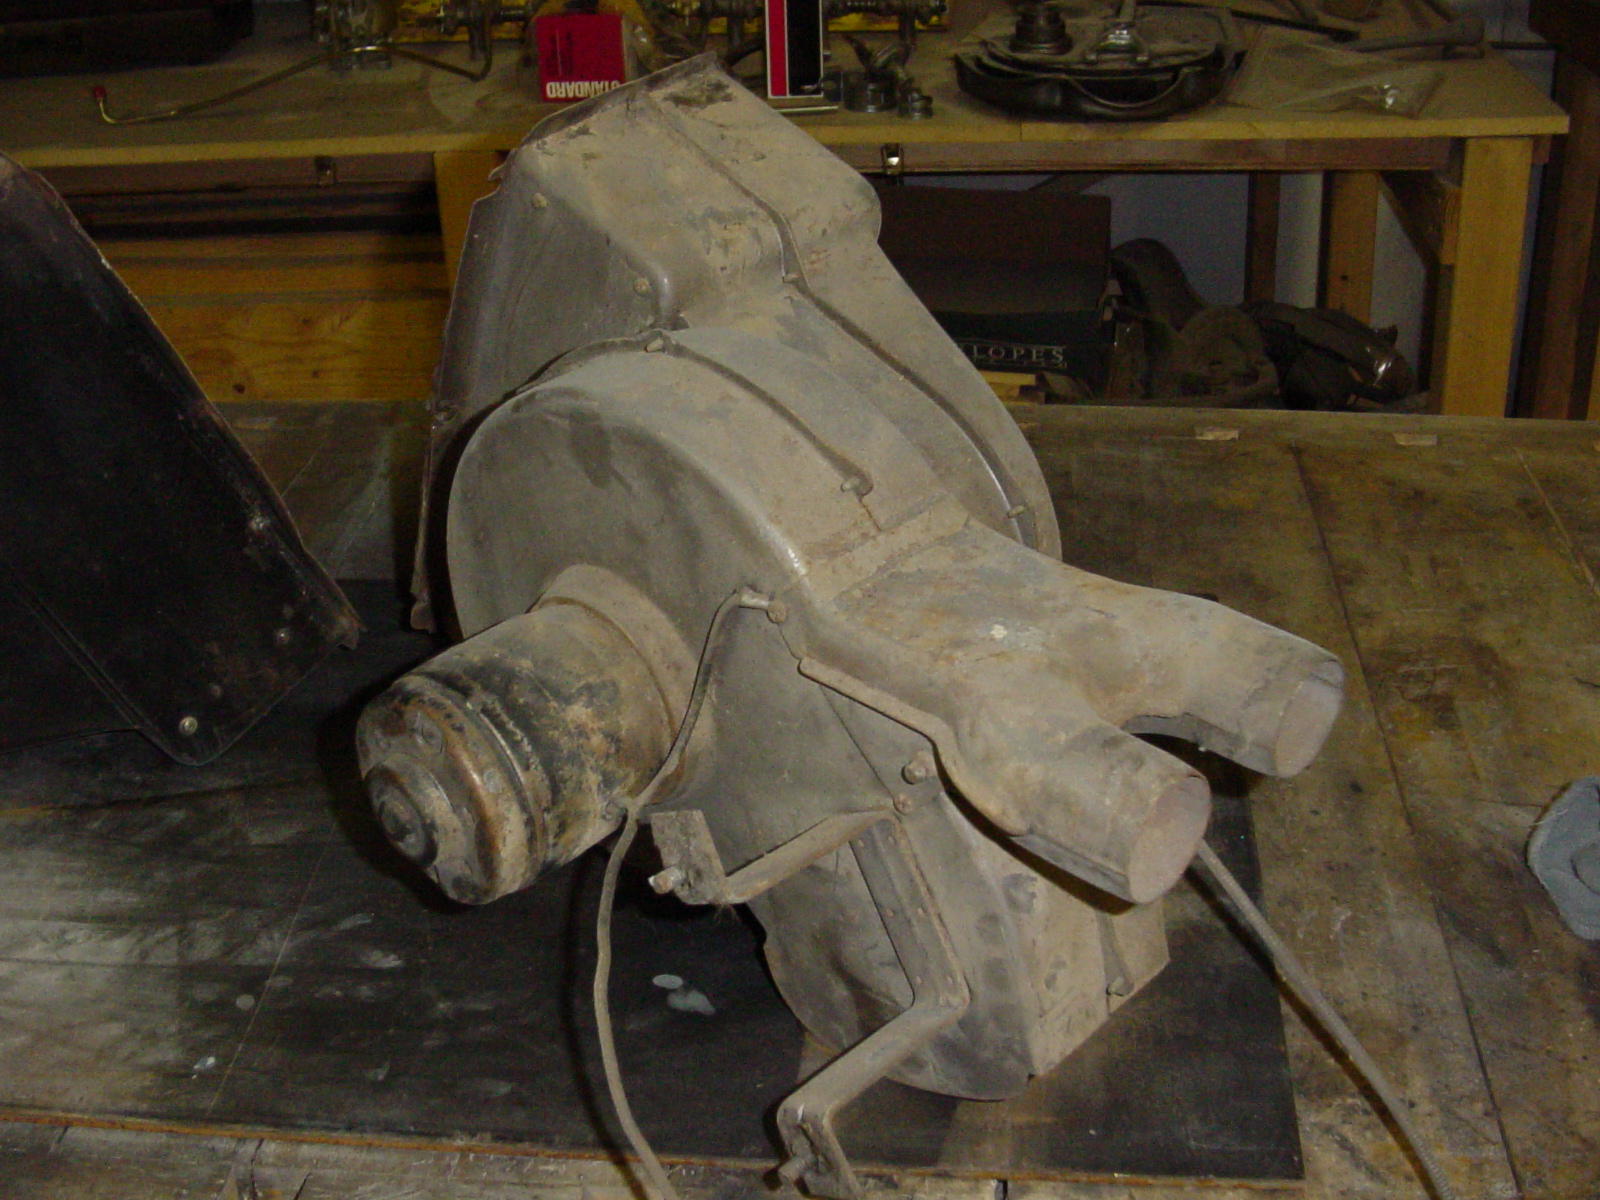
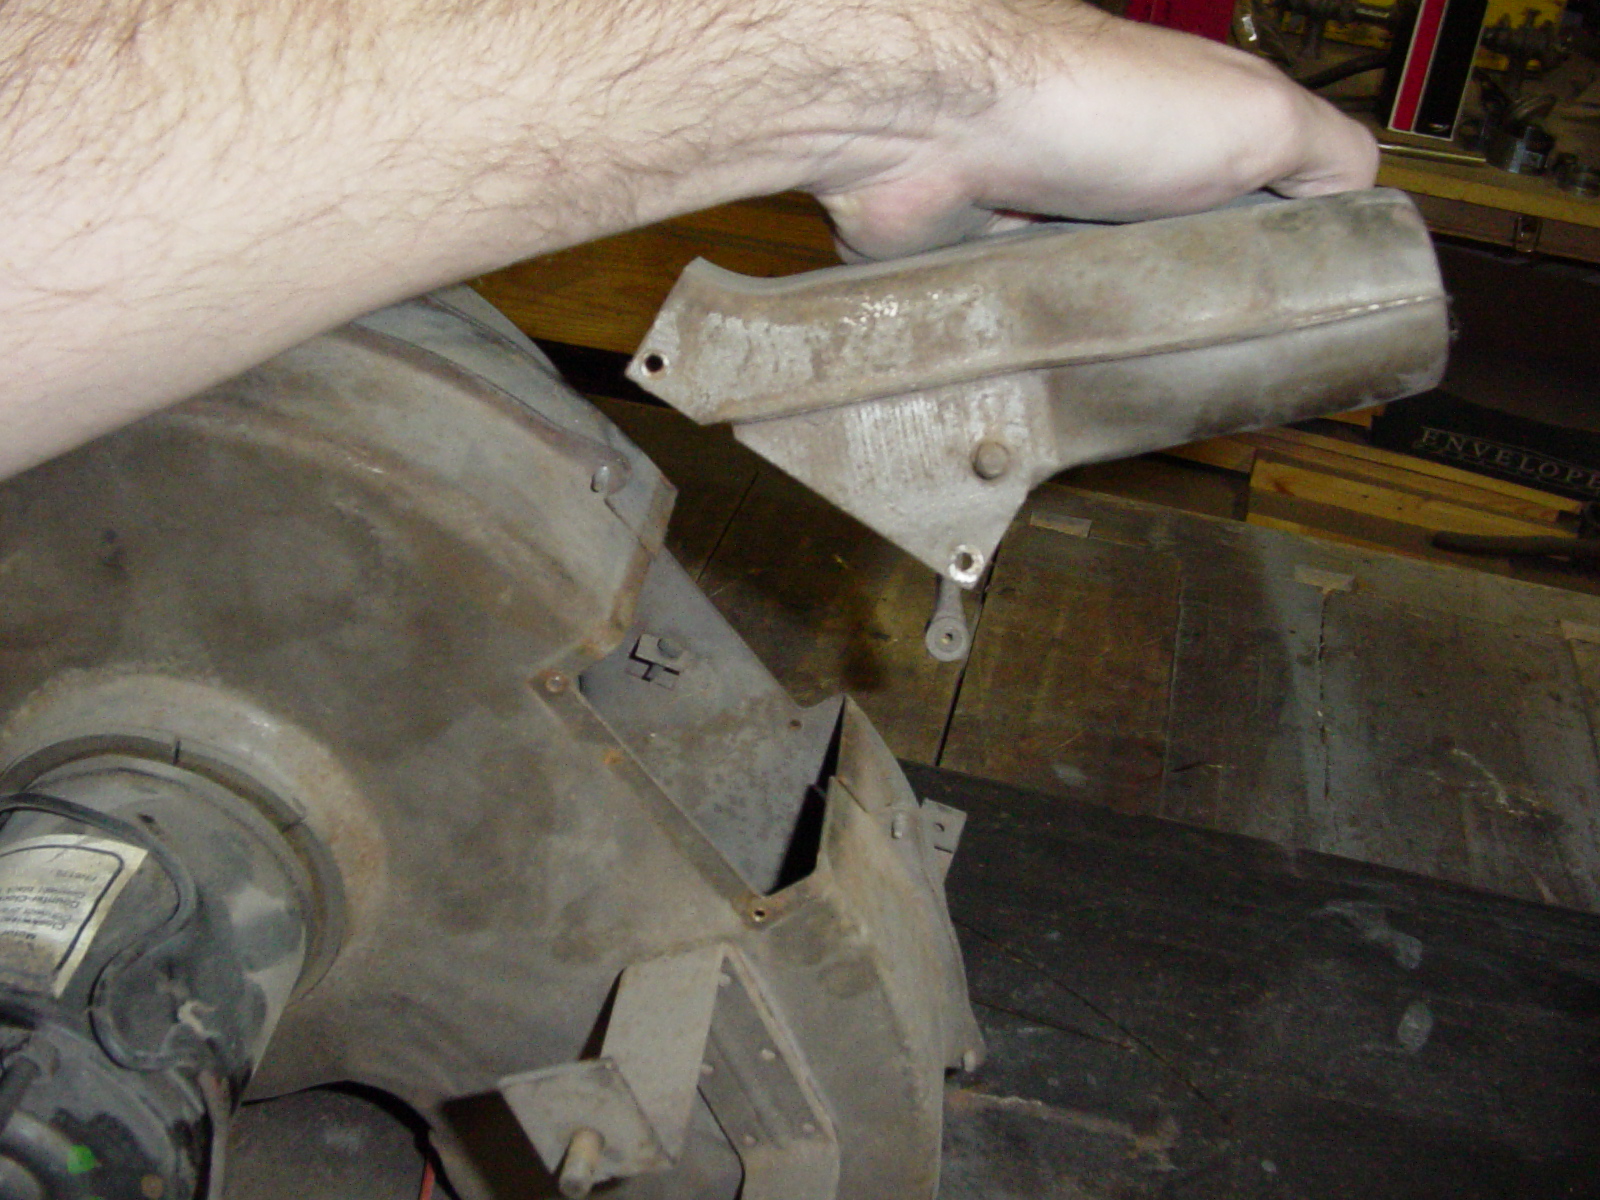
 This is how the small duct housing is attached to the motor housing. In this picture and inside the main housing is a small rubber bumper. This picture shows the direction that bumper needs to be reinstalled in. You want to take great care and use unusual finesse in removing this bumper. It is not available through any of our vendors. It will need to be removed for the re-painting process. I realize this picture is too small to see it (click on the picture for a larger one), but trust me, it's there, and you need to take great care with it.
This is how the two halves of the core housing are assembled. Just about everything involved in this project is fastened with #6 x 3/8 inch Phillips Pan Sheet Metal Screws. Buy new ones; they are cheap.

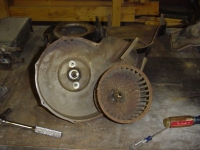 Here is the rest of the core housing removed from the motor housing. There were no gaskets in between the two.
This one is with the fan assembly removed. This is no big deal really. There is a slotted set screw on the side of the shaft and all it takes is loosening that and then a little persuasion with a punch and the fan will come right off. Be careful not to beat on things too hard since it is very possible to bend the fan assembly.
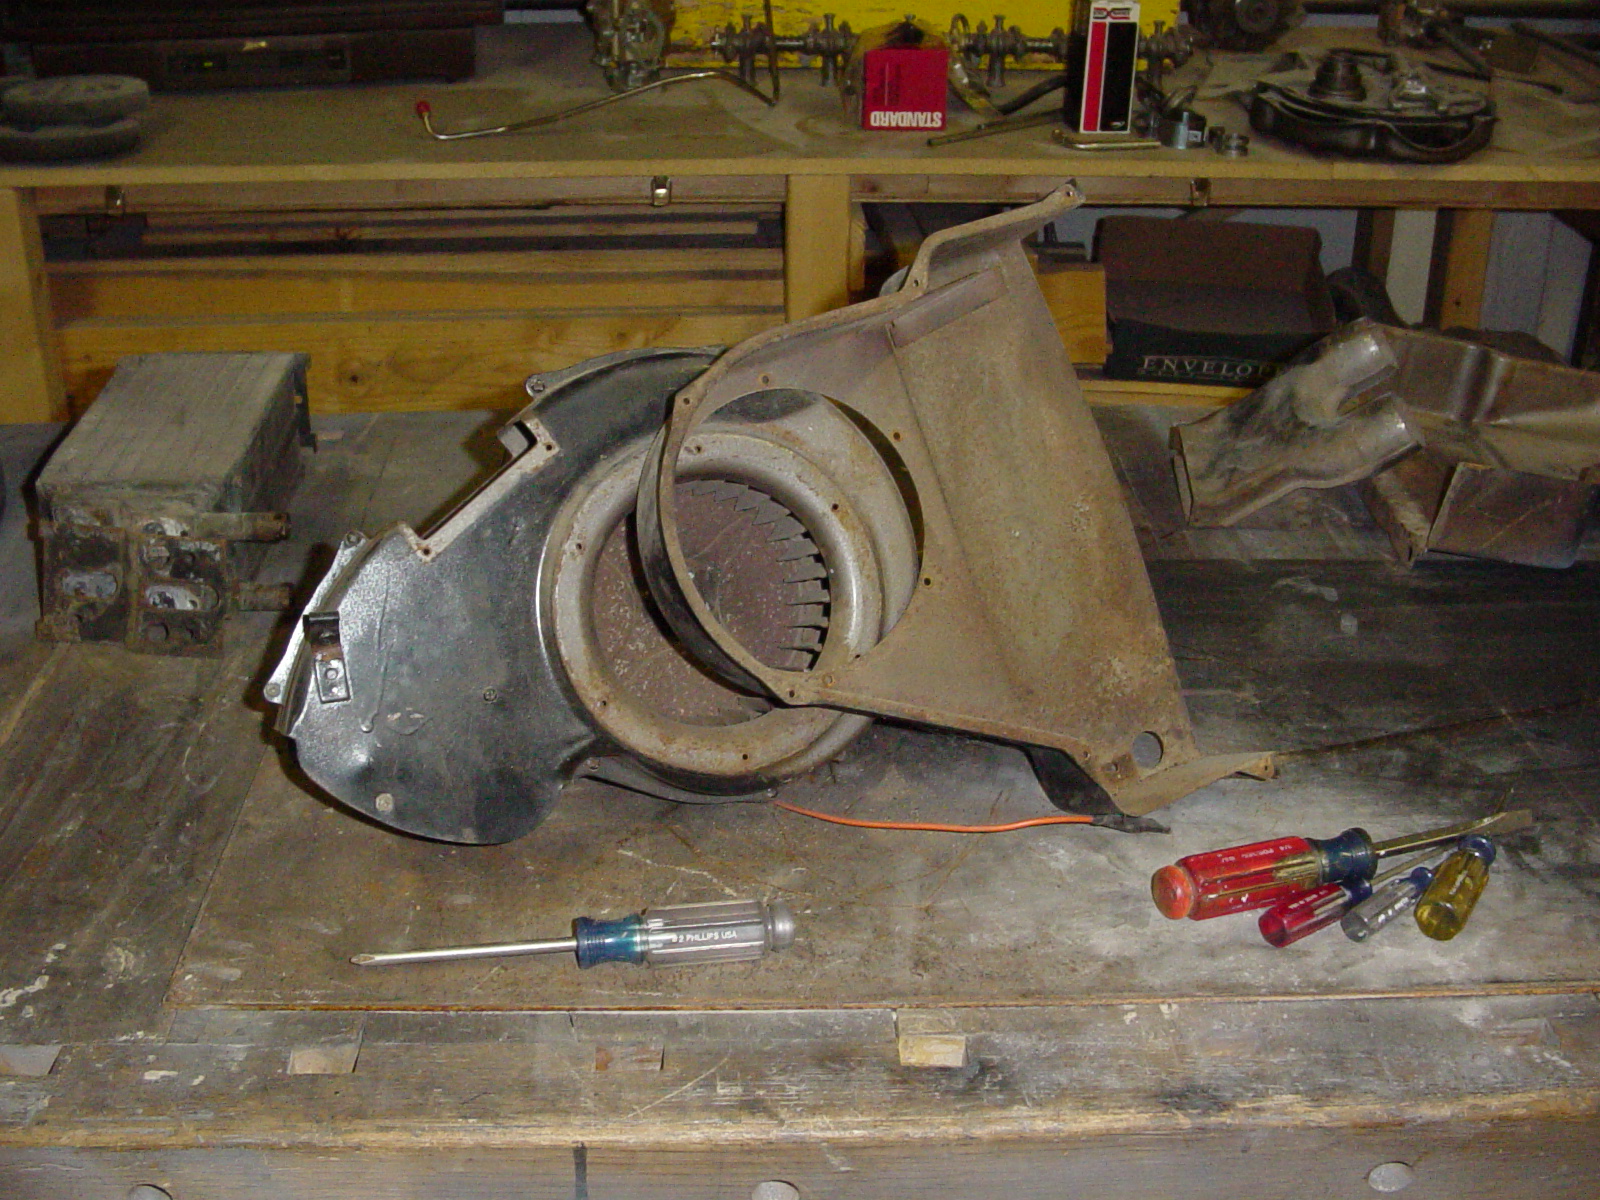
 This is the entire heater disassembled. Not a lot to it, but these pics should help in getting it all correctly back together. In case you can't see enough detail, you can click on these pictures to make them much larger. They are in 1200x1600 high resolution.
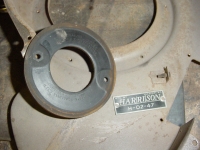
This is to show a few things - what the Harrison Faceplate looks like exactly, what the 'motor to housing' gasket looks like, and the placement of the aforementioned rubber bumper.

 There are two of them pesky rubber bumpers. Here is where the other one goes. Again, take care in removing them since they are not available new.
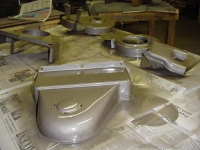
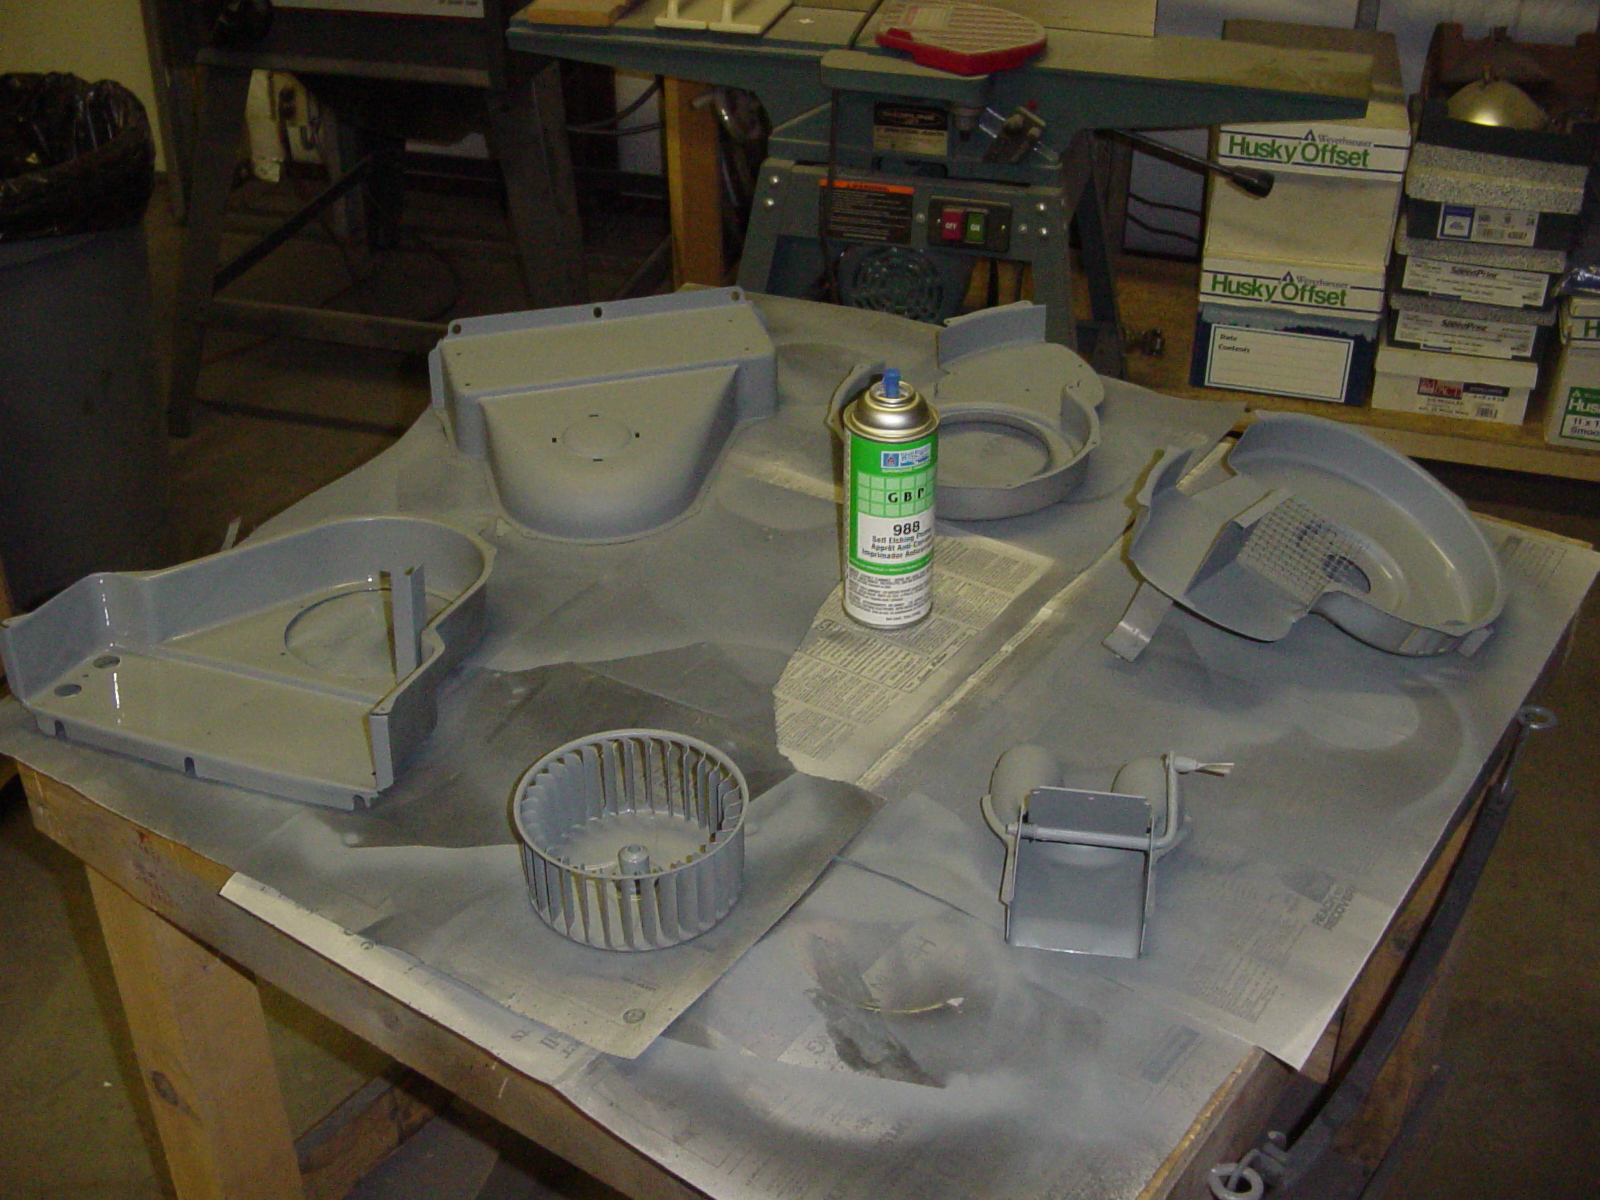
Here are all the parts laid out after sandblasting and thorough cleaning and then primer-ed using a good self-etching primer. Take time to do a thorough job in prepping your metal parts. This heater will get hot and be used a lot so the paint should adhere well.
 My heater had a missing screen. Since I have two and can see what was original, I discovered that 1/4" hardware cloth available at the local lumber yard was what they used originally. I just got a small piece and then used JBWeld to glue it down. It was originally tack welded into place, but that would be a little hard for me to do. JBWeld works perfectly.
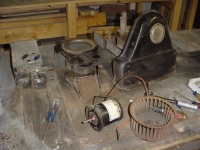
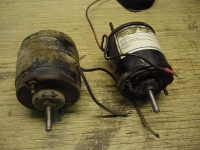
The motor on the left is the 6 volt original and the one on the right is a 12 volt replacement. This difference would be noticeable under the hood thus unacceptable. It so happens that Chevs of the 40's sells a replacement 12 volt motor that is small enough to fit IN the 6 volt motor housing! It takes a little work to remove the 6 volt guts, but once you have done this, you have a perfectly original looking 12 volt motor. If the motor you get doesn't appear to fit (front to back), it may be because you are not done gutting the 6v motor. Clear inside the back of the motor housing is another small piece thats riveted in. Remove that, and it should all make perfect sense.
 This picture is offered so that you can get the correct replacement motor when you call Chevs of the 40's. They are also the only vendor I have found that has the complete gasket set for these heaters and the decal for the defroster mechanism. Bowtie Bits is the only vendor I have found that carries the thick rubber motor-to-housing gasket.
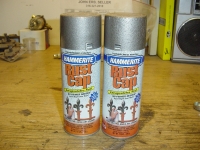
This is the paint I finally decided on. You can get heater paint from any of the vendors, but this product is a name brand and is a perfect factory fresh match. The best part is that it is in aerosol cans so its very easy to use. Use a swirling motion and be sure to shake the can extra well. Two cans is more than enough to do an entire heater. The paint is made by the Kilz corporation and its called Hammerite Rust Cap Bronze. Eastwood sells it.
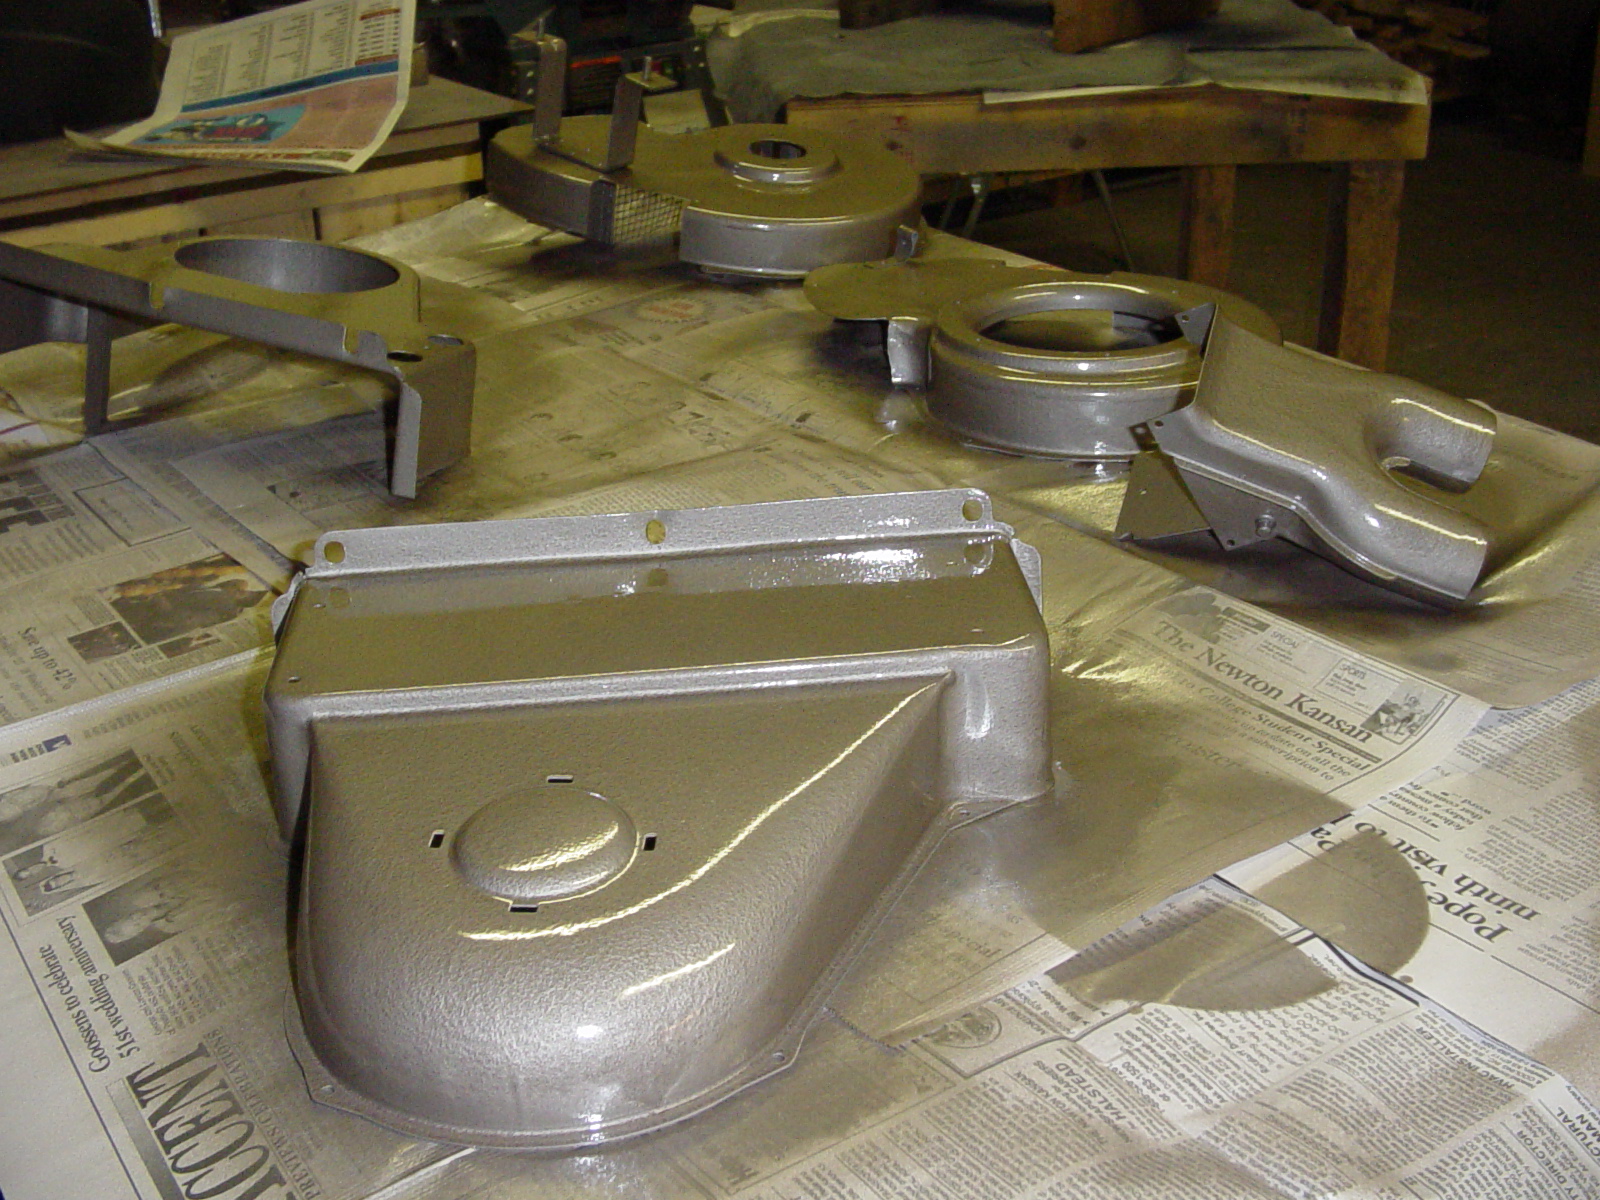
 Here are the parts all laid out and painted. They came out absolutely perfect. The color and the finish is amazing. I painted the inside of each piece first so that I could test my technique on an area that wouldn't be seen. I let the first side dry overnight and then came in the next day and painted the outside. I then let the job set for 3 days before re-assembly.
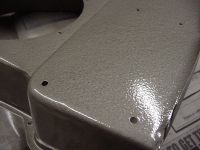
This is just a close-up of the work so you can see the hammered finish. It looks so original. The colors in these pictures don't do the work justice. My digital camera and the color of the fluorescent lights in the shop change its appearance.
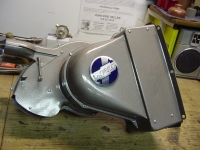
Thanks to the previous pictures, I figured out how to put it back together! I think this heater will look very nice in my '50 frame up restoration project.
Notice the motor. It looks exactly like the 6 volt original. After I shot these pictures, I added the proper defroster decal. The 'Chevrolet' emblem is not a decal. It is a faceplate and you can get that from most of the vendors. I used JBWeld to attach it to the original plate once I polished the sides of it.
Here is the before and after. You have to really see it to believe it. I hope documenting this does someone some good.
More Pictures available at The Site Archive Page!
This article was first published at DevesTechNet.com(c)2015 All Rights Reserved

 Here is the heater just taken out of the truck. Where to start? We have a few issues to consider. The two main issues are making it look like new and making it work like new. In this case it will be better than new since we will also use a 12 volt motor to run it. In addition, the unit must not in any way look as if it is not 100% original.
Let's get a few shots of the heater still fully assembled so that we don't forget how it goes back together. This picture shows not only how the ducts are arranged, but how much play in the defroster cable is normal. This will help during re-assembly.
 This one will help us figure out the relationship of the parts during re-assembly. Once you have it apart, it becomes apparent how important the before pictures can be.
Here's a shot of the heater core and how it's installed in the housing. Turns out this core is good.
 This is how the small duct housing is attached to the motor housing. In this picture and inside the main housing is a small rubber bumper. This picture shows the direction that bumper needs to be reinstalled in. You want to take great care and use unusual finesse in removing this bumper. It is not available through any of our vendors. It will need to be removed for the re-painting process. I realize this picture is too small to see it (click on the picture for a larger one), but trust me, it's there, and you need to take great care with it.
This is how the two halves of the core housing are assembled. Just about everything involved in this project is fastened with #6 x 3/8 inch Phillips Pan Sheet Metal Screws. Buy new ones; they are cheap.
 Here is the rest of the core housing removed from the motor housing. There were no gaskets in between the two.
This one is with the fan assembly removed. This is no big deal really. There is a slotted set screw on the side of the shaft and all it takes is loosening that and then a little persuasion with a punch and the fan will come right off. Be careful not to beat on things too hard since it is very possible to bend the fan assembly.

 This is the entire heater disassembled. Not a lot to it, but these pics should help in getting it all correctly back together. In case you can't see enough detail, you can click on these pictures to make them much larger. They are in 1200x1600 high resolution.
This is to show a few things - what the Harrison Faceplate looks like exactly, what the 'motor to housing' gasket looks like, and the placement of the aforementioned rubber bumper.

 There are two of them pesky rubber bumpers. Here is where the other one goes. Again, take care in removing them since they are not available new.
Here are all the parts laid out after sandblasting and thorough cleaning and then primer-ed using a good self-etching primer. Take time to do a thorough job in prepping your metal parts. This heater will get hot and be used a lot so the paint should adhere well.

 My heater had a missing screen. Since I have two and can see what was original, I discovered that 1/4" hardware cloth available at the local lumber yard was what they used originally. I just got a small piece and then used JBWeld to glue it down. It was originally tack welded into place, but that would be a little hard for me to do. JBWeld works perfectly.
The motor on the left is the 6 volt original and the one on the right is a 12 volt replacement. This difference would be noticeable under the hood thus unacceptable. It so happens that Chevs of the 40's sells a replacement 12 volt motor that is small enough to fit IN the 6 volt motor housing! It takes a little work to remove the 6 volt guts, but once you have done this, you have a perfectly original looking 12 volt motor. If the motor you get doesn't appear to fit (front to back), it may be because you are not done gutting the 6v motor. Clear inside the back of the motor housing is another small piece thats riveted in. Remove that, and it should all make perfect sense.

 This picture is offered so that you can get the correct replacement motor when you call Chevs of the 40's. They are also the only vendor I have found that has the complete gasket set for these heaters and the decal for the defroster mechanism. Bowtie Bits is the only vendor I have found that carries the thick rubber motor-to-housing gasket.
This is the paint I finally decided on. You can get heater paint from any of the vendors, but this product is a name brand and is a perfect factory fresh match. The best part is that it is in aerosol cans so its very easy to use. Use a swirling motion and be sure to shake the can extra well. Two cans is more than enough to do an entire heater. The paint is made by the Kilz corporation and its called Hammerite Rust Cap Bronze. Eastwood sells it.
 Here are the parts all laid out and painted. They came out absolutely perfect. The color and the finish is amazing. I painted the inside of each piece first so that I could test my technique on an area that wouldn't be seen. I let the first side dry overnight and then came in the next day and painted the outside. I then let the job set for 3 days before re-assembly.
This is just a close-up of the work so you can see the hammered finish. It looks so original. The colors in these pictures don't do the work justice. My digital camera and the color of the fluorescent lights in the shop change its appearance.


Thanks to the previous pictures, I figured out how to put it back together! I think this heater will look very nice in my '50 frame up restoration project.
Notice the motor. It looks exactly like the 6 volt original. After I shot these pictures, I added the proper defroster decal. The 'Chevrolet' emblem is not a decal. It is a faceplate and you can get that from most of the vendors. I used JBWeld to attach it to the original plate once I polished the sides of it.
Here is the before and after. You have to really see it to believe it. I hope documenting this does someone some good.
More Pictures available at The Site Archive Page!
This article was first published at DevesTechNet.com(c)2015 All Rights Reserved
Comment