This week we finish up the sheet metal repair on the Drivers side. Hope you are having as much fun as I am! You can see this episode in pictures HERE.
Drivers Side Sheet Metal (Part Three)
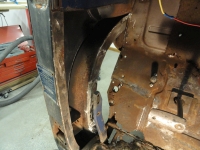
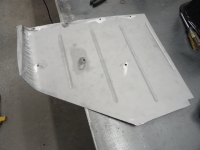 Last week we worked on all of the structural support issues. The inner cowl support was in pretty bad shape, and where the fenders meet the outside cowl was also in need of repair. With all of the metal work done, we need to try to preserve our work as long as possible before buttoning up this area with the inside kick panel. To preserve all of the new metal, I like to spray self etching primer and then paint the interior area with a standard spray paint. I just feel better having this area covered with something that will prevent rust. Realize of course that we are not done welding and this paint may not survive, nonetheless its better than nothing. Each new panel needs to be spot welded to the structural support. This is an easy task by marking the support against the kick panel and then drilling about 1/4" holes in the new panel. This secures the panel to the cowl support as well as all of the edges making it part of the structural support.
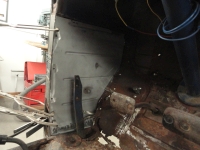
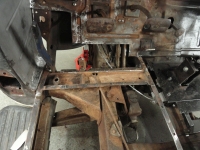 The kick panels that we get from the vendors do not fit properly because the bend at the bottom of the panel is not right. As a general rule before I install a new kick panel, I unbend the flange at the bottom and flatten it out, then install it and mark where the new bend needs to happen, then rebend the flange. This makes for a very nice fit. Floor removal was very difficult because the spot welds were impossible to detect due to the damage. Take your time and do everything to ensure you do not damage the floors structural support. In this case, the structural supports were good and reusable. Leaving them in place keeps the floor nice and straight making the install much easier. As you can see from the pic on the right, I cut out the damaged area of the toeboard. It generally works out that the toeboard areas most prone to damage are near the bottom which is nice because there is quite a bit more work involved once the pedals and other features come into play.
Note: As with everything else on Devestechnet.com, I, DEVE, do not profess to be a professional metal worker. As with everything else, I learned the hard way. No schooling other than the school of hard knocks. If you are seeing amatuer work here, it is because I AM an amatuer. No better way to learn! There are areas of this project that I had to sort of roll the dice. Measurement is one of my problems in doing this. There are no straight edges anywhere in this project!
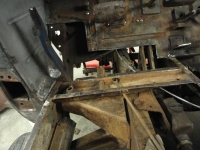
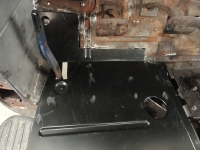 These are before and after. as you can see, I had some difficulty cutting the new panel to exactly fit. I DID measure twice! So if you run into this, do not worry about it because it is easy to fix. You never do a project like this without obtaining small pieces of scrap that you can cut to fit. Since MIG wire melds very nicely to the scrap and the panel, it just takes a little more time. The key to getting this right is to look at every angle of everything. Starting with the flange at the door to the flange at the transmission cover. That is a non-negotiable thing. With luck, those two flanges will fit perfectly in their place. But remember it's a repro, so no telling right? Well, in this case, they fit perfectly! I have had this measurement NOT fit and I had to get creative, but in this case we are good there. Where we are not good is the parking brake hole. It is off about 1/2 inch and not straight across. To repair this sort of thing, plug the hole with a round metal donor piece and redrill. Besides that, I was very impressed with the fit. The stamped features all came together perfectly.
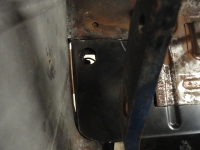
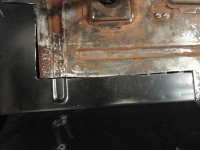 Here are some closeups of the problem areas discussed in the last paragraph. Remember, if you do measure wrong and have to repair it, you still have your sense of quality and accept no less. So no matter what you have, you will figure out how to make it meet your exacting standards. In the end I was very pleased with the project. I learned a technique from the local town Blacksmith called Long Arcing. Basically, it puts welds on thin edges of the metal without burning through. By backing the wand off about an inch or so, letting the wire extend out further than normal, you can close gaps that would normally be hard to do. I was able to use that technique for most of the gaps you see here. Once you get comfortable with your MIG Welder and its capabilities, there is really nothing you can't do.
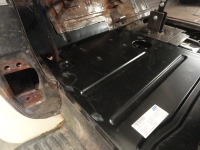
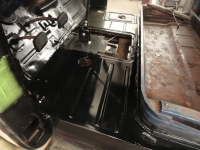 As with the kick panel, you need to put spot weld holes in the floor to correspond to the structural supports. To do this, just crawl under the truck with a Sharpie and mark where the supports are, then mark where the holes need to go. Both sides of the structural support and the trans cover support need them. Be sure to mark keeping in mind the trans cover screw locations. Every little thing needs to be considered. The pic on the right is the finished and painted drivers floor/toeboard fix. Don't forget to replace the Windlace channel. My Lincoln SP-175+ MIG really stepped up to the plate! I used almost a half a medium bottle of Gas in the process and about half a spool of MIG wire. Also, one 4 inch grinding wheel, eight 4" cutoff discs, a 3" cutoff disc for the air grinder and 15 Dremel cutoff discs. I found the Dremel with the remote attachment was perfect for fine tuning the grinds after welding.
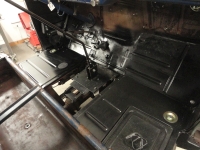 And THAT concludes the sheet metal portion of the project. All told, it took about two weeks to get there from here. I do not work real fast but that IS 10 hour days for that time period. I am pleased with the outcome. That is because I took the time no matter how badly I wanted to move on and did all of the small things required to make the project a success. Take your time and put no timeframe on this. If you are patient you can amaze yourself! To finish the job, get some spray undercoating and go under the fenders and spray undercoat on the repaired areas as well as anywhere else you may suspect vulnerability. If this were a show truck, we would send it to the paint shop and have them (haha, uh.. me) put a skim coat of filler on all of the welds to smooth everything out, then epoxy primer, etc, etc. In this case, the owner (me) didn't want to spend the extra money/time on a shop truck.
Next week we will completely refurbish the door hinges. This requires a vendor supplied door hinge kit that includes a new oversize hinge pin as well as two springs per side. Have a great week and if everything goes as planned, I will show you how to completely overhaul your door hinges. This is a revisited topic, but I plan to include pictures this time. Seeya Next Week!
Drivers Side Sheet Metal (Part Three)

 Last week we worked on all of the structural support issues. The inner cowl support was in pretty bad shape, and where the fenders meet the outside cowl was also in need of repair. With all of the metal work done, we need to try to preserve our work as long as possible before buttoning up this area with the inside kick panel. To preserve all of the new metal, I like to spray self etching primer and then paint the interior area with a standard spray paint. I just feel better having this area covered with something that will prevent rust. Realize of course that we are not done welding and this paint may not survive, nonetheless its better than nothing. Each new panel needs to be spot welded to the structural support. This is an easy task by marking the support against the kick panel and then drilling about 1/4" holes in the new panel. This secures the panel to the cowl support as well as all of the edges making it part of the structural support.
 The kick panels that we get from the vendors do not fit properly because the bend at the bottom of the panel is not right. As a general rule before I install a new kick panel, I unbend the flange at the bottom and flatten it out, then install it and mark where the new bend needs to happen, then rebend the flange. This makes for a very nice fit. Floor removal was very difficult because the spot welds were impossible to detect due to the damage. Take your time and do everything to ensure you do not damage the floors structural support. In this case, the structural supports were good and reusable. Leaving them in place keeps the floor nice and straight making the install much easier. As you can see from the pic on the right, I cut out the damaged area of the toeboard. It generally works out that the toeboard areas most prone to damage are near the bottom which is nice because there is quite a bit more work involved once the pedals and other features come into play.
Note: As with everything else on Devestechnet.com, I, DEVE, do not profess to be a professional metal worker. As with everything else, I learned the hard way. No schooling other than the school of hard knocks. If you are seeing amatuer work here, it is because I AM an amatuer. No better way to learn! There are areas of this project that I had to sort of roll the dice. Measurement is one of my problems in doing this. There are no straight edges anywhere in this project!

 These are before and after. as you can see, I had some difficulty cutting the new panel to exactly fit. I DID measure twice! So if you run into this, do not worry about it because it is easy to fix. You never do a project like this without obtaining small pieces of scrap that you can cut to fit. Since MIG wire melds very nicely to the scrap and the panel, it just takes a little more time. The key to getting this right is to look at every angle of everything. Starting with the flange at the door to the flange at the transmission cover. That is a non-negotiable thing. With luck, those two flanges will fit perfectly in their place. But remember it's a repro, so no telling right? Well, in this case, they fit perfectly! I have had this measurement NOT fit and I had to get creative, but in this case we are good there. Where we are not good is the parking brake hole. It is off about 1/2 inch and not straight across. To repair this sort of thing, plug the hole with a round metal donor piece and redrill. Besides that, I was very impressed with the fit. The stamped features all came together perfectly.
 Here are some closeups of the problem areas discussed in the last paragraph. Remember, if you do measure wrong and have to repair it, you still have your sense of quality and accept no less. So no matter what you have, you will figure out how to make it meet your exacting standards. In the end I was very pleased with the project. I learned a technique from the local town Blacksmith called Long Arcing. Basically, it puts welds on thin edges of the metal without burning through. By backing the wand off about an inch or so, letting the wire extend out further than normal, you can close gaps that would normally be hard to do. I was able to use that technique for most of the gaps you see here. Once you get comfortable with your MIG Welder and its capabilities, there is really nothing you can't do.
 As with the kick panel, you need to put spot weld holes in the floor to correspond to the structural supports. To do this, just crawl under the truck with a Sharpie and mark where the supports are, then mark where the holes need to go. Both sides of the structural support and the trans cover support need them. Be sure to mark keeping in mind the trans cover screw locations. Every little thing needs to be considered. The pic on the right is the finished and painted drivers floor/toeboard fix. Don't forget to replace the Windlace channel. My Lincoln SP-175+ MIG really stepped up to the plate! I used almost a half a medium bottle of Gas in the process and about half a spool of MIG wire. Also, one 4 inch grinding wheel, eight 4" cutoff discs, a 3" cutoff disc for the air grinder and 15 Dremel cutoff discs. I found the Dremel with the remote attachment was perfect for fine tuning the grinds after welding.
 And THAT concludes the sheet metal portion of the project. All told, it took about two weeks to get there from here. I do not work real fast but that IS 10 hour days for that time period. I am pleased with the outcome. That is because I took the time no matter how badly I wanted to move on and did all of the small things required to make the project a success. Take your time and put no timeframe on this. If you are patient you can amaze yourself! To finish the job, get some spray undercoating and go under the fenders and spray undercoat on the repaired areas as well as anywhere else you may suspect vulnerability. If this were a show truck, we would send it to the paint shop and have them (haha, uh.. me) put a skim coat of filler on all of the welds to smooth everything out, then epoxy primer, etc, etc. In this case, the owner (me) didn't want to spend the extra money/time on a shop truck.
Next week we will completely refurbish the door hinges. This requires a vendor supplied door hinge kit that includes a new oversize hinge pin as well as two springs per side. Have a great week and if everything goes as planned, I will show you how to completely overhaul your door hinges. This is a revisited topic, but I plan to include pictures this time. Seeya Next Week!


 Welcome to Deves Technet.com Forums. I encourage everyone to register so we can get a better idea of the traffic and its usefulness. Please leave a word or two describing your stay and what we can do to make it more enjoyable. Thanks!