


 Welcome to Deves Technet.com Forums. I encourage everyone to register so we can get a better idea of the traffic and its usefulness. Please leave a word or two describing your stay and what we can do to make it more enjoyable. Thanks!
 Tweet
Tweet
Door Hinge Repair
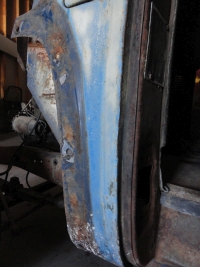
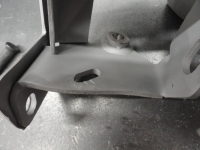
This has already been covered in a previous Tip of the Week, but not with pictures and not while I am actually doing the process. There is nothing better than doing something and writing it down as you go. This week we will discuss how exactly to repair those pesky Door Hinges on an Advance Design Truck. To really bring home the need for this type of maintenance, I share with you the picture on the left. This picture does not do justice to the problem, the crease is MUCH deeper and nastier in person. You will find this crease damage on many AD era pickups. The reason for this crease and many like it is due to the Door Hinges not having the Stop Springs, or the Springs are worn out, broken or missing. The wind grabs the door and just slams the door against the cowl creating the damage. Do NOT let this happen to you! Cowl damage of this magnitude is expensive to repair and very costly to fix correctly. Especially if Louvers or Cowl vents are in play. Nevermind the damage to the door and the ability of the doors to align properly.
So let's begin with being a part of the solution!
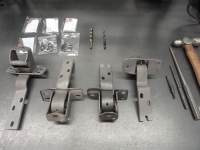
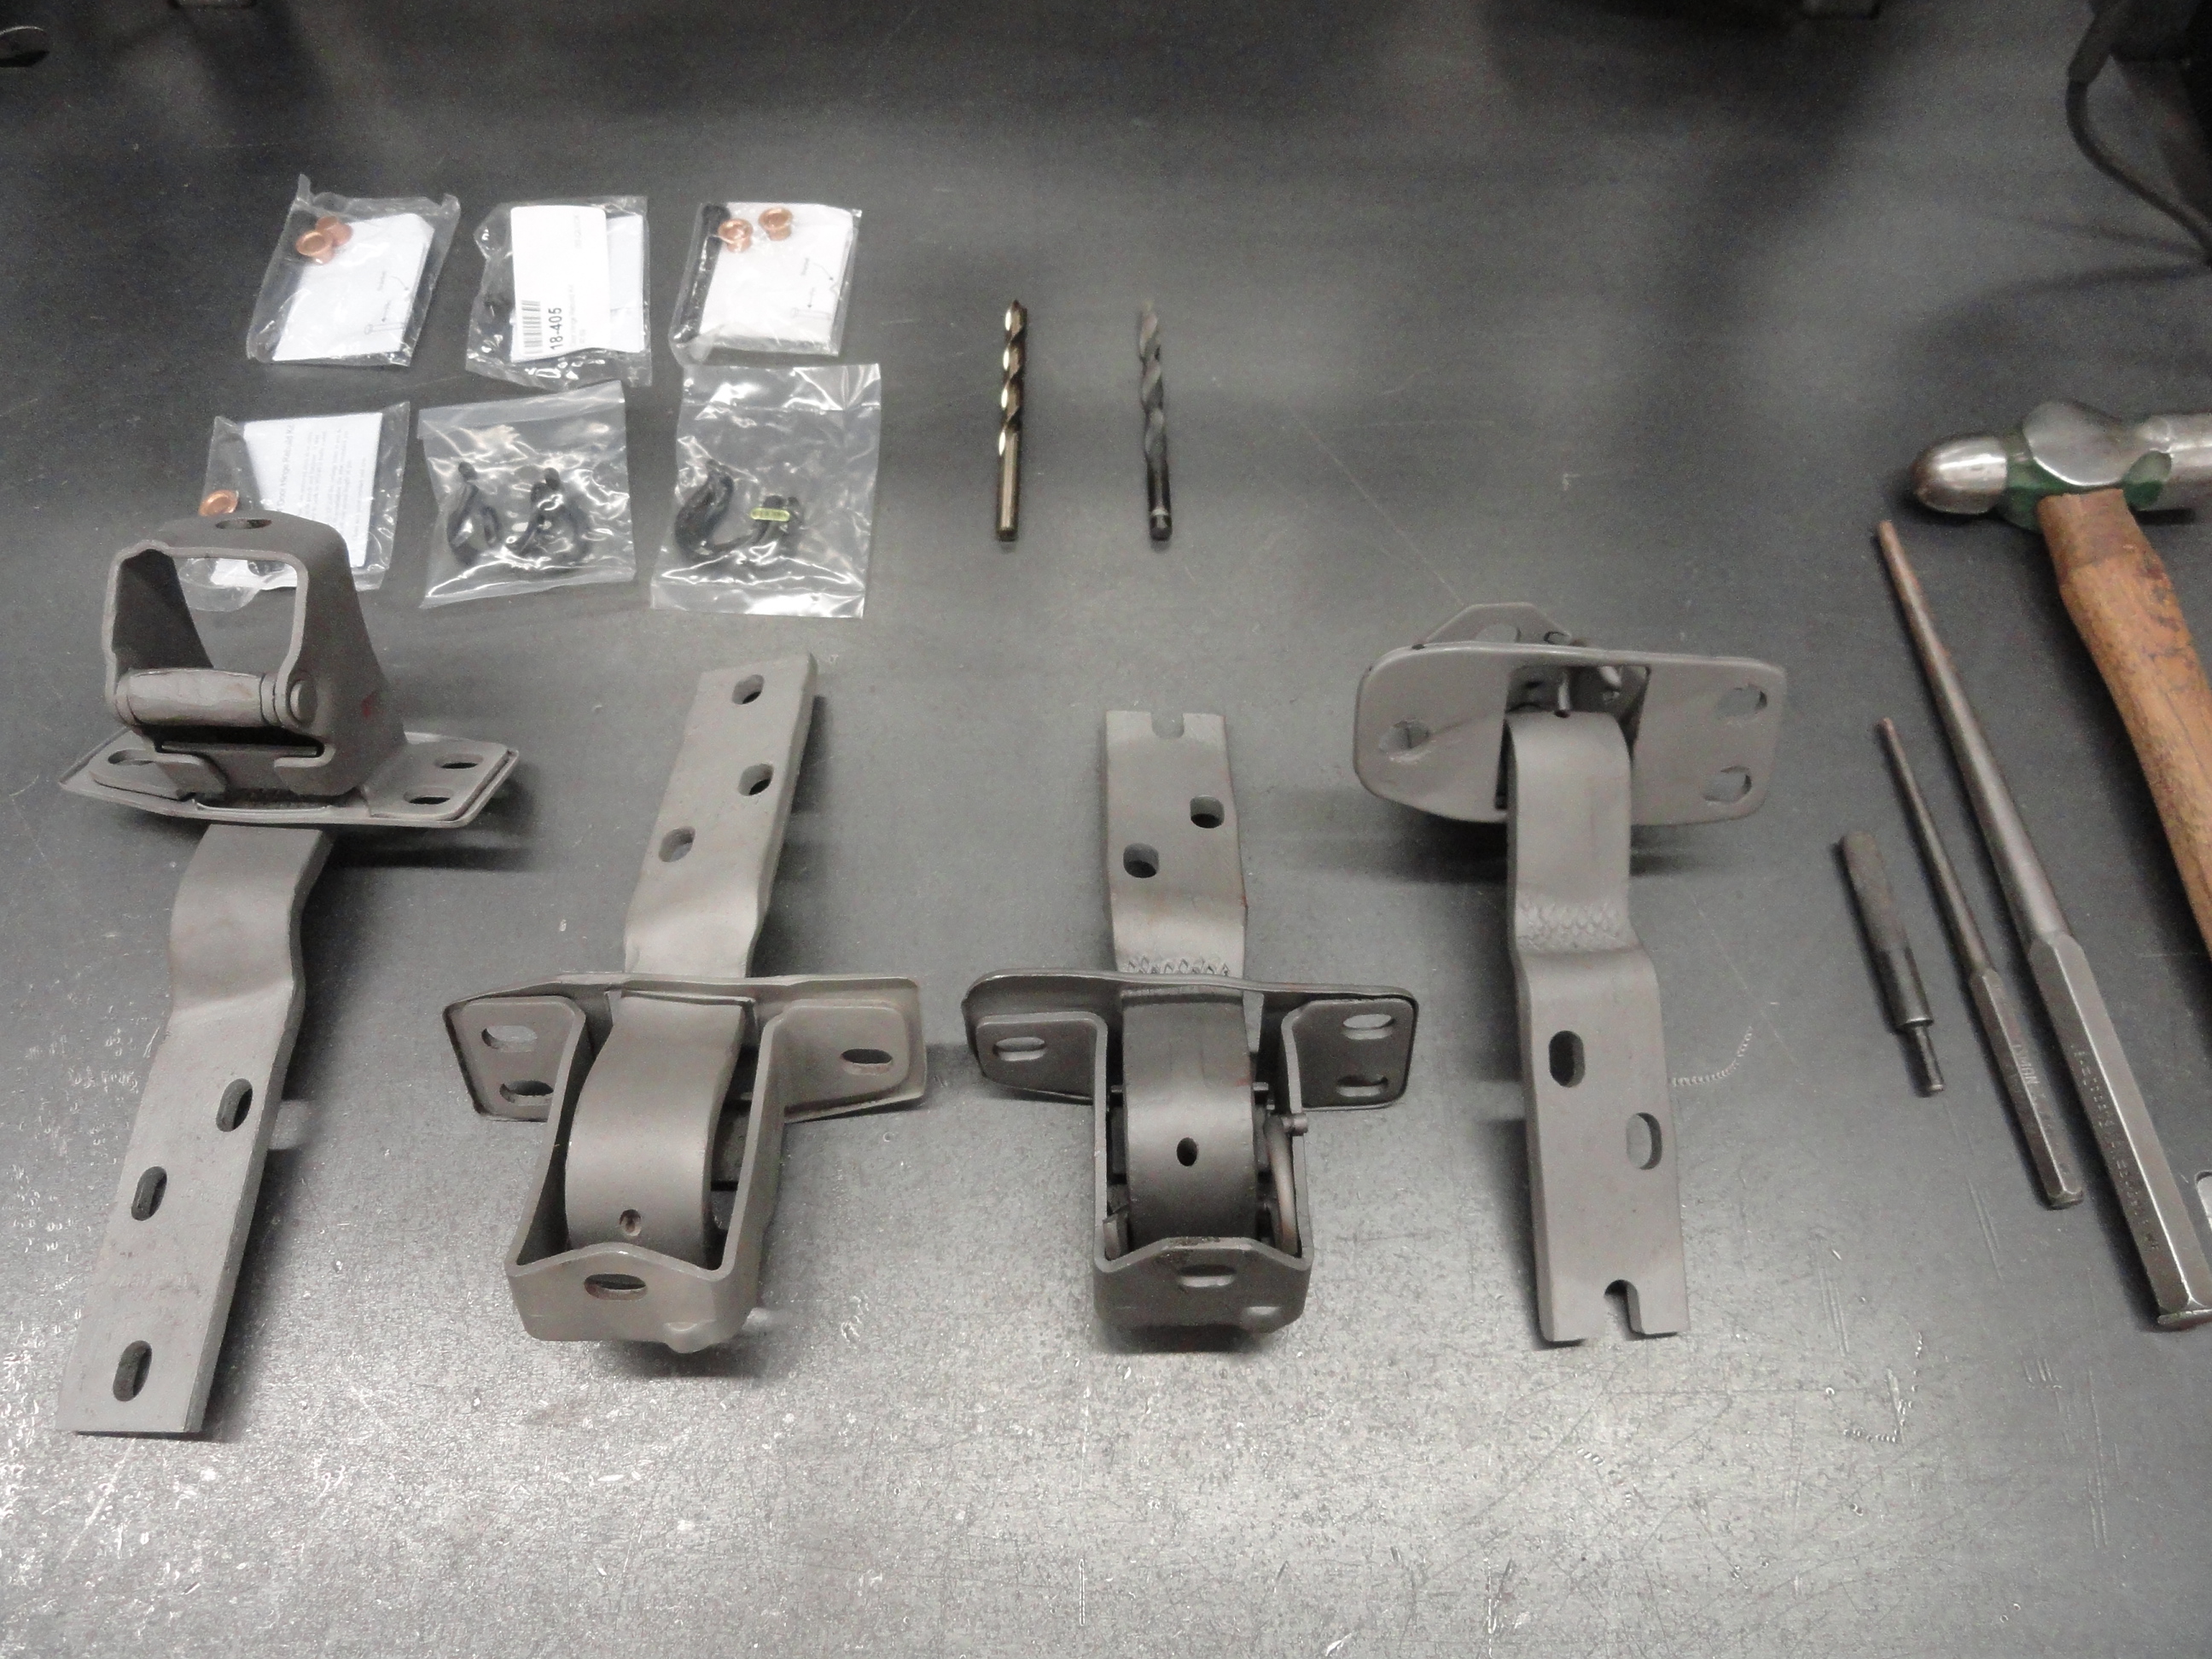
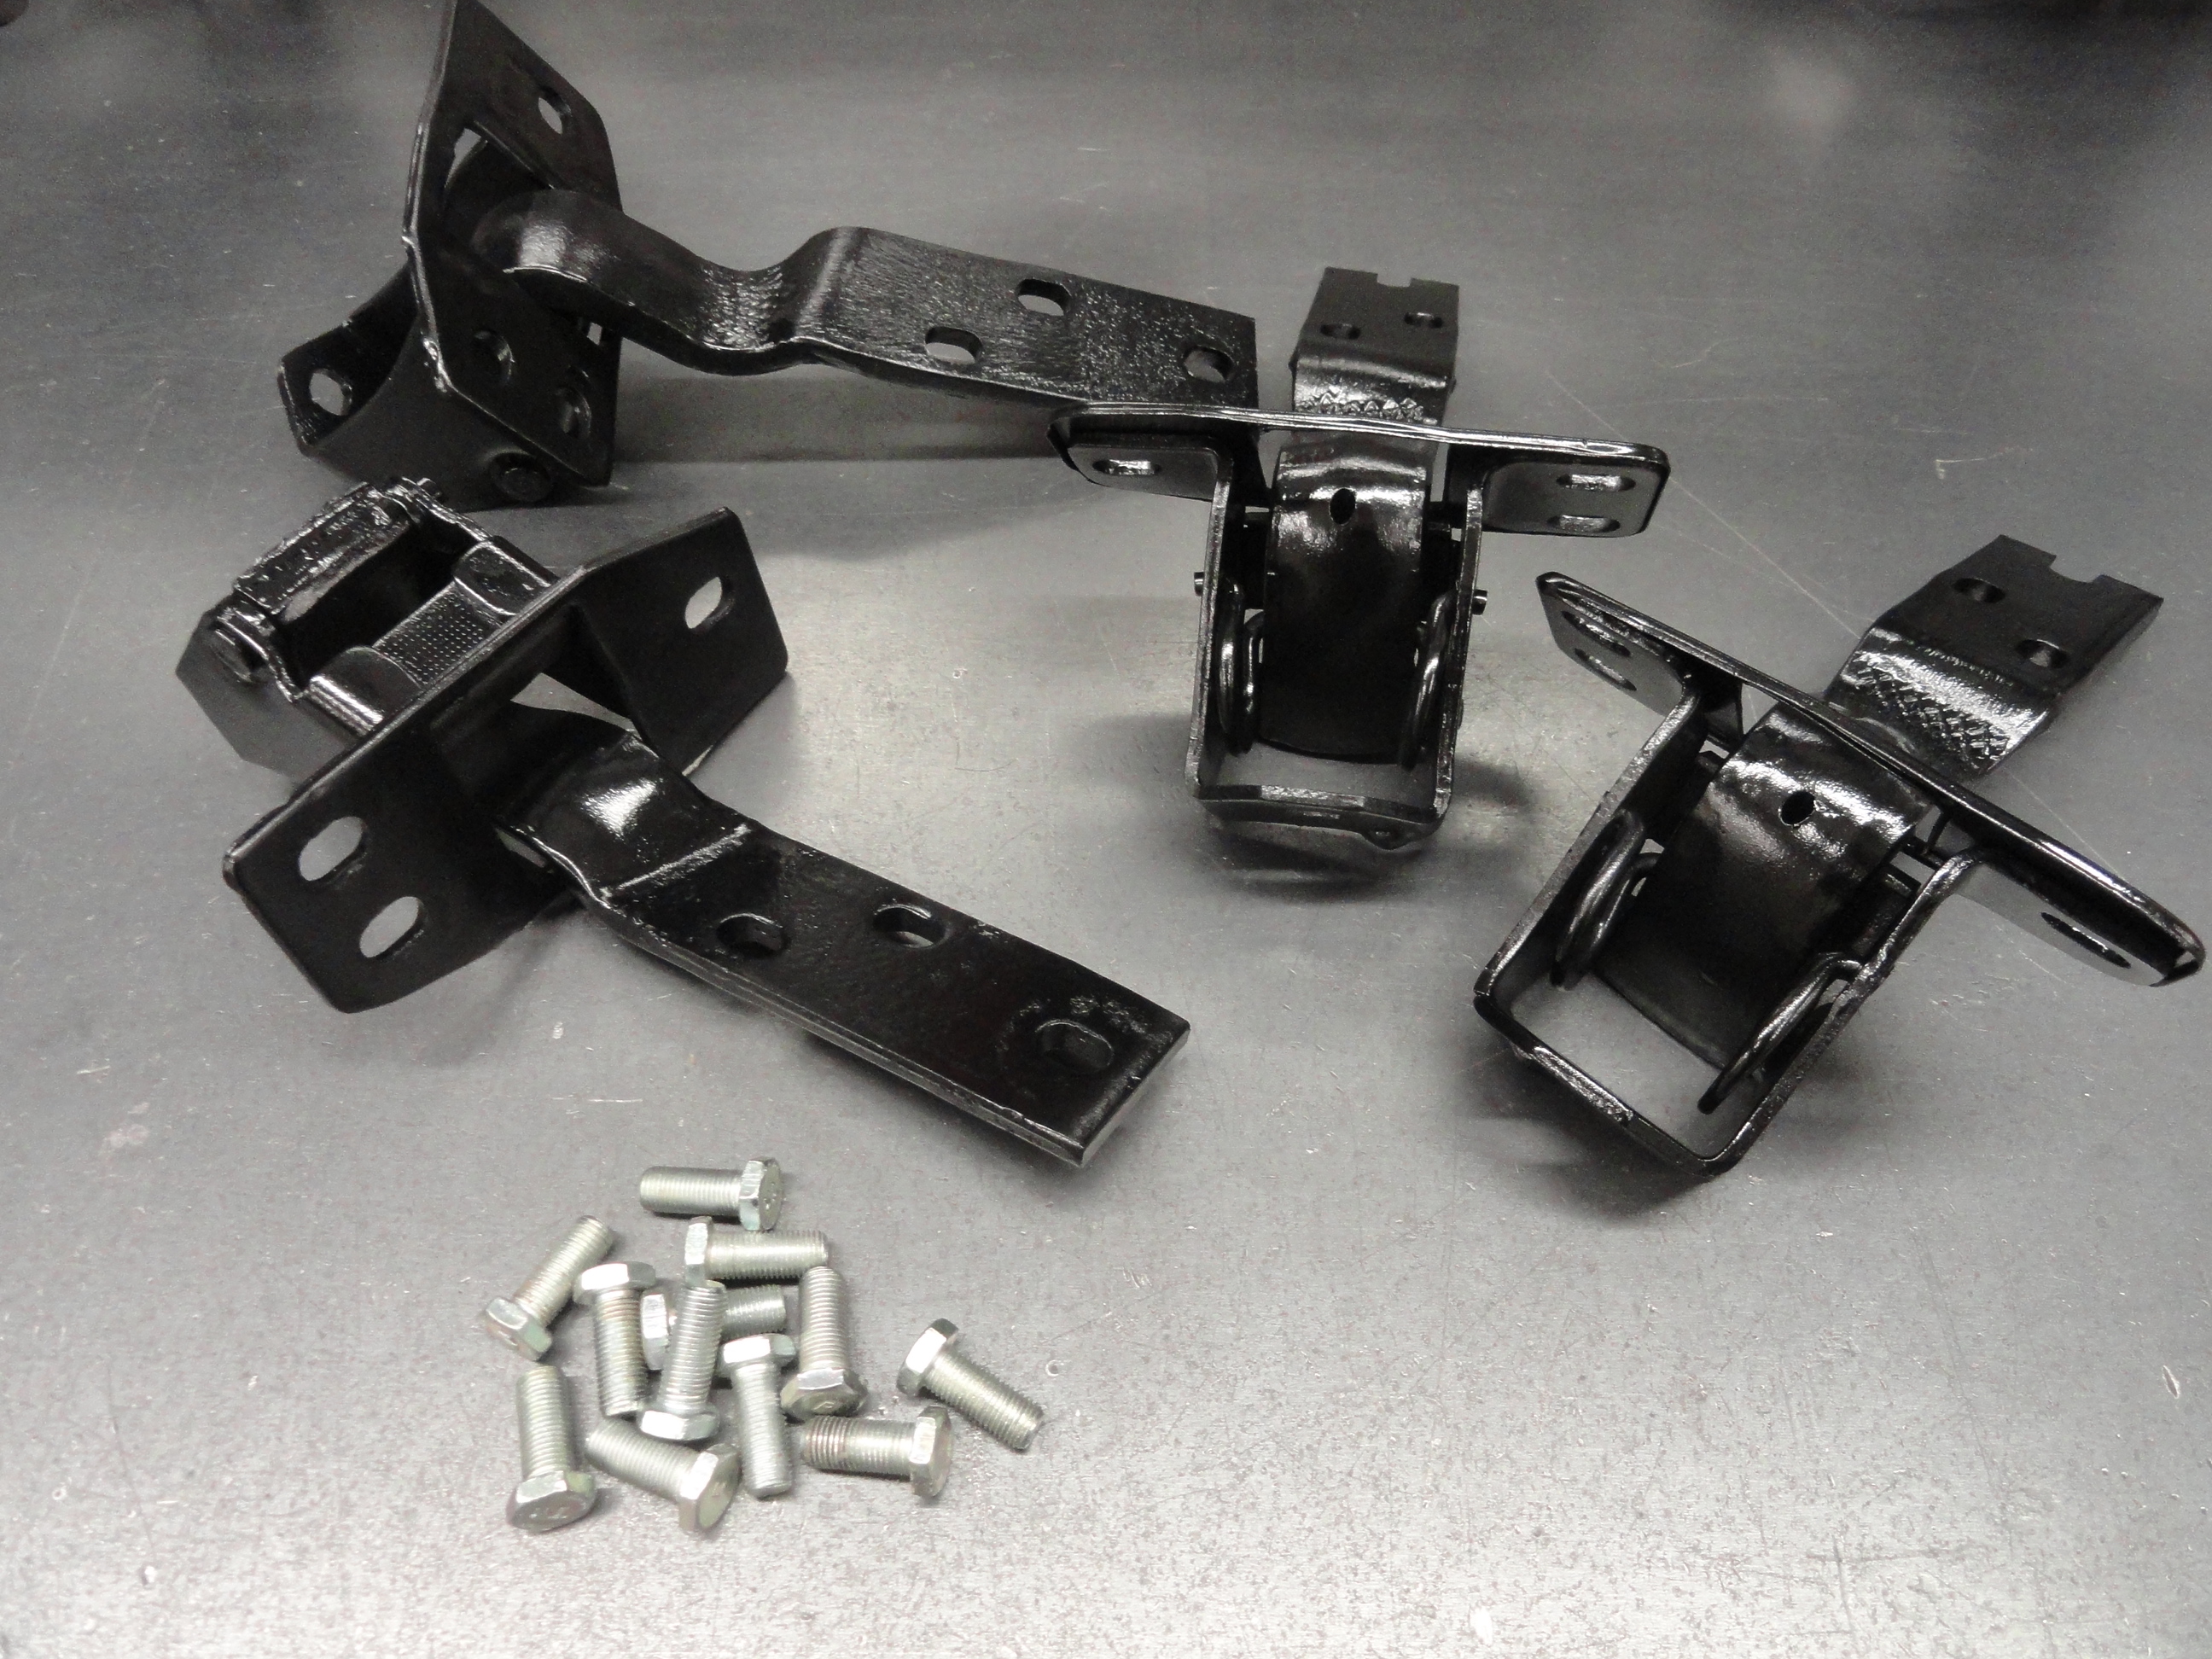
 Start by getting the Pin Kits and the Spring Kits from your favorite Vendor. I got mine from Classic Parts. All of these Pin Kits are oversize because the vendors recognize the amount of wear that is present by the time these hinges need a rebuild. The Spring Kits are for the Top Hinge only. There are TWO Springs per hinge/per side of the truck. The Pin Kits have an instruction with them, however I deviate considerably from the instruction, so listen to ME, not the instruction. Why would you do this? All I can say is do one their way, then do one my way. Then, when you have drilled the holes wrong, figure out how to repair the damage. OR.. just do it my way. Here is why..
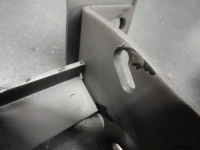
The instruction tells you to drill both the Hinge Frame, and the Hinge with an 11/32" Drill bit. This may make sense in theory, but in practice it's a bad idea. The Hinge Pin is made out of Hardened Steel. The long hole that goes through the hinge has a large contact surface. The Hinge Frame has a very small contact surface in comparison. By making them both the same size, the Hinge Frame will be loose in comparison to the Hinge and it won't take long for the Hinge Frame's holes to wear enough to cause a loose hinge. Remember, the Pin is supposed to rotate inside the HINGE and the Hinge Frame is supposed to capture the Pin. By using an 11/32" bit, you are oversizing the holes in the Hinge Frame. You can't go back from that without welding, so PLEASE get yourself a LETTER R Drill Bit for the Hinge Frame. It is slightly smaller than 11/32" and it will ensure your hinge works properly and lasts a long time.
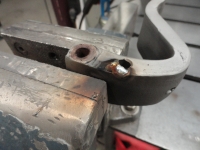
Another point of interest is the use of those soft brass bushings that come with the kit. The instruction says to use them ONLY if the Hinge itself is worn beyond 11/32". This would be a very rare thing since the new pins are already oversized, but if that were to happen, soft brass would not be the way I would go. You are asking to have to replace them again in a short time. Instead, weld the Hinge hole shut as deep as your welder can go on both sides and then re-drill the hole. The Hinge itself is not 11/32" all the way through. It is made with a cavity in the center to accommodate oil. This means welding about 1/2" deep into the hole on both sides is about the same as a new hinge and you used STEEL to repair it so there is no worry of brass bushings on a heavy door such as this. Do this job right the first time, and you probably will never change them again in your lifetime.
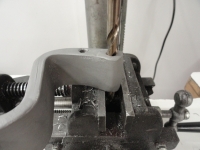
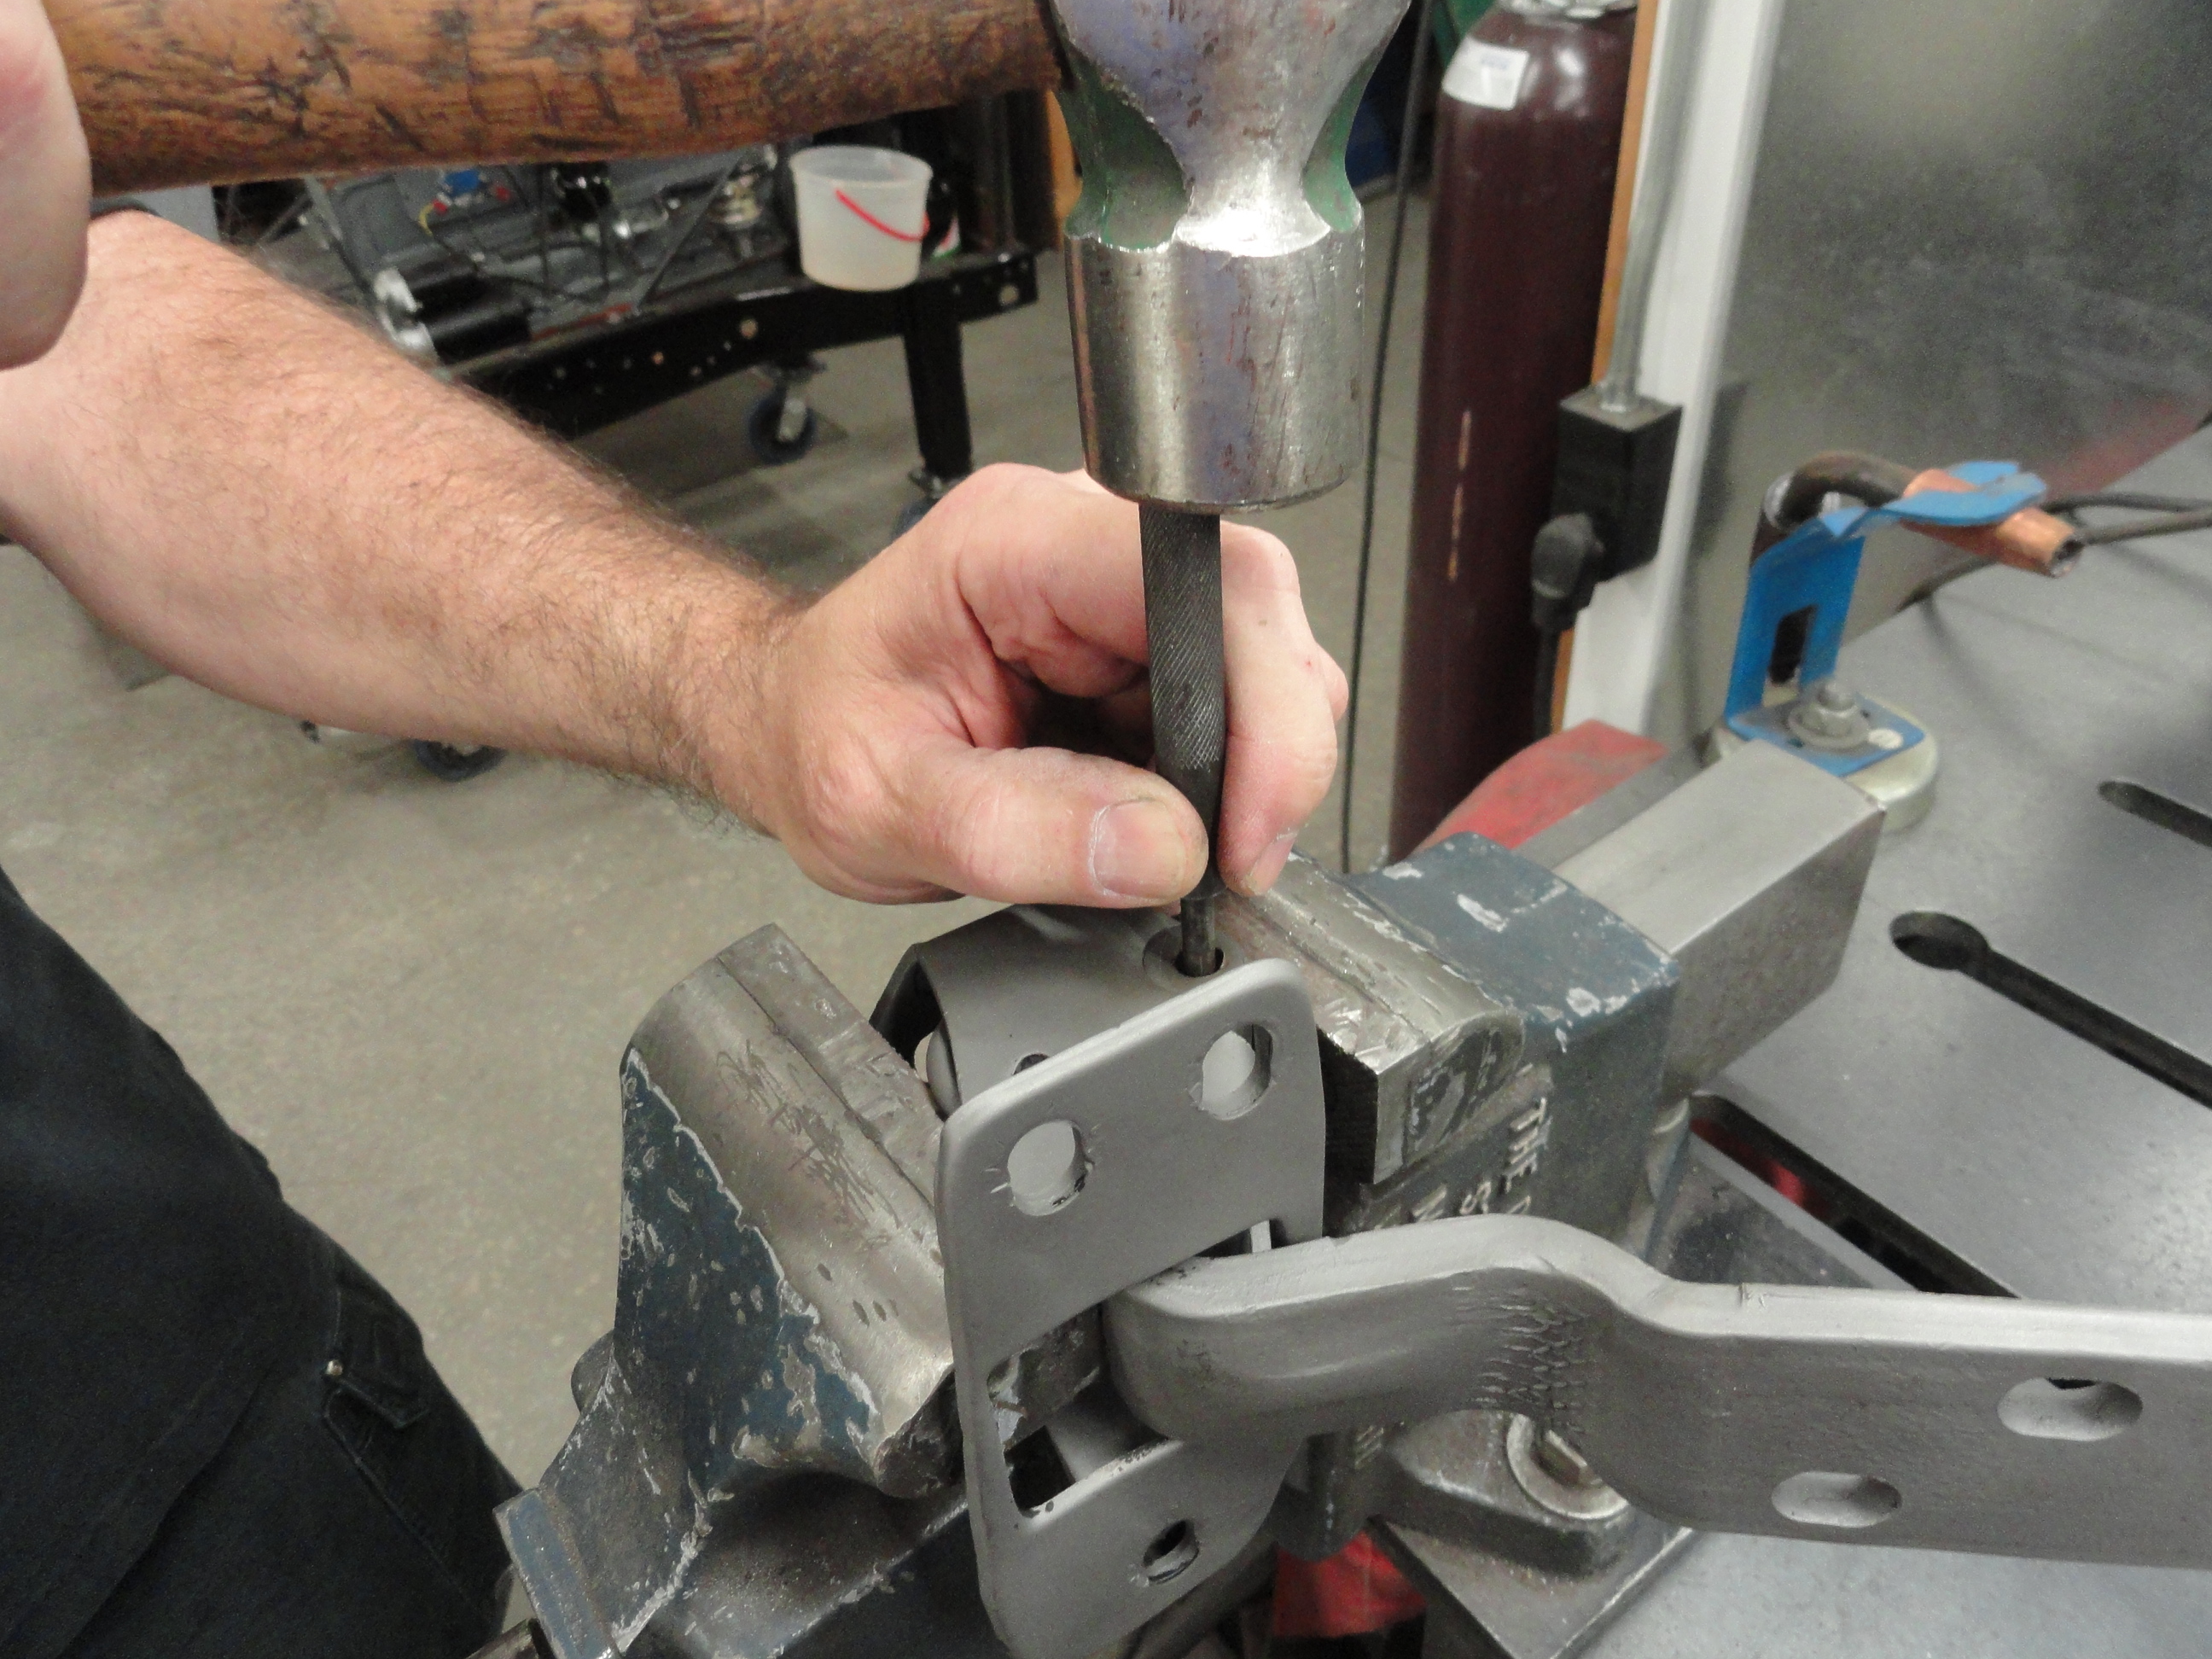
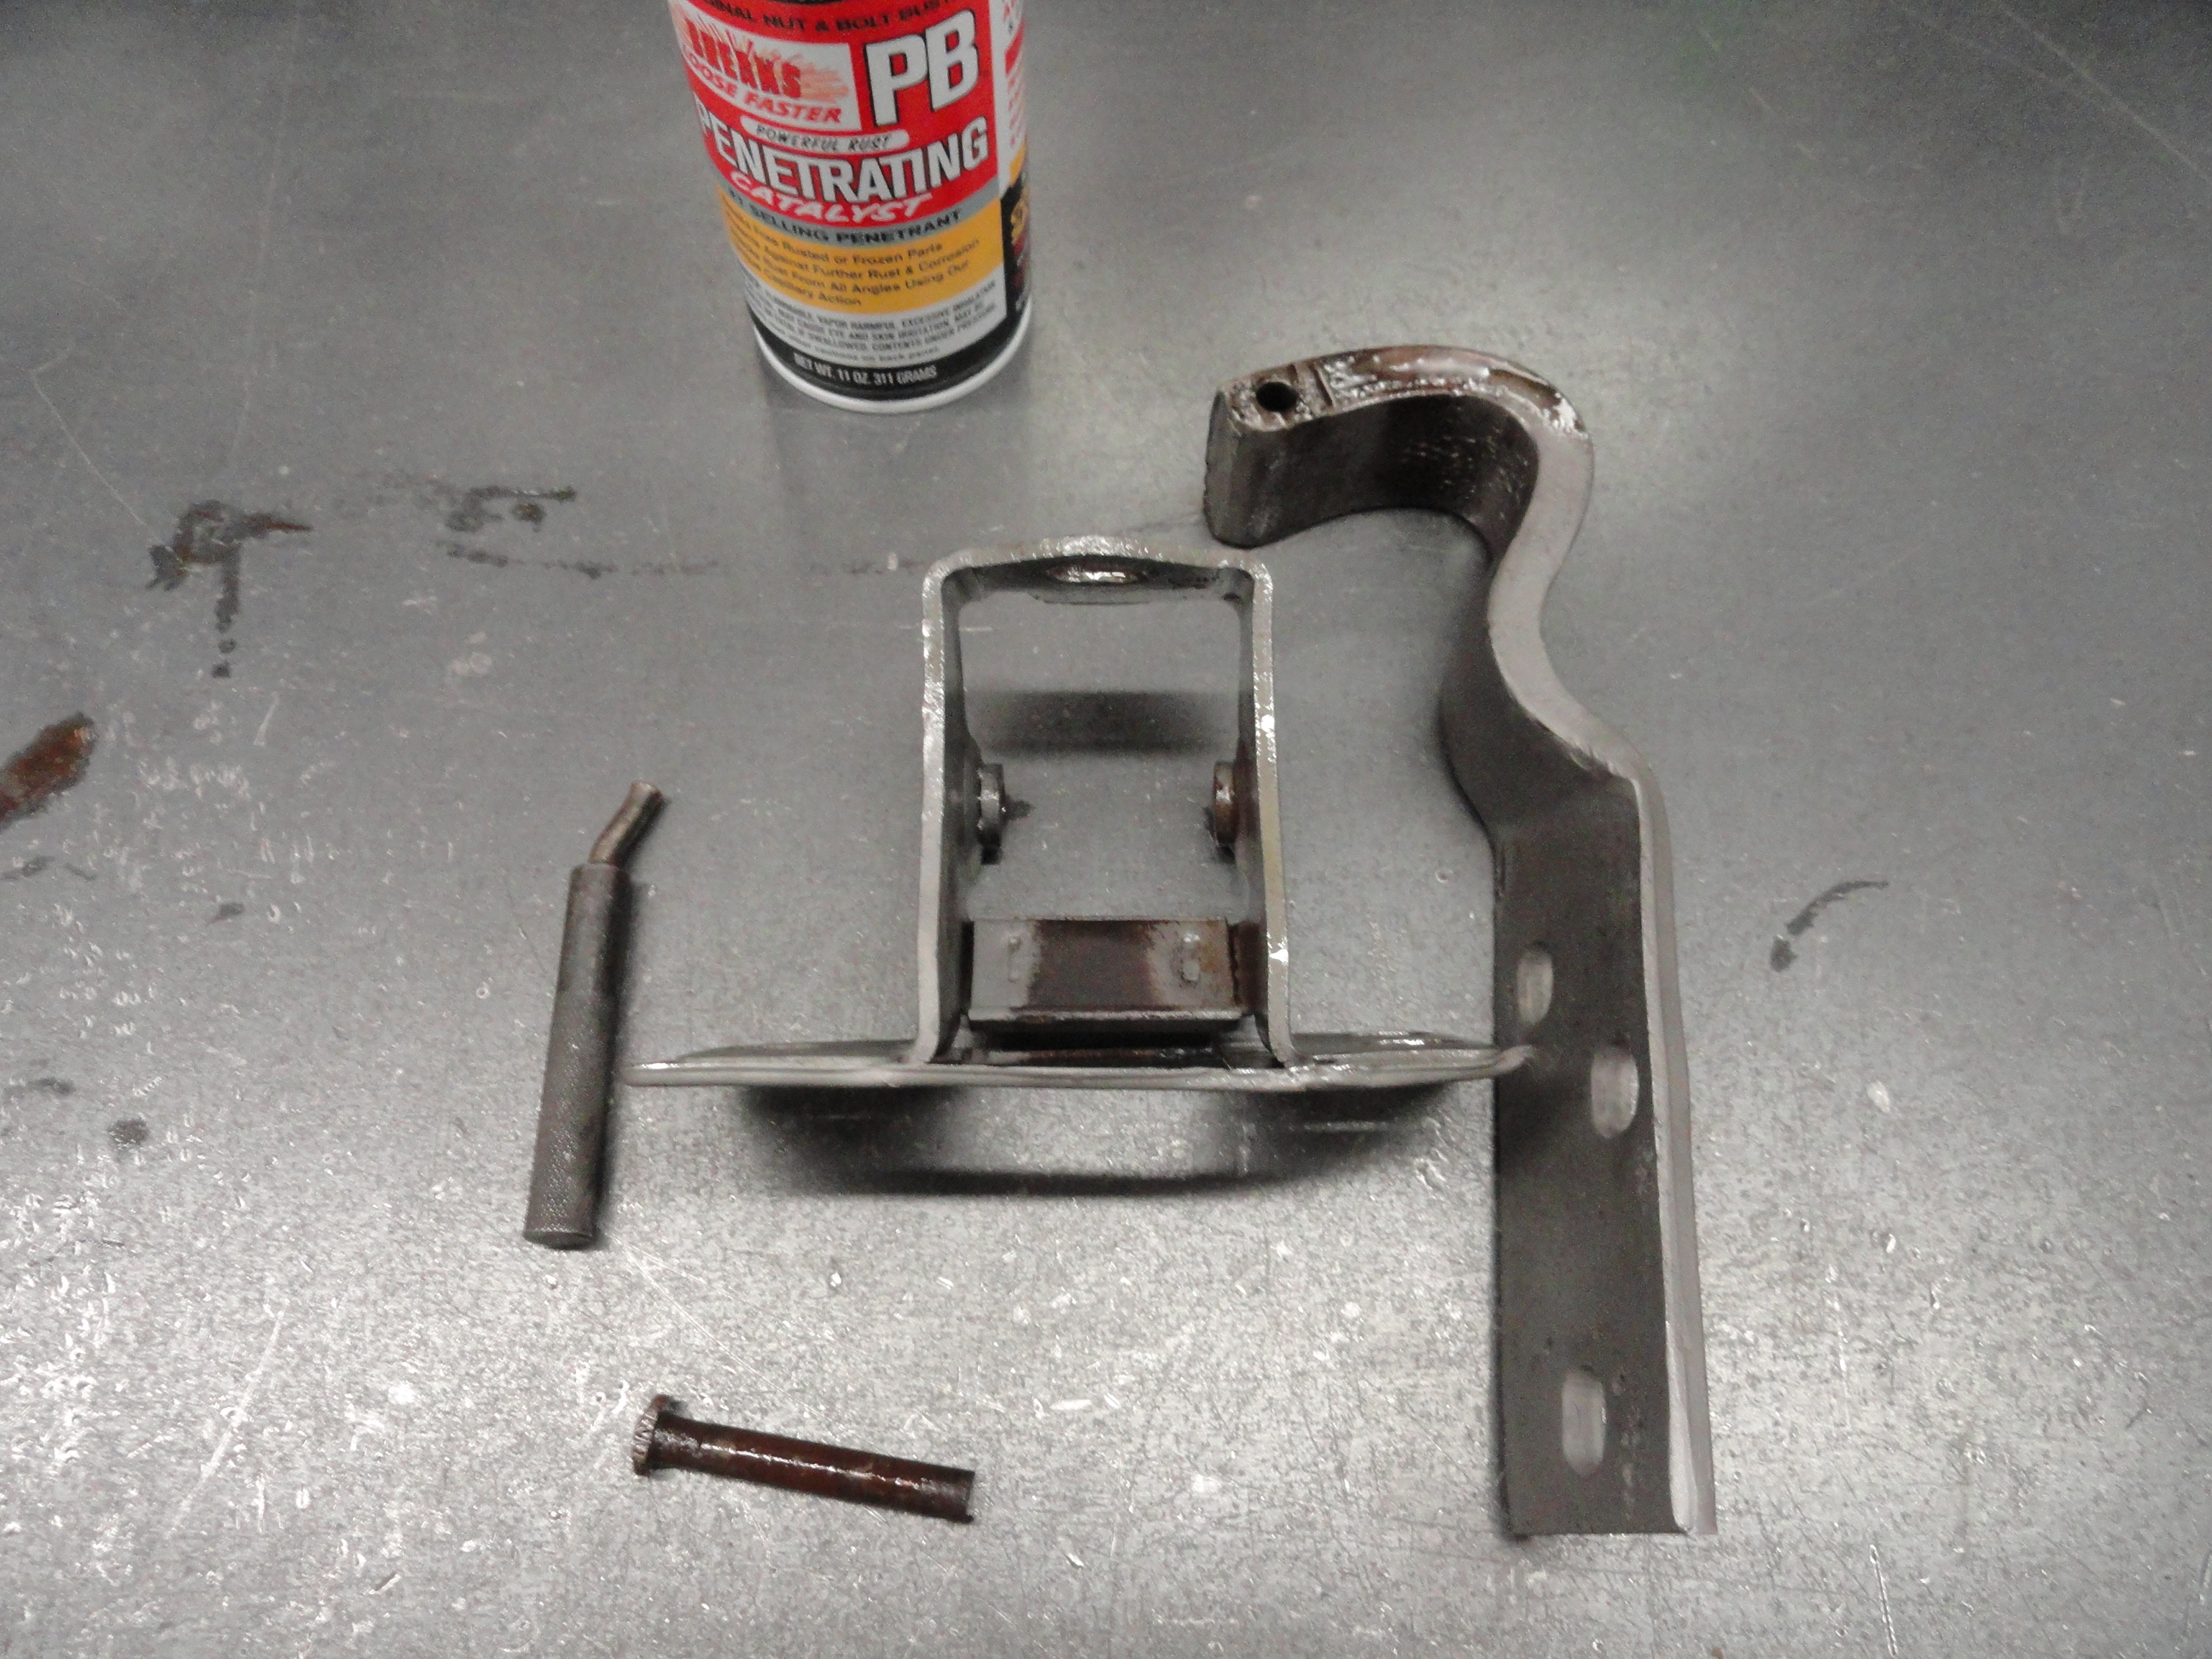
 So to begin this process, let's get the old pin out. This is easier said than done (and then some). If you are one of the lucky guys who even KNEW there is an oil hole in the center of your hinges and oiled them regularly, the pin will come out with moderate effort. Best to use PB Blaster and let the Hinge set overnight. Also, get a GOOD punch set that you can use a very large ball peen hammer on without bending the punch. There are a few pitfalls here. If you beat on this assembly too hard, you will bend the hinge frame and cause a lot of damage. Support the assembly, better than what you see in the picture. In the case of that one, the pin came out with moderate effort. Due to the shape of the assembly, I would welcome suggestions on how to hold this thing to prevent damage. It's very unwieldy. Notice the damage to one of my punches. This is one of those processes that works just as you are about to give up. Do not give up and do not be tempted to do anything that will bend your Hinge Frame!
Let's take on a Top Hinge because it has the two springs on it. With the Pin removed, let's take a closer look at the Hinge and Hinge Housing for excessive wear. In this case, the wear is just too bad to let go. All that will happen if ignored is, the spring can pop out and you can end up with the same problem you had before you started. To repair this damage, clean the area for a good weld, add a little weld in the affected area and grind it smooth. My hope for you is that you will not run into this problem, but this is how it is properly repaired. A little wear is normal, but when it gets as bad as this, it's time to break out the welder.

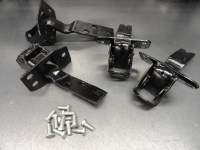
 Here are the repaired Hinge and Hinge Frame ready for installation. I am including these repairs so you know there are ways to fix these issues rather than ignore them. But there is more! Often, when pounding out that nasty pin, one of the spot welded spacers will fall off! Clean the surfaces and spot weld them back by tacking weld to the sides. There are more pictures on the subject of fixing these Hinges HERE. In a process like Automotive Restoration, it is a really handy skill to learn MIG Welding. Be sure to get one that lets you use Argon/CO2 for shielding.

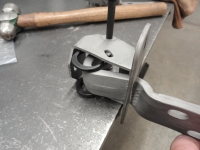
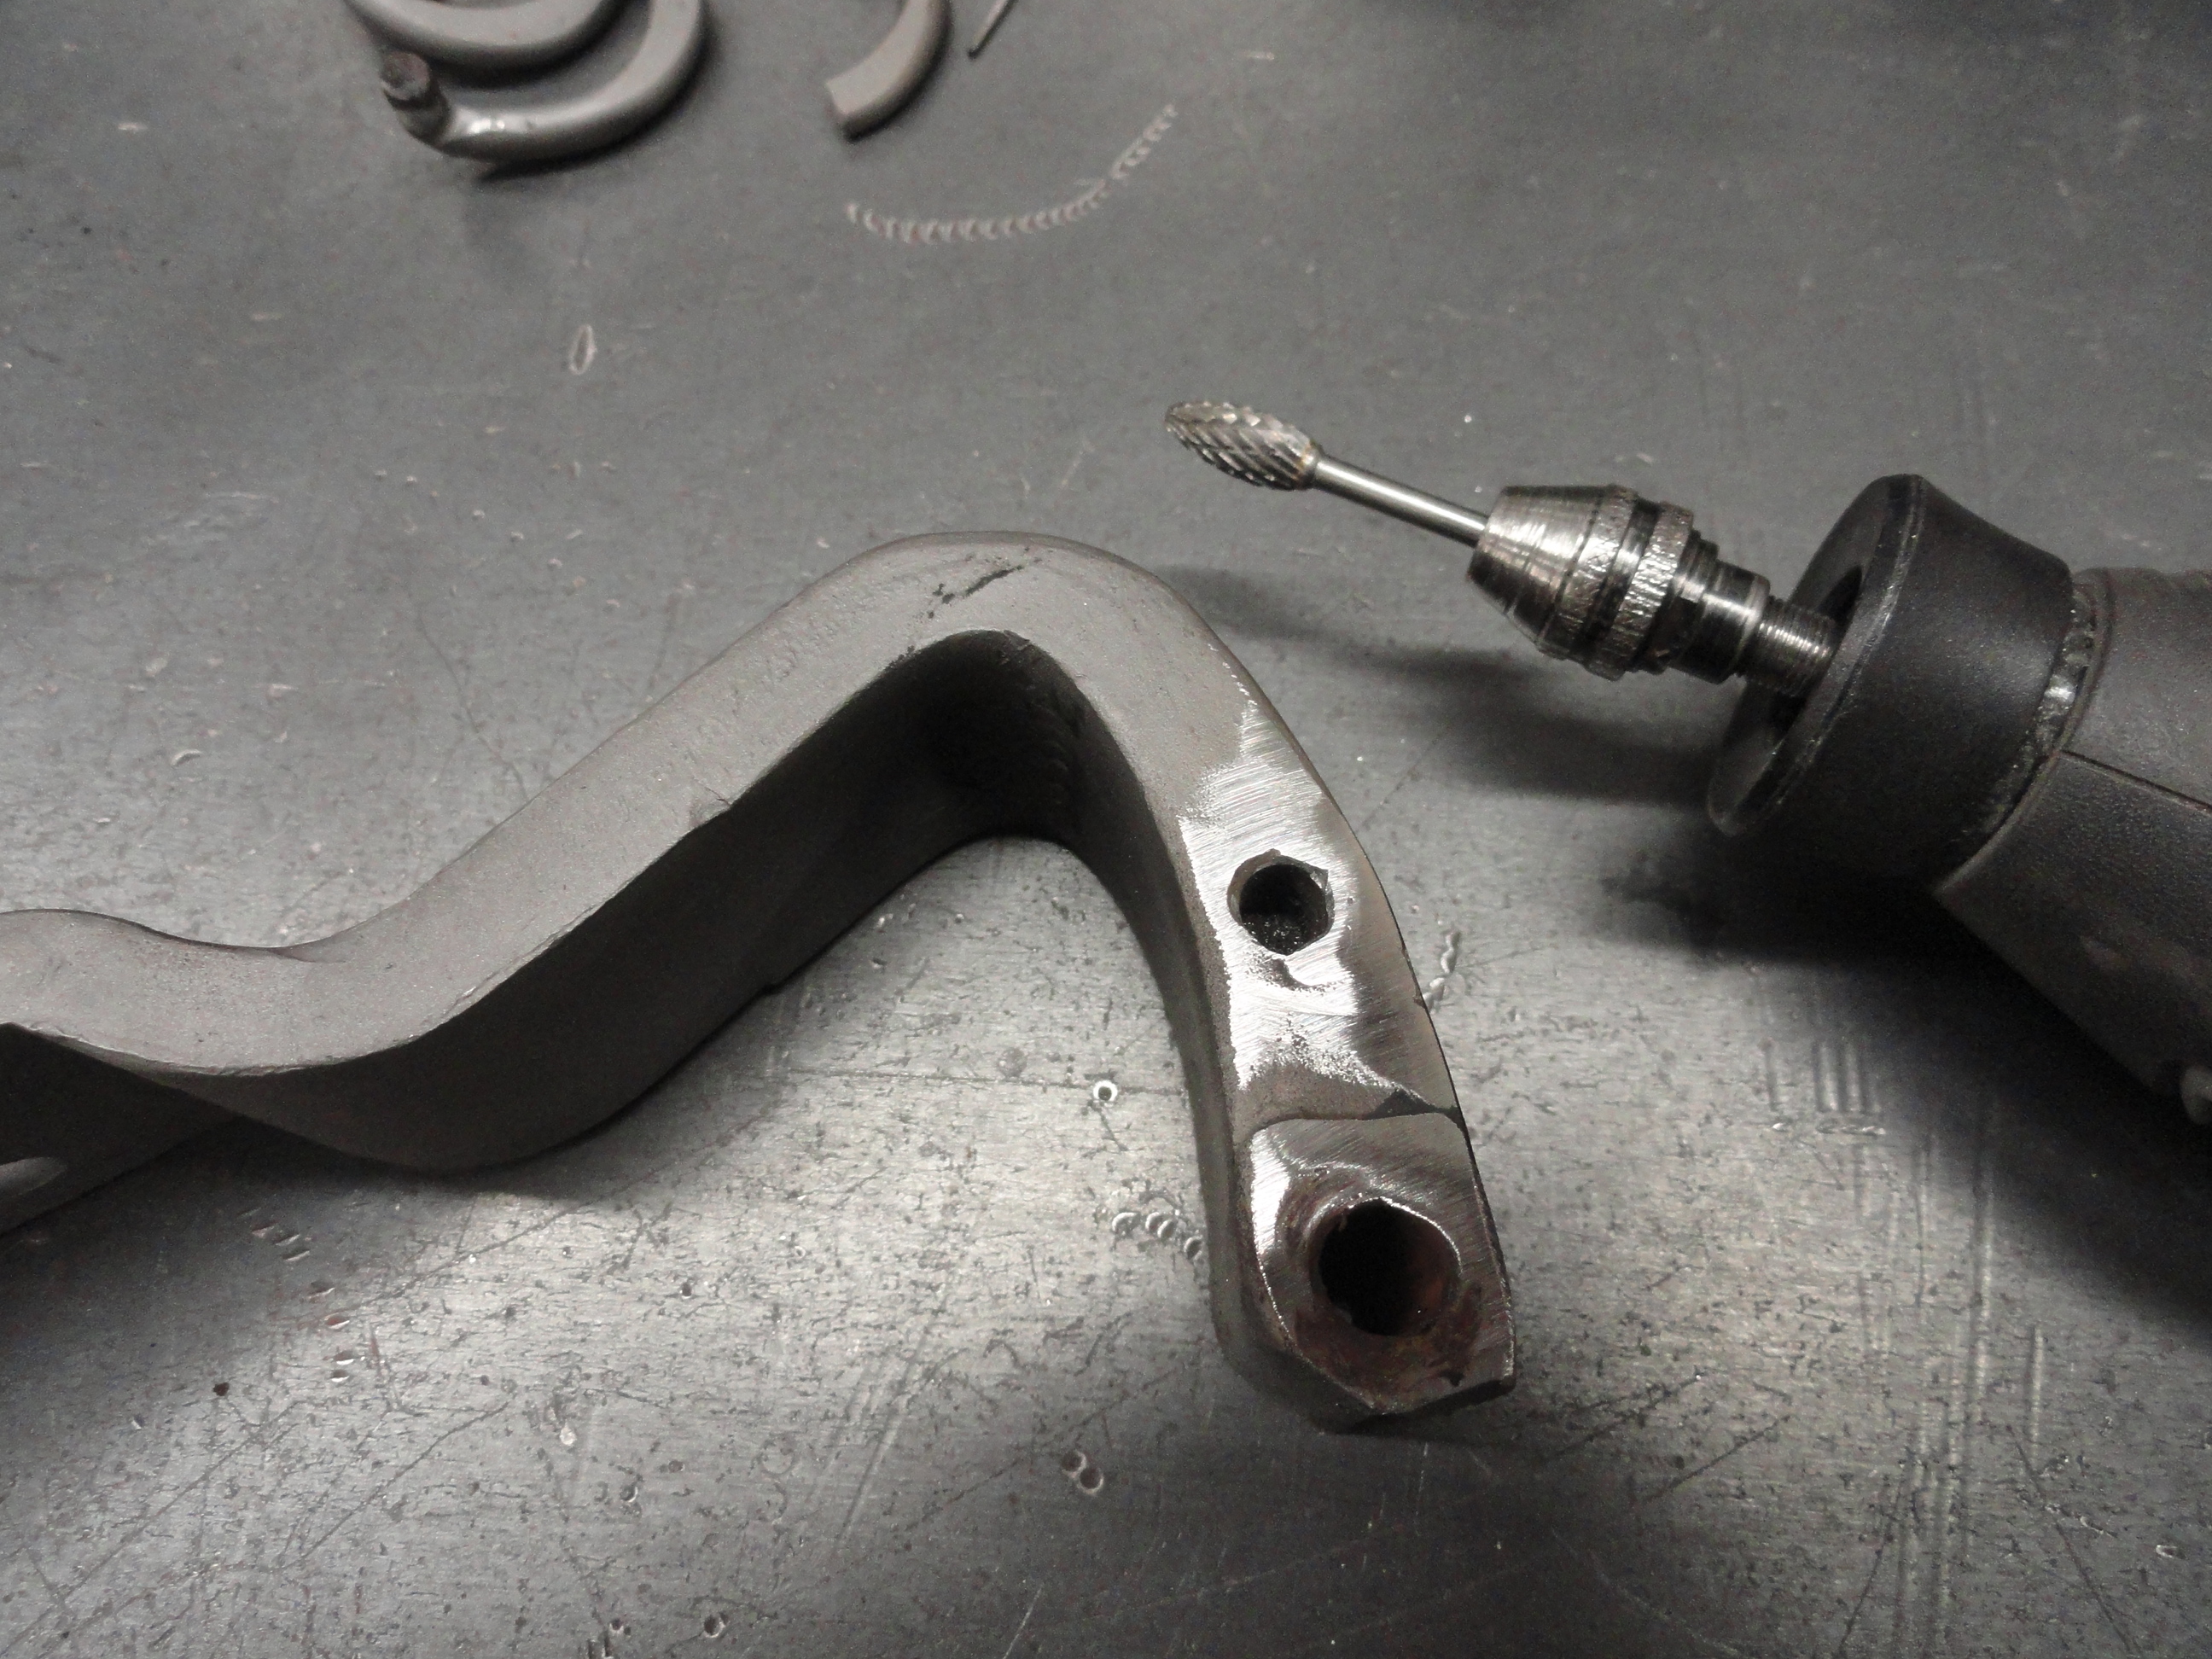
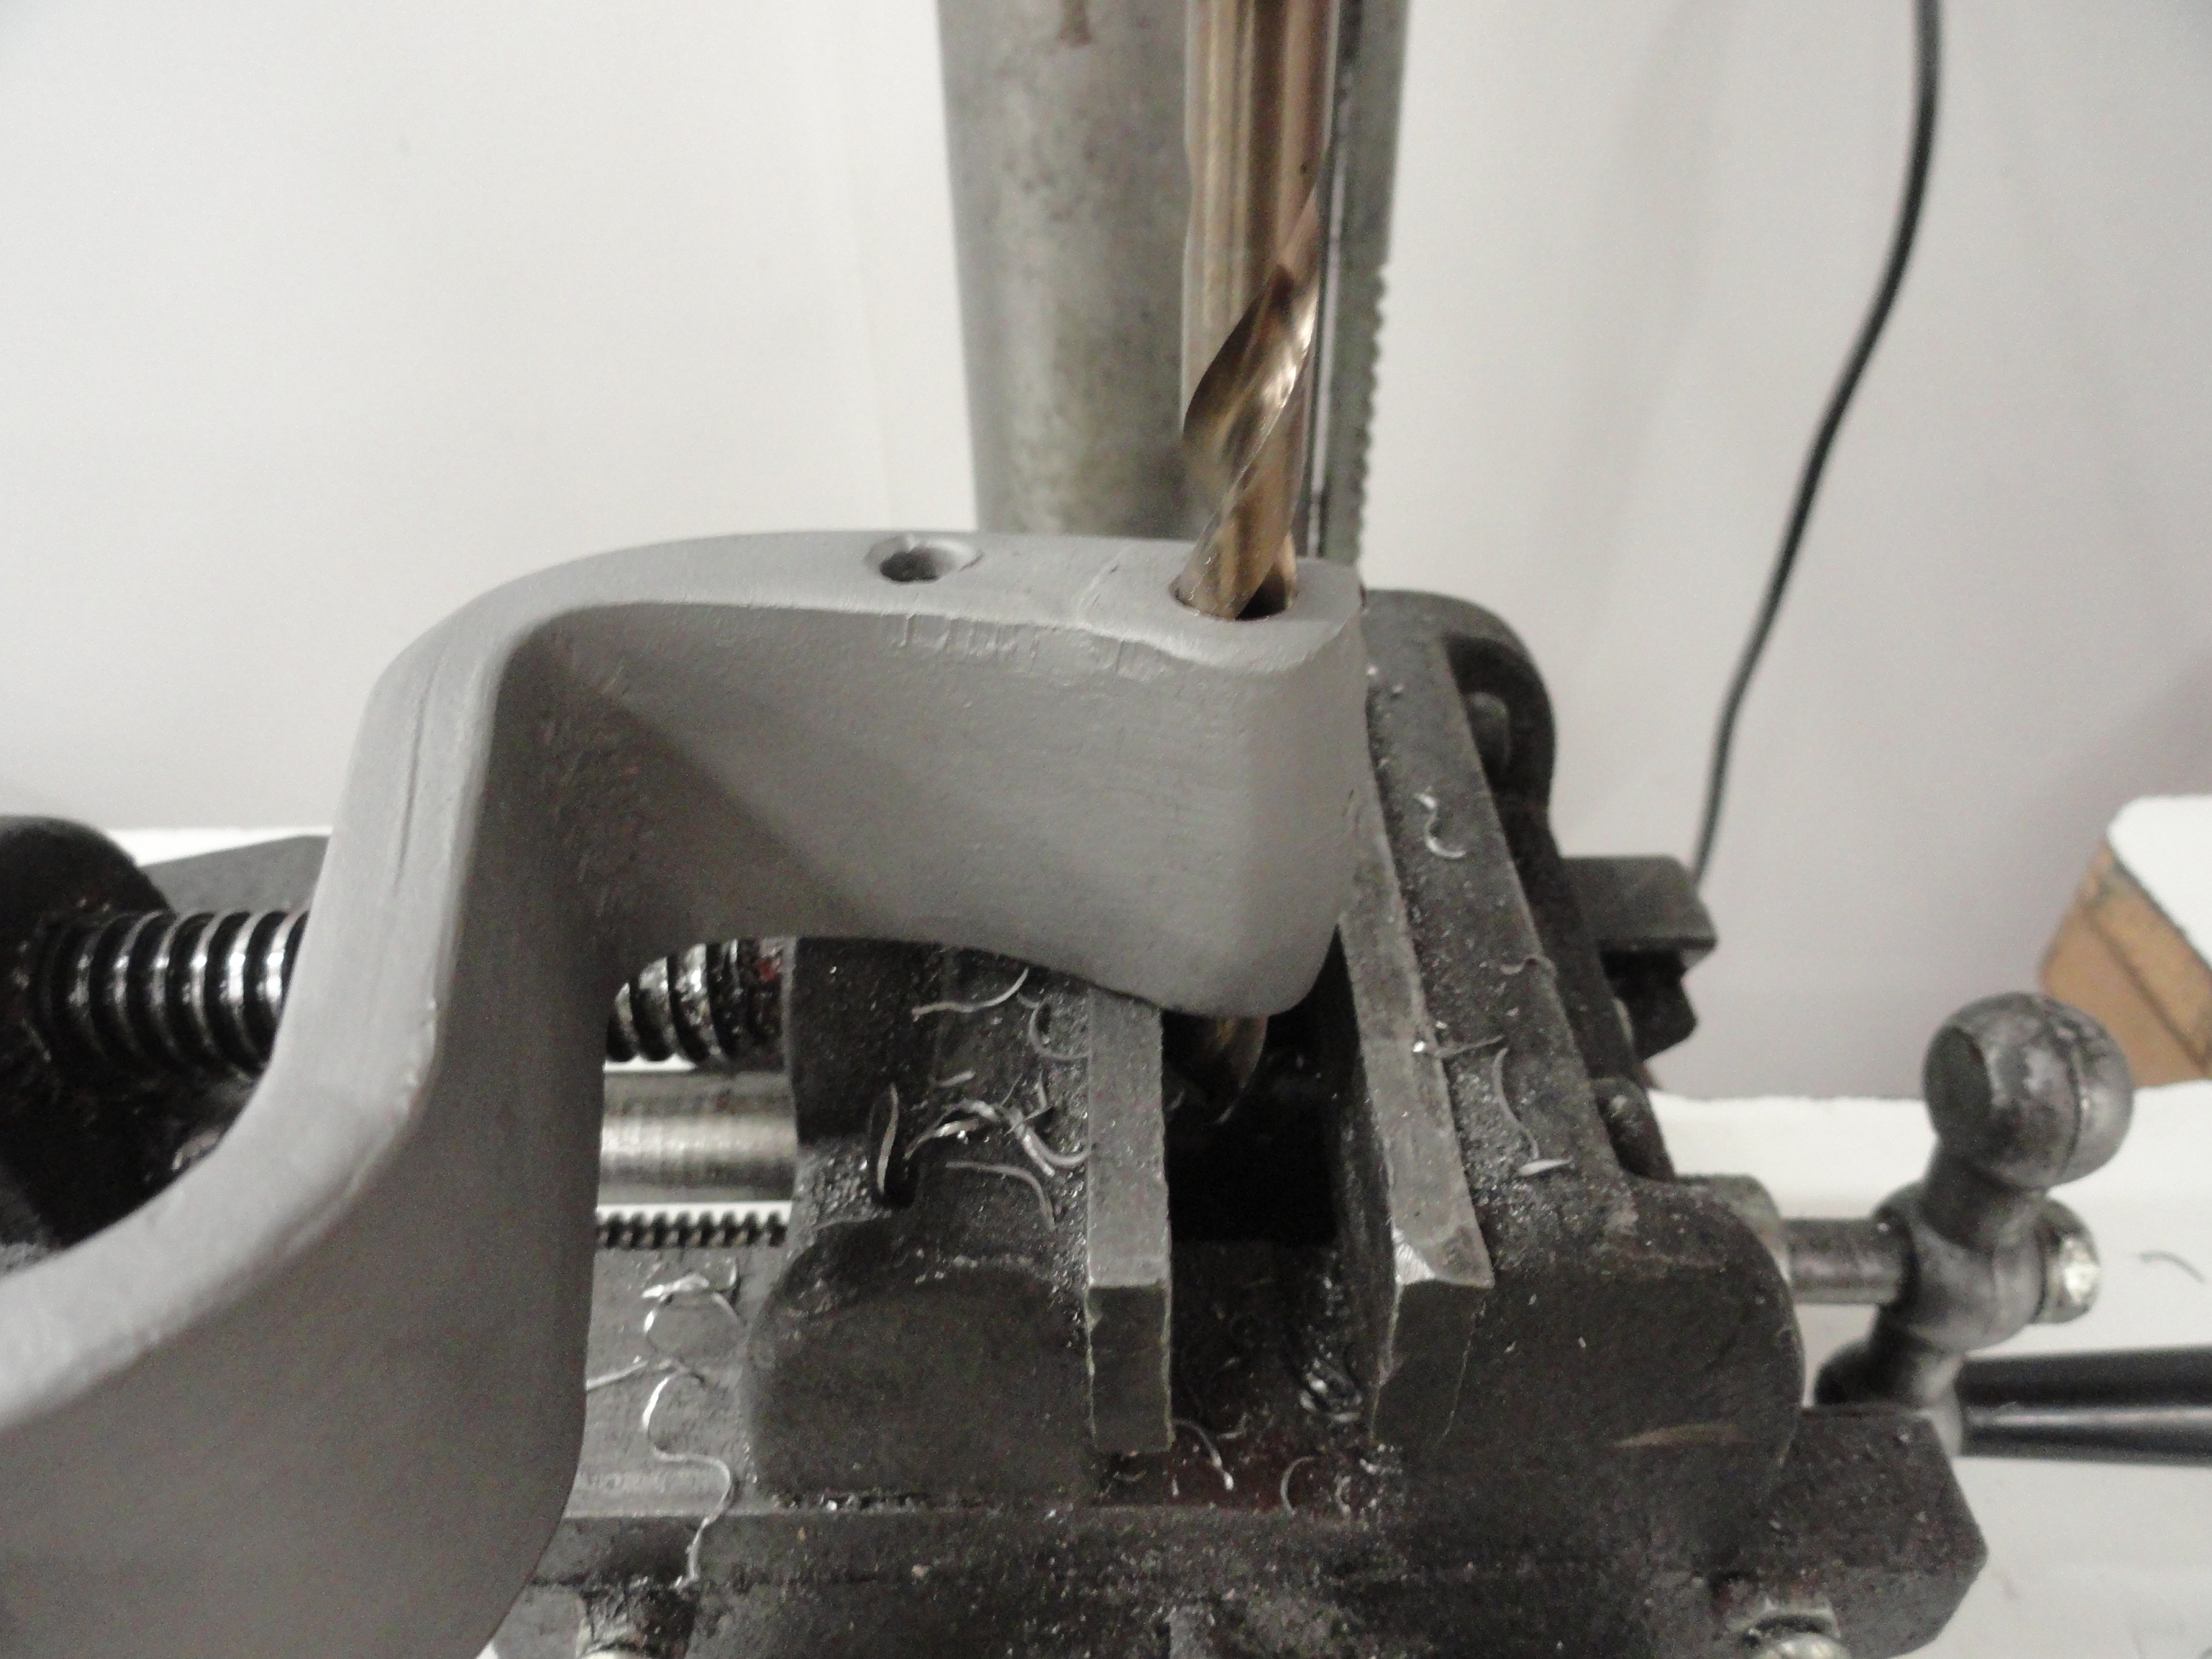
 With the Hinge Frame separated from the Hinge, Chuck up a Letter R drill bit and place the Hinge Frame so that you can drill all the way through it to drill both holes at the same time. The Bit is plenty long enough to do this. Be careful in doing this and wear gloves. I was able to accomplish this with the Hinge Frame situated as shown. By drilling them at the same time, we can be assured the holes are aligned perfectly. Next, drill the Hinge with the 11/32" Bit. The nice part about drilling the hinge is the Bit will follow the hole without a lot of worry about misalignment. Let the bit do the work and go fast, right down the hole and it will come out perfect every time. The mistake some people make is to clamp it down. Yes, it is unsafe to have it floating, so take proper precautions, but letting the Hinge float will allow the Bit to follow the path of least resistance which in this case is what we want. You can open the jaws of the vice loosely and set it in the jaws in such a way as it will stop if it gets out of hand yet floats. After the holes are drilled, put a paper clip through the Oil hole to be sure it is clear and ready for OIL.

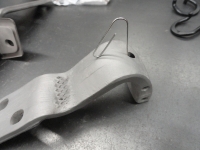
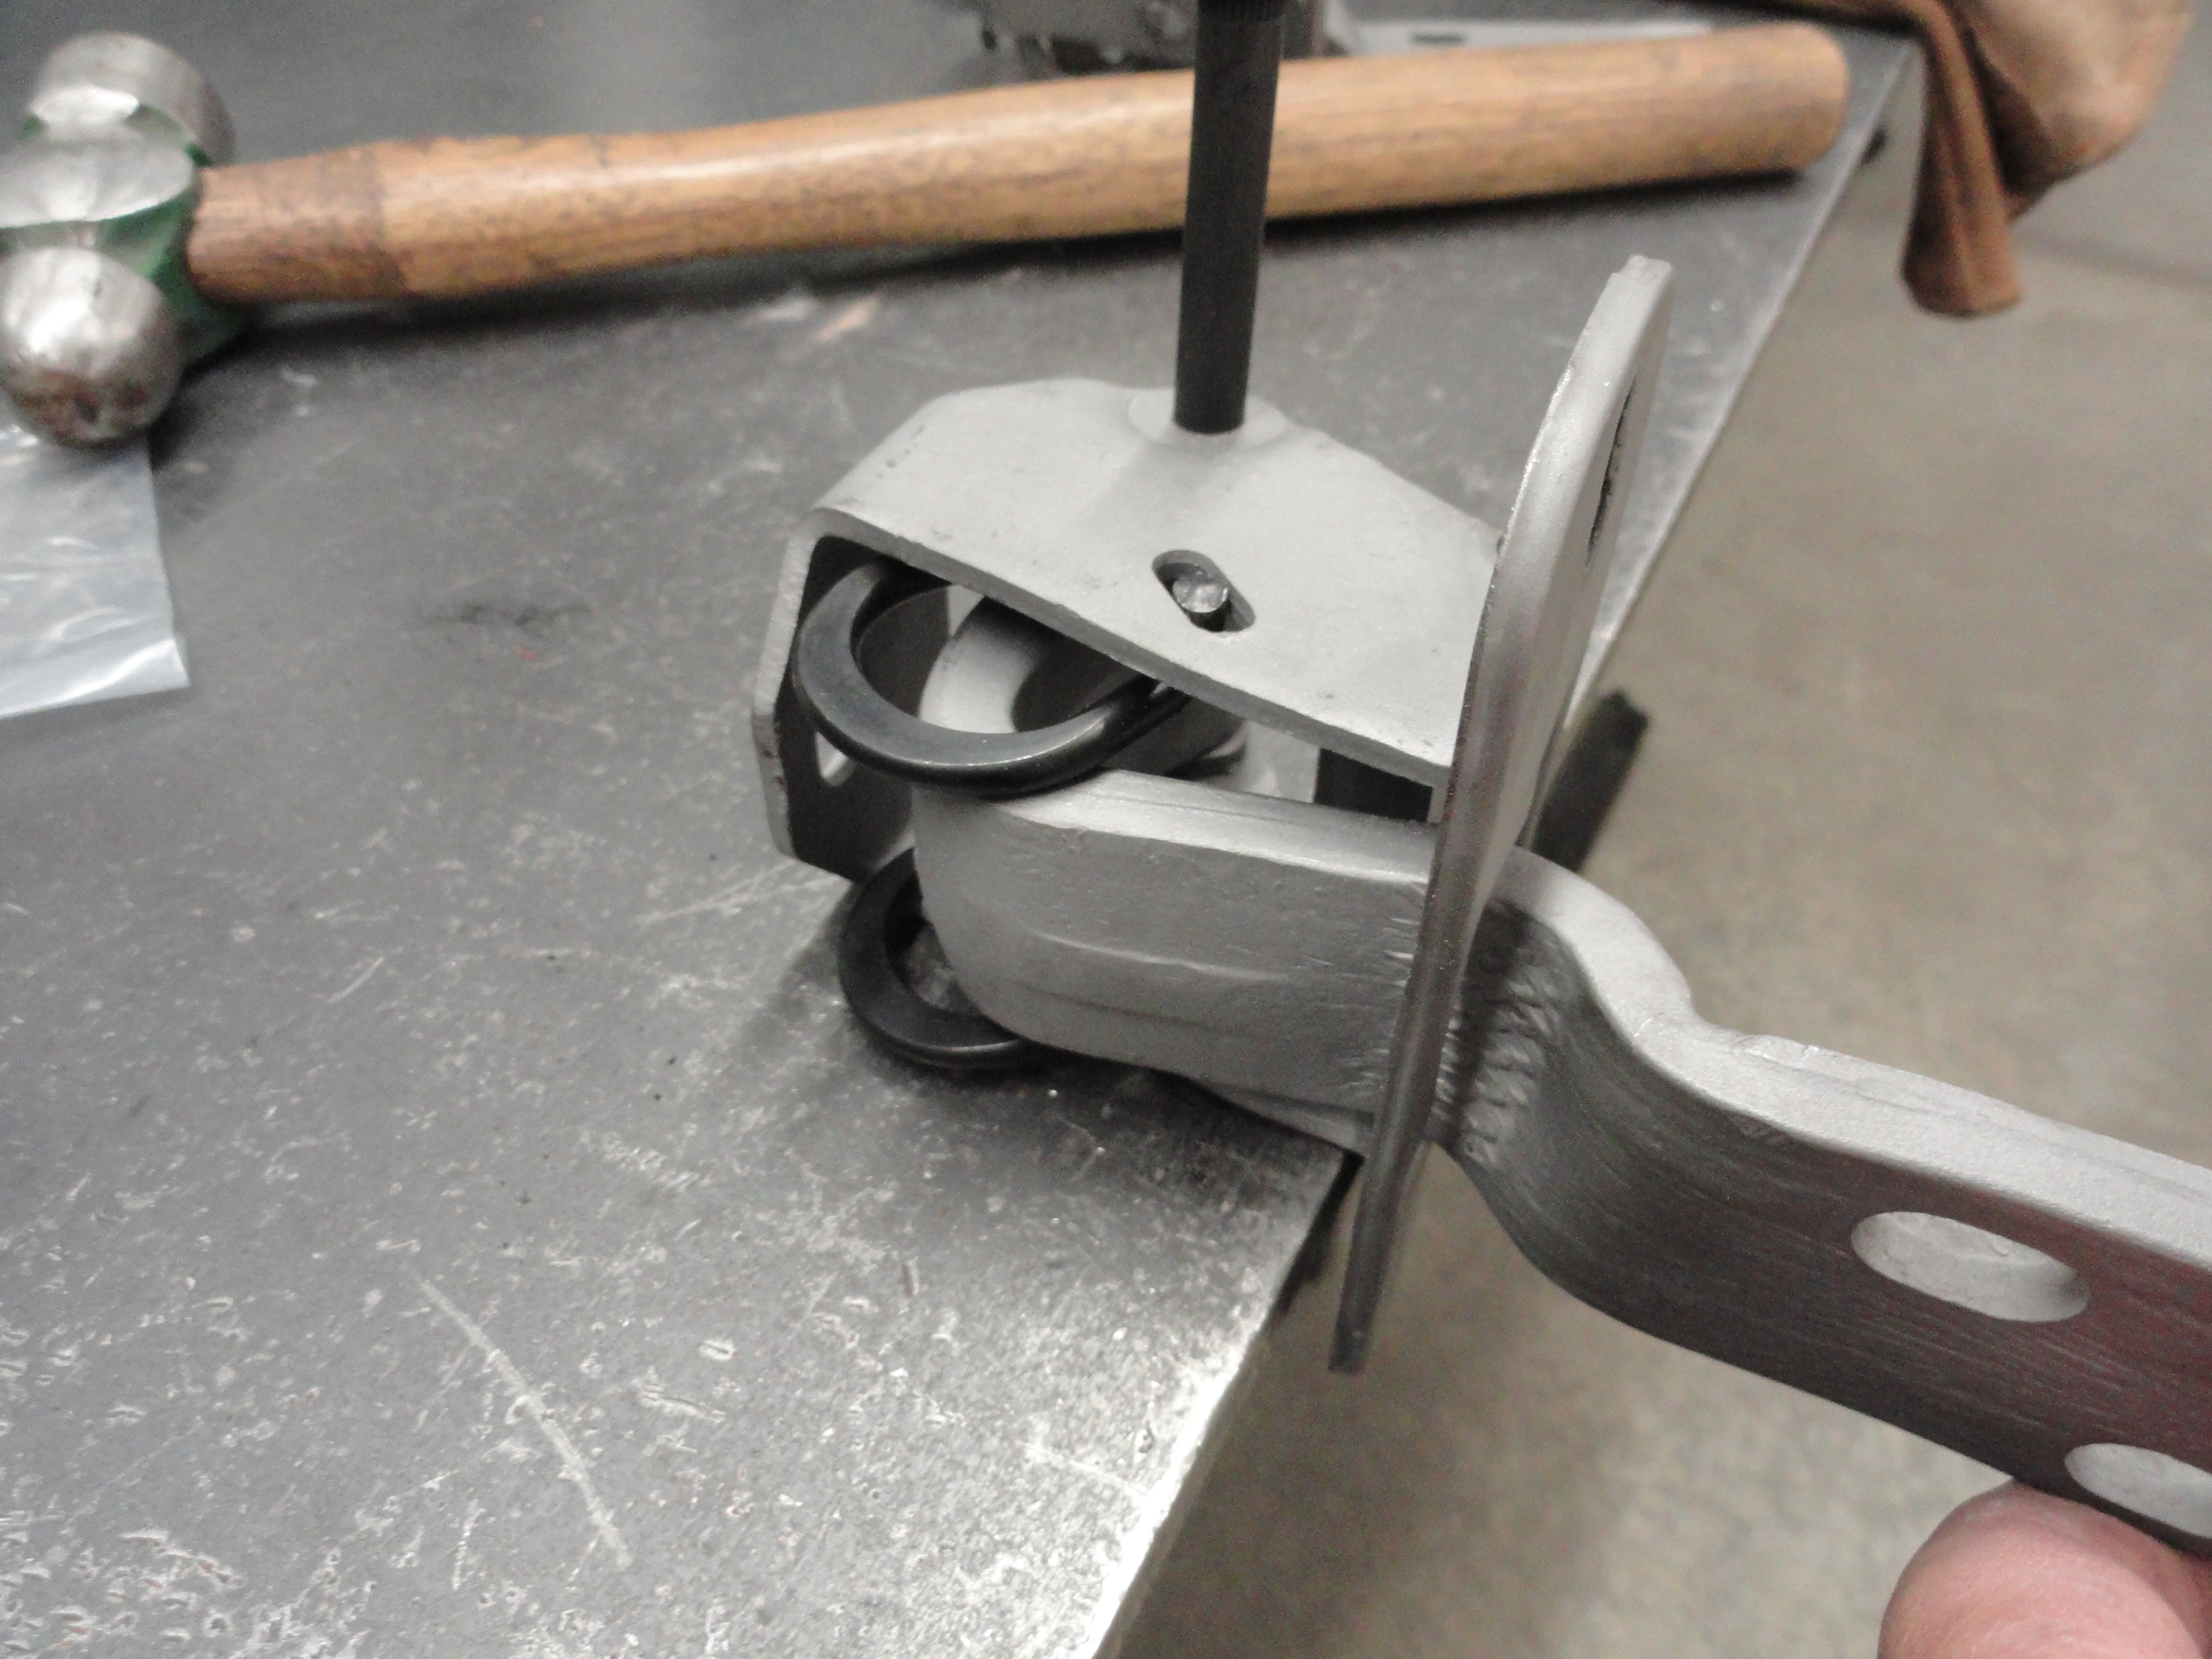
 The springs go in as shown. It is sort of a juggling thing, but set both springs in place with the hinge inside the frame as shown, then line up the pin. Set the Assembly on the edge of a table or anvil and drive the Pin in ALWAYS from the top of the hinge. The Pin Head should always be on top as assembled on the truck. Take the time to notice which way the hinge goes into the Cabs pocket before hammering the Pin into place. Drive the Pin all the way in. For the last 1/16" or so, I turned my Ball Peen Hammer over so I could hit the head of the Pin below the recess. If you did this correctly, and because you used a smaller Bit on the Hinge Frame, you will have a super tight Hinge with new springs, ready for long lasting service! Lastly, with a cutoff disc on your Grinder, cut off the excess pin. I like to leave about 1/4". Doing so will not get in the way of anything. Rinse and Repeat for the other three Hinges. The top Hinges are the only ones that get the springs. I find installing the Hinge Assembly into the Cab pockets first, THEN the Doors works best then adjust as needed.
I have done about 12 sets of these hinges and this is what works the best for me. Of course there is no easy way to get that Pin out. I have a 20 ton shop press and I do not use it for this. The reason is, you need a shock value that the Hammer provides to break the rust loose. I have gone so far as to apply heat with an Acetylene Torch. but I always do that as a last resort. A very good punch and a large Hammer will break about 80% of them loose even with great effort. I encourage you to go to the Picture Archive to see all of the material I shot for this process. Remember, these Hinges have an Oil Hole! Be sure to oil them every now and then! My experience, the lower hinges are the hardest to get the pin out.
As always, I am happy to answer questions. Have a great week!
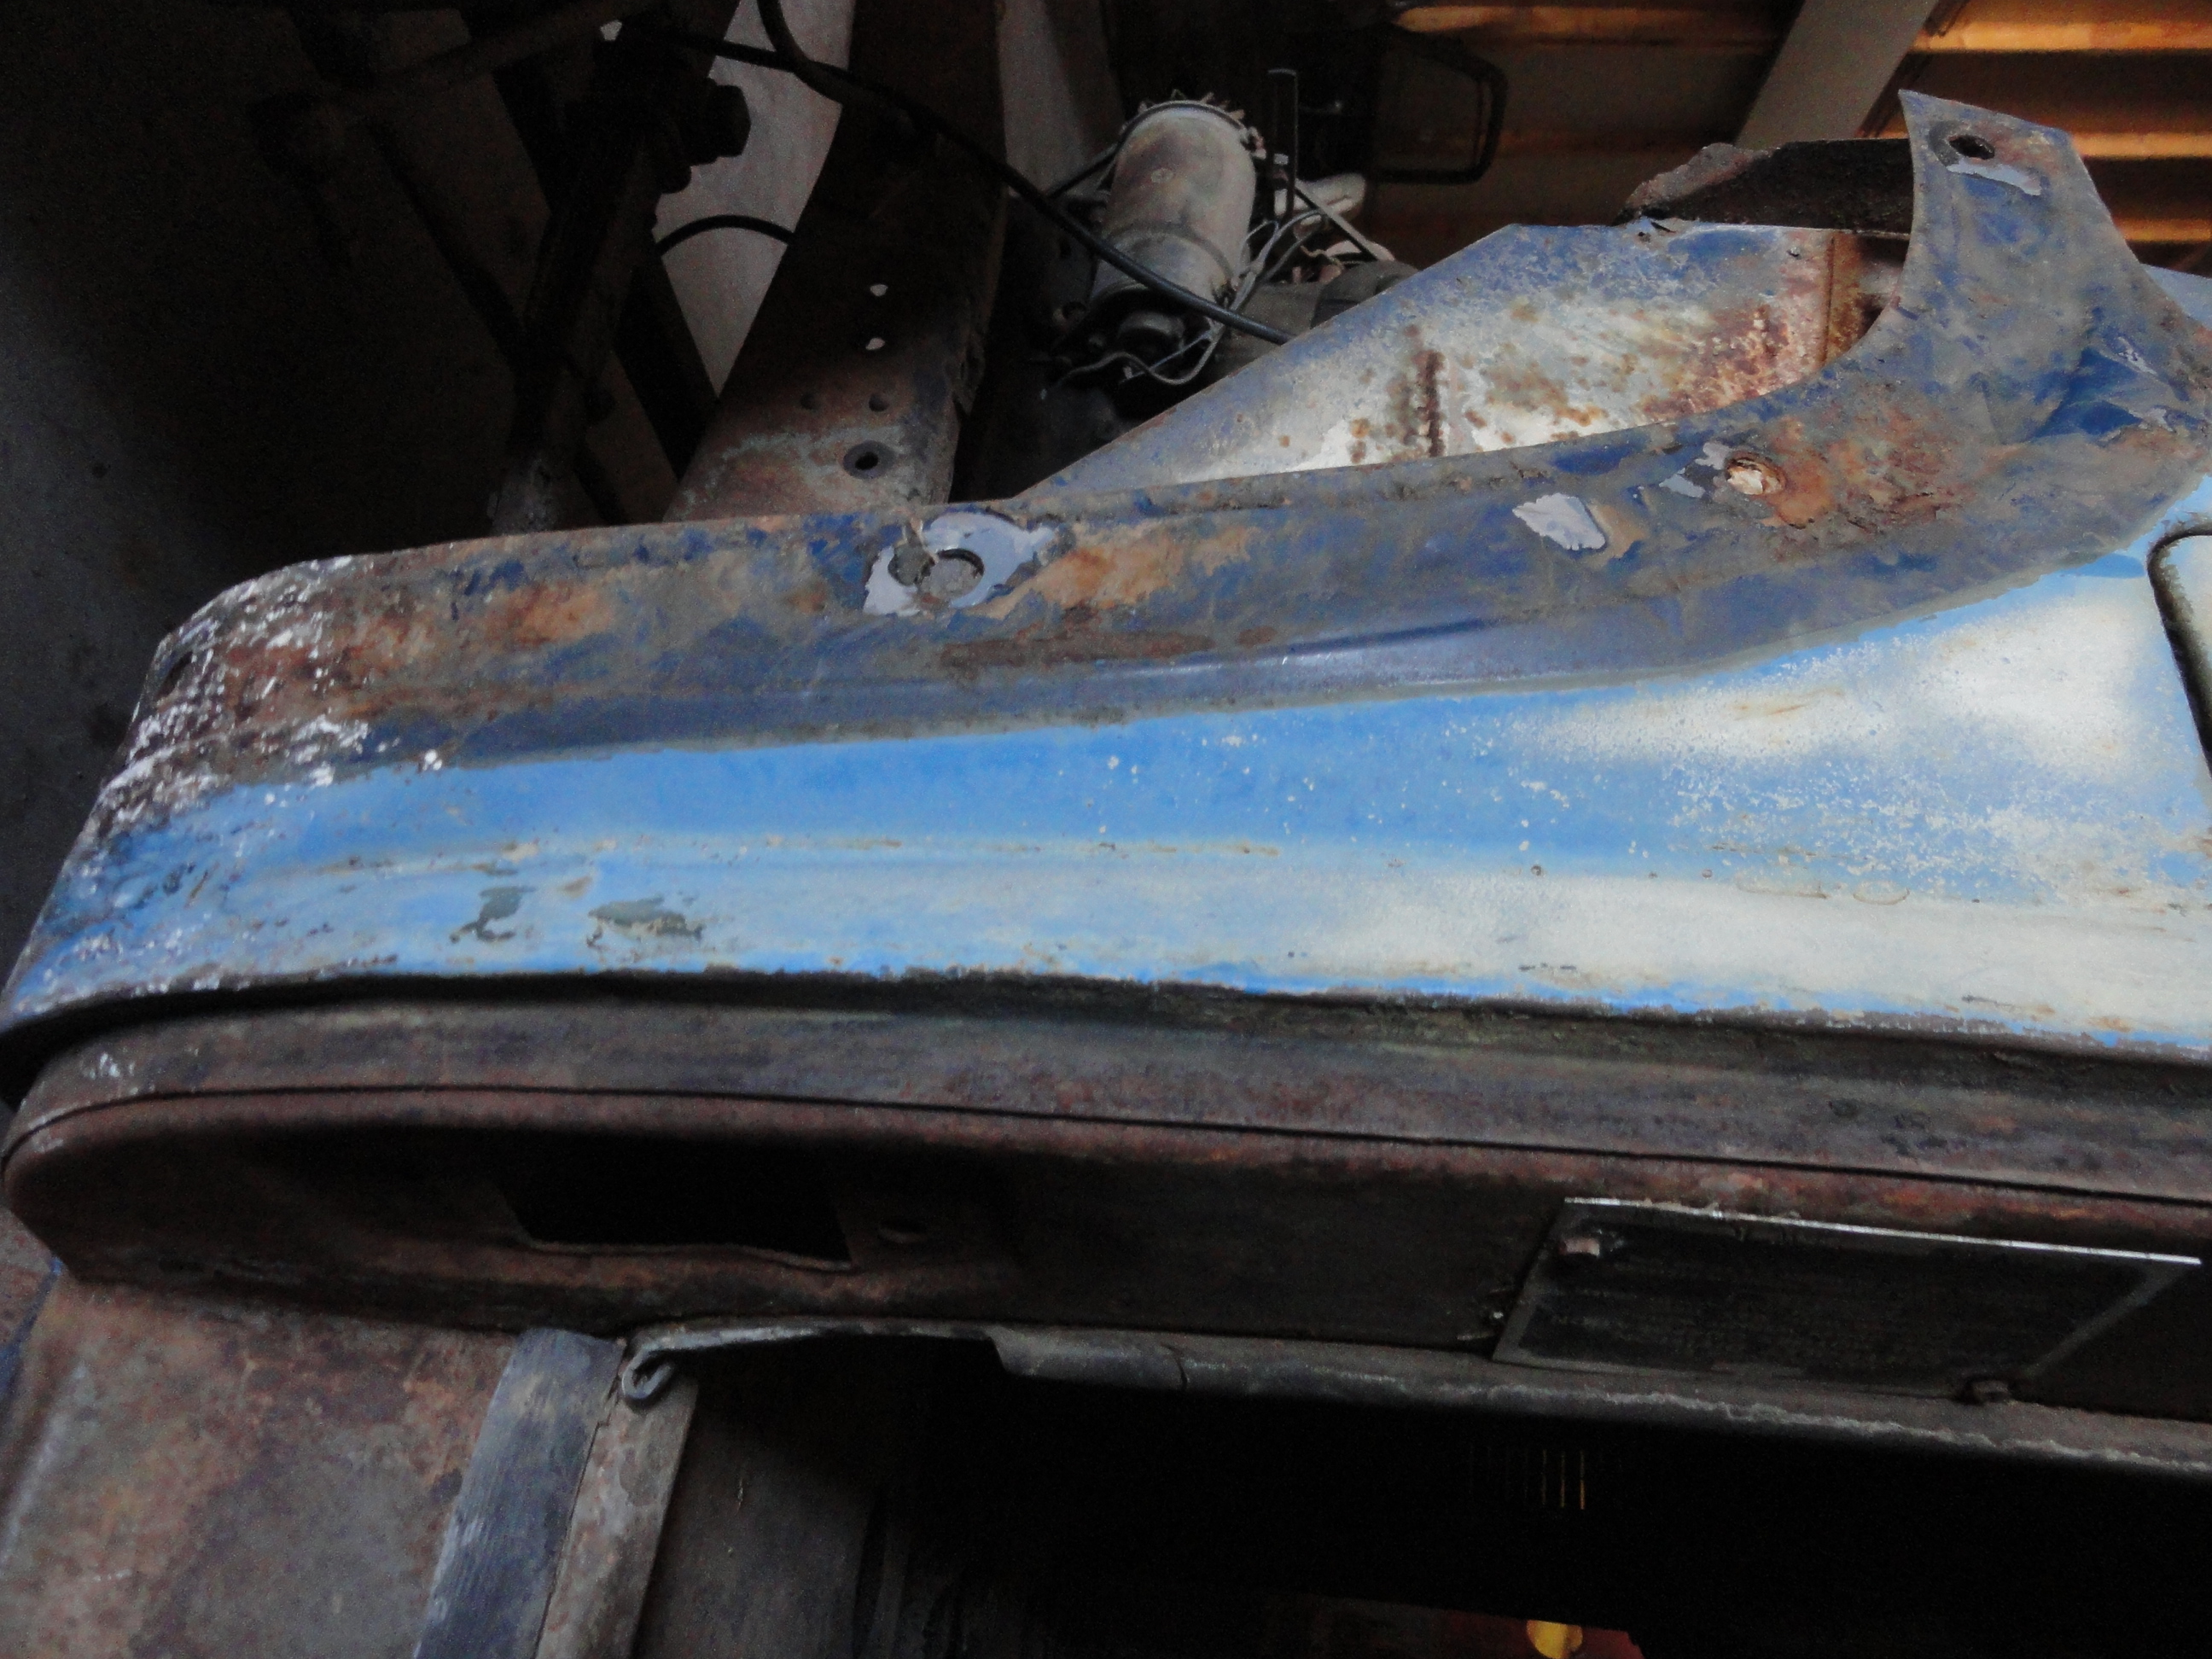
This has already been covered in a previous Tip of the Week, but not with pictures and not while I am actually doing the process. There is nothing better than doing something and writing it down as you go. This week we will discuss how exactly to repair those pesky Door Hinges on an Advance Design Truck. To really bring home the need for this type of maintenance, I share with you the picture on the left. This picture does not do justice to the problem, the crease is MUCH deeper and nastier in person. You will find this crease damage on many AD era pickups. The reason for this crease and many like it is due to the Door Hinges not having the Stop Springs, or the Springs are worn out, broken or missing. The wind grabs the door and just slams the door against the cowl creating the damage. Do NOT let this happen to you! Cowl damage of this magnitude is expensive to repair and very costly to fix correctly. Especially if Louvers or Cowl vents are in play. Nevermind the damage to the door and the ability of the doors to align properly.
So let's begin with being a part of the solution!
 Start by getting the Pin Kits and the Spring Kits from your favorite Vendor. I got mine from Classic Parts. All of these Pin Kits are oversize because the vendors recognize the amount of wear that is present by the time these hinges need a rebuild. The Spring Kits are for the Top Hinge only. There are TWO Springs per hinge/per side of the truck. The Pin Kits have an instruction with them, however I deviate considerably from the instruction, so listen to ME, not the instruction. Why would you do this? All I can say is do one their way, then do one my way. Then, when you have drilled the holes wrong, figure out how to repair the damage. OR.. just do it my way. Here is why..
The instruction tells you to drill both the Hinge Frame, and the Hinge with an 11/32" Drill bit. This may make sense in theory, but in practice it's a bad idea. The Hinge Pin is made out of Hardened Steel. The long hole that goes through the hinge has a large contact surface. The Hinge Frame has a very small contact surface in comparison. By making them both the same size, the Hinge Frame will be loose in comparison to the Hinge and it won't take long for the Hinge Frame's holes to wear enough to cause a loose hinge. Remember, the Pin is supposed to rotate inside the HINGE and the Hinge Frame is supposed to capture the Pin. By using an 11/32" bit, you are oversizing the holes in the Hinge Frame. You can't go back from that without welding, so PLEASE get yourself a LETTER R Drill Bit for the Hinge Frame. It is slightly smaller than 11/32" and it will ensure your hinge works properly and lasts a long time.
Another point of interest is the use of those soft brass bushings that come with the kit. The instruction says to use them ONLY if the Hinge itself is worn beyond 11/32". This would be a very rare thing since the new pins are already oversized, but if that were to happen, soft brass would not be the way I would go. You are asking to have to replace them again in a short time. Instead, weld the Hinge hole shut as deep as your welder can go on both sides and then re-drill the hole. The Hinge itself is not 11/32" all the way through. It is made with a cavity in the center to accommodate oil. This means welding about 1/2" deep into the hole on both sides is about the same as a new hinge and you used STEEL to repair it so there is no worry of brass bushings on a heavy door such as this. Do this job right the first time, and you probably will never change them again in your lifetime.
 So to begin this process, let's get the old pin out. This is easier said than done (and then some). If you are one of the lucky guys who even KNEW there is an oil hole in the center of your hinges and oiled them regularly, the pin will come out with moderate effort. Best to use PB Blaster and let the Hinge set overnight. Also, get a GOOD punch set that you can use a very large ball peen hammer on without bending the punch. There are a few pitfalls here. If you beat on this assembly too hard, you will bend the hinge frame and cause a lot of damage. Support the assembly, better than what you see in the picture. In the case of that one, the pin came out with moderate effort. Due to the shape of the assembly, I would welcome suggestions on how to hold this thing to prevent damage. It's very unwieldy. Notice the damage to one of my punches. This is one of those processes that works just as you are about to give up. Do not give up and do not be tempted to do anything that will bend your Hinge Frame!
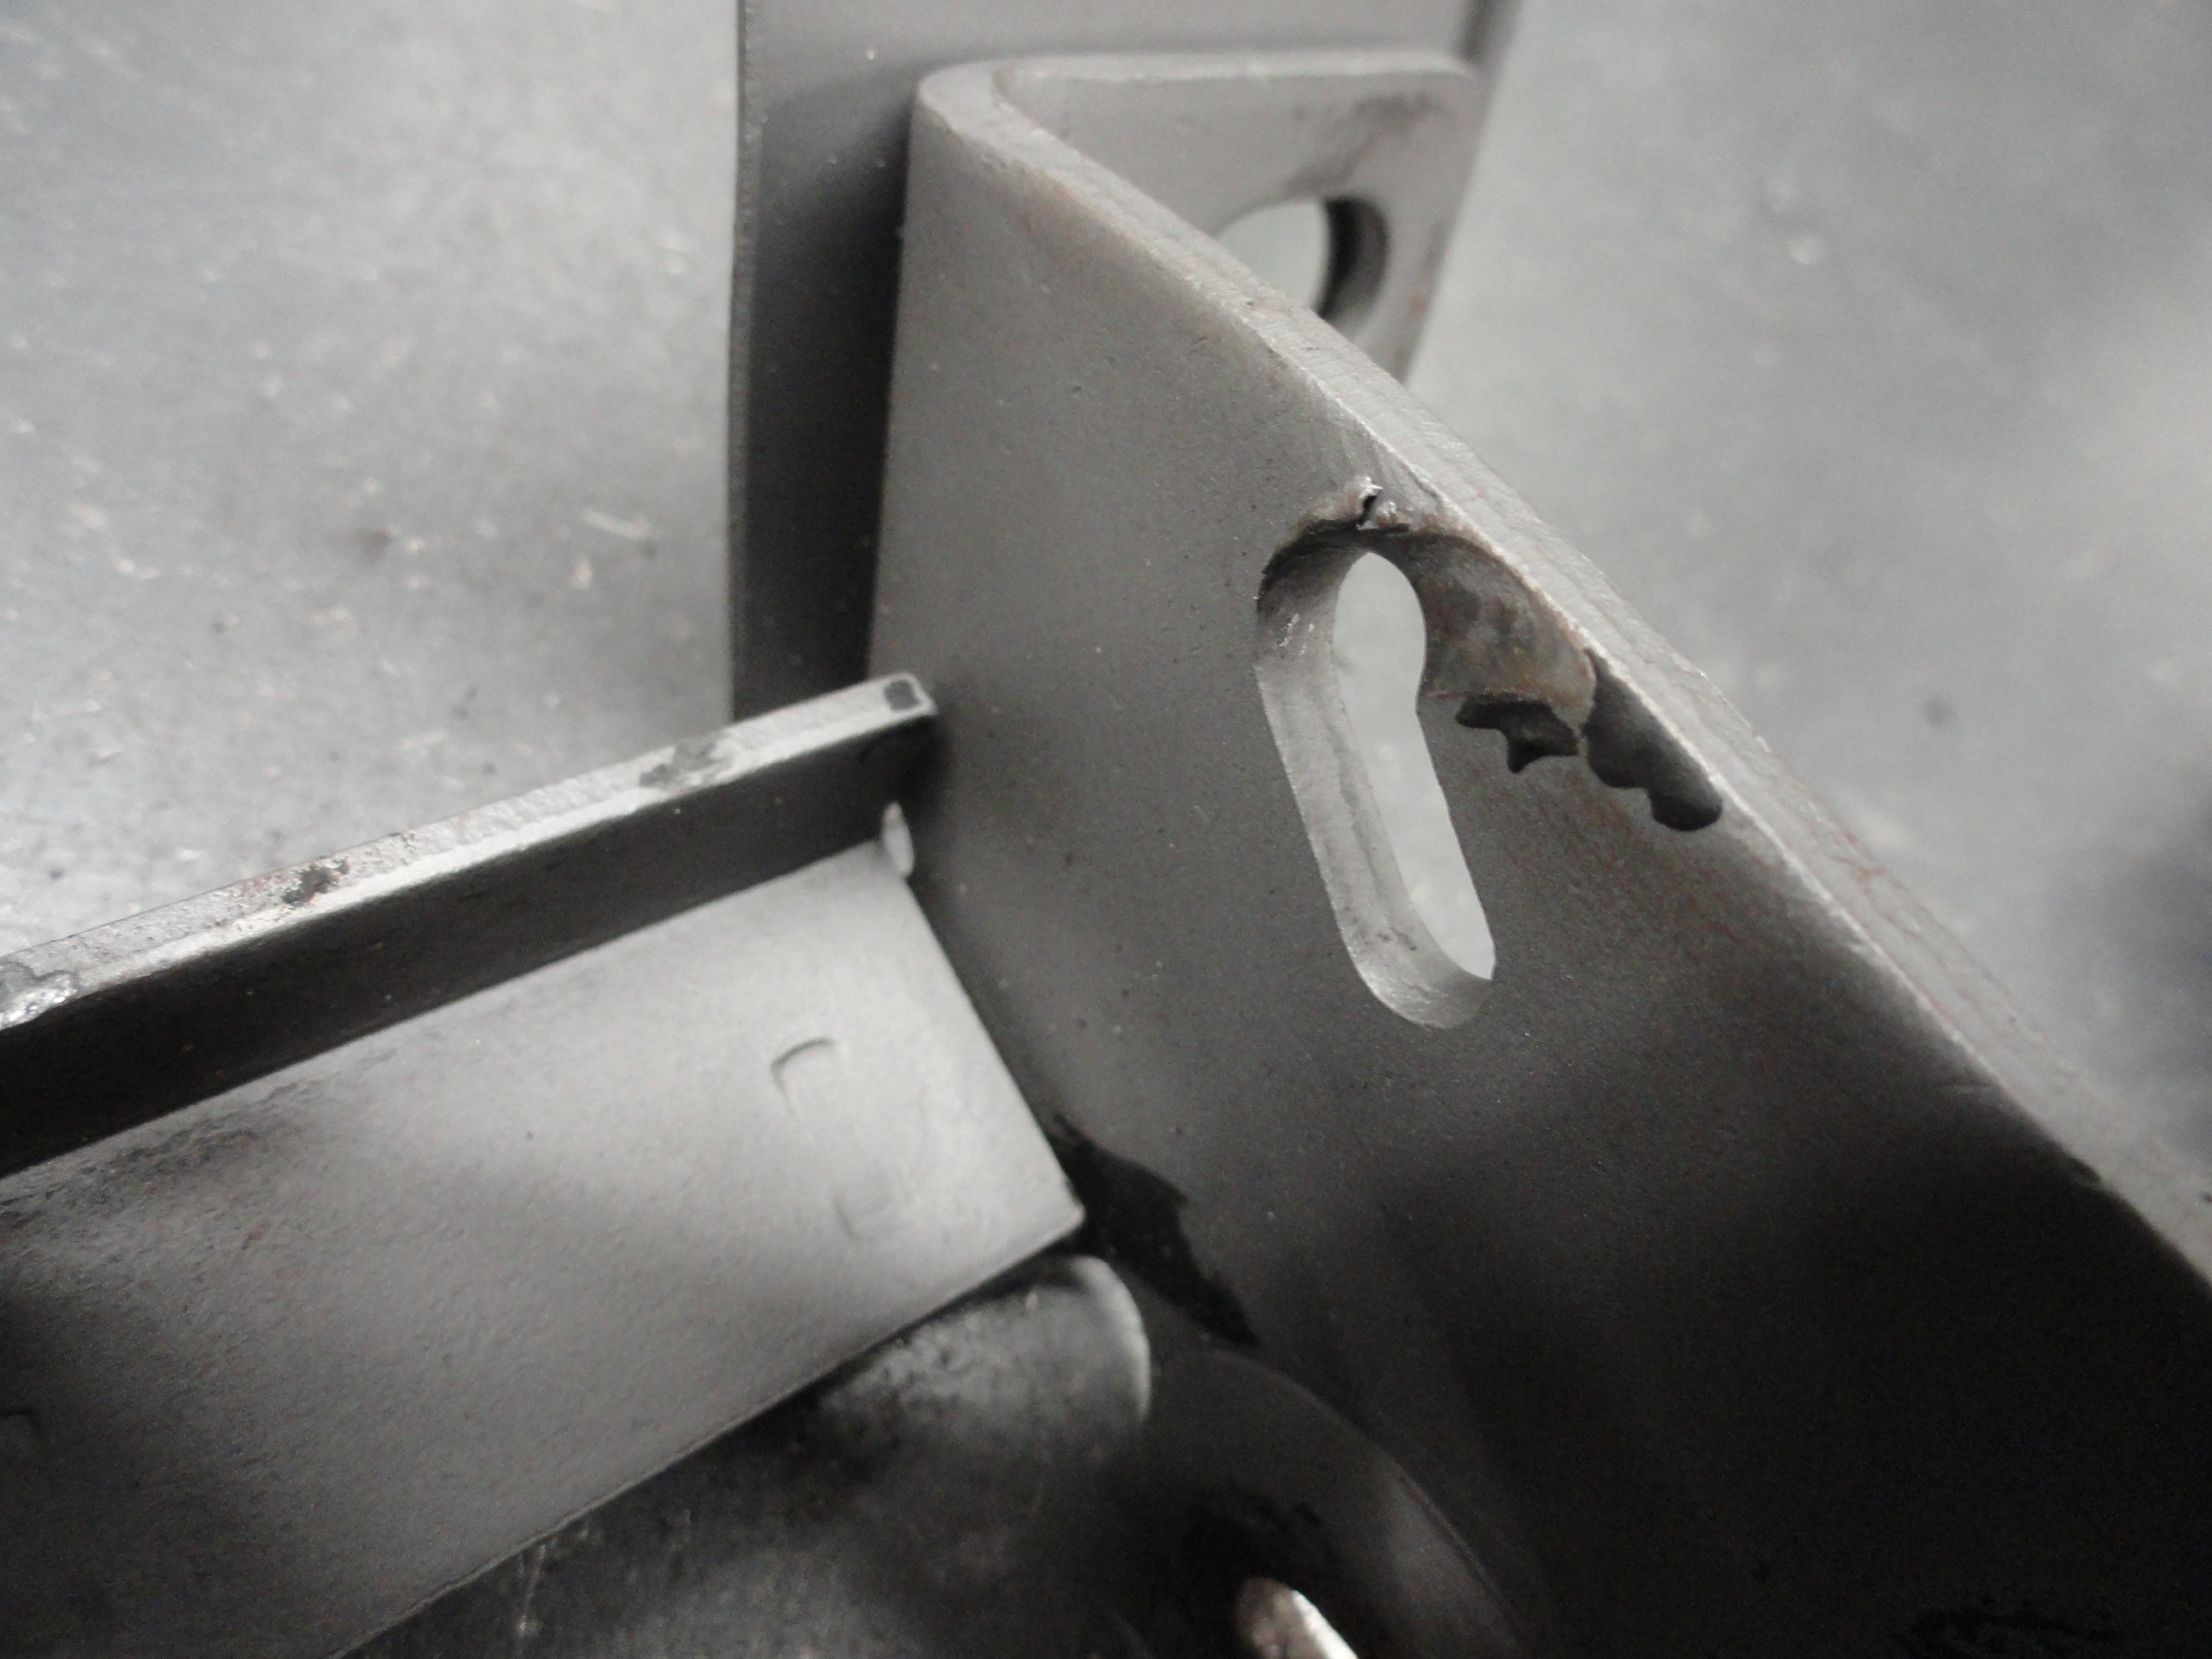

Let's take on a Top Hinge because it has the two springs on it. With the Pin removed, let's take a closer look at the Hinge and Hinge Housing for excessive wear. In this case, the wear is just too bad to let go. All that will happen if ignored is, the spring can pop out and you can end up with the same problem you had before you started. To repair this damage, clean the area for a good weld, add a little weld in the affected area and grind it smooth. My hope for you is that you will not run into this problem, but this is how it is properly repaired. A little wear is normal, but when it gets as bad as this, it's time to break out the welder.
 Here are the repaired Hinge and Hinge Frame ready for installation. I am including these repairs so you know there are ways to fix these issues rather than ignore them. But there is more! Often, when pounding out that nasty pin, one of the spot welded spacers will fall off! Clean the surfaces and spot weld them back by tacking weld to the sides. There are more pictures on the subject of fixing these Hinges HERE. In a process like Automotive Restoration, it is a really handy skill to learn MIG Welding. Be sure to get one that lets you use Argon/CO2 for shielding.
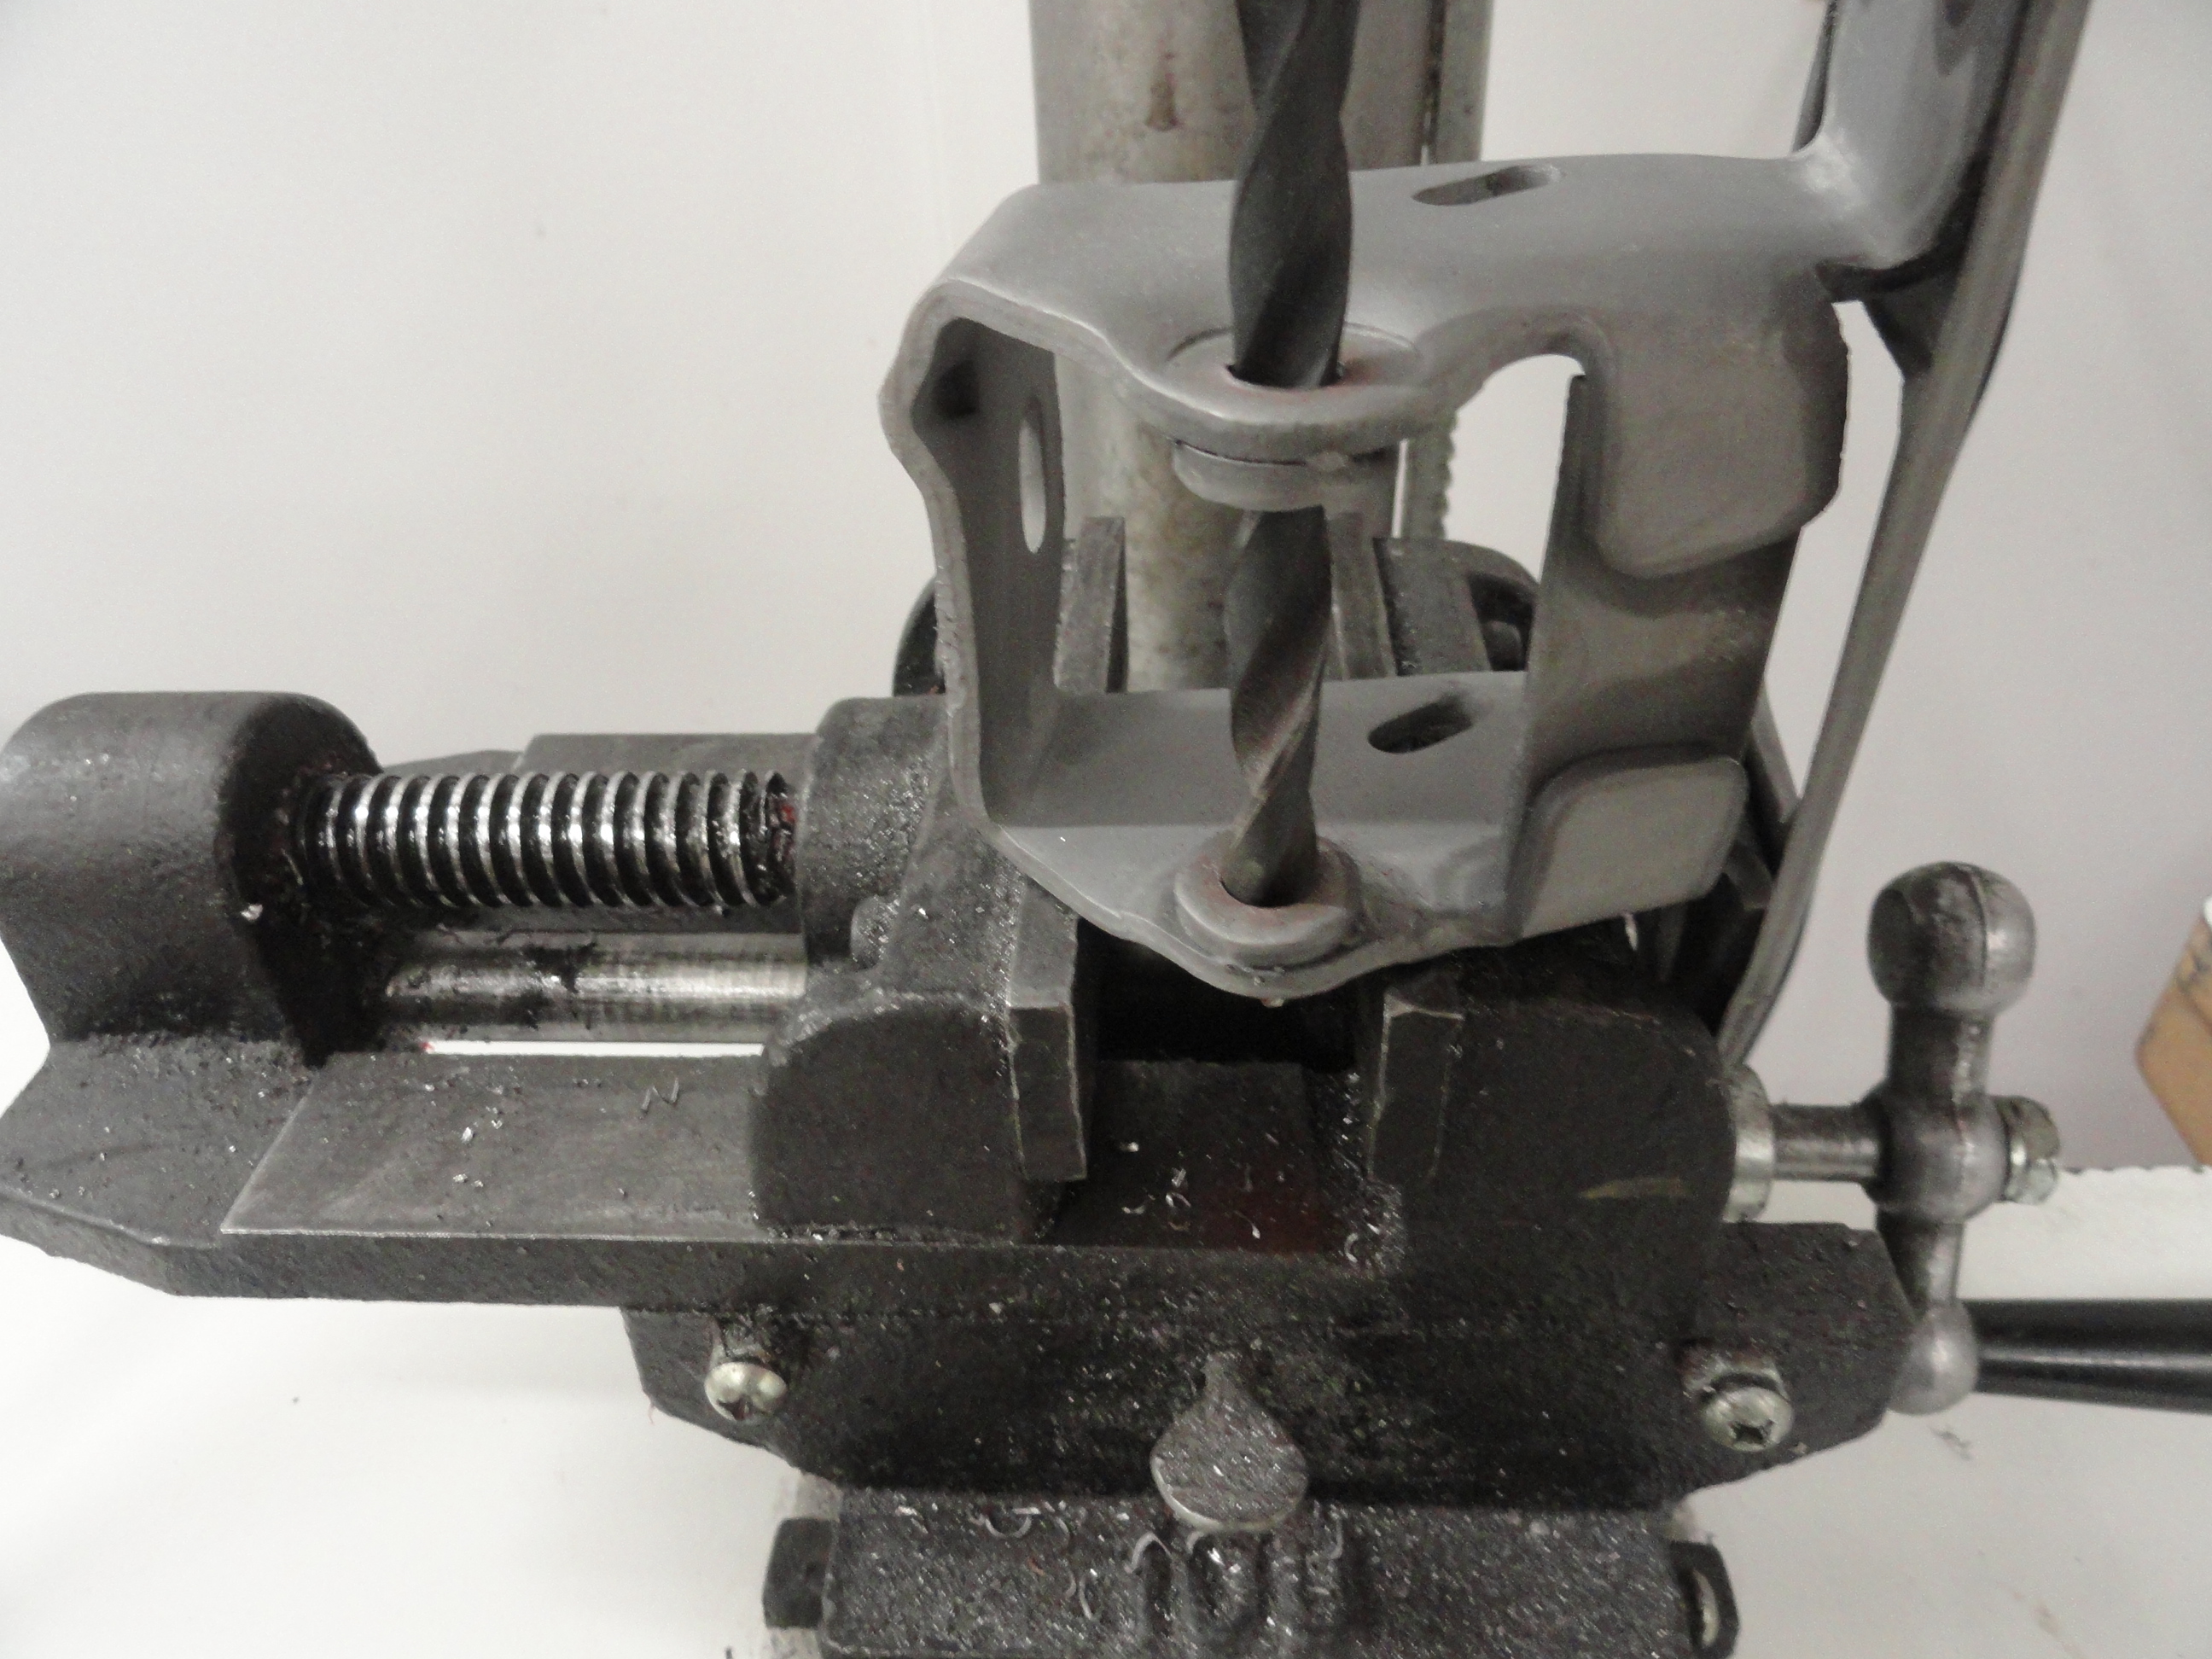
 With the Hinge Frame separated from the Hinge, Chuck up a Letter R drill bit and place the Hinge Frame so that you can drill all the way through it to drill both holes at the same time. The Bit is plenty long enough to do this. Be careful in doing this and wear gloves. I was able to accomplish this with the Hinge Frame situated as shown. By drilling them at the same time, we can be assured the holes are aligned perfectly. Next, drill the Hinge with the 11/32" Bit. The nice part about drilling the hinge is the Bit will follow the hole without a lot of worry about misalignment. Let the bit do the work and go fast, right down the hole and it will come out perfect every time. The mistake some people make is to clamp it down. Yes, it is unsafe to have it floating, so take proper precautions, but letting the Hinge float will allow the Bit to follow the path of least resistance which in this case is what we want. You can open the jaws of the vice loosely and set it in the jaws in such a way as it will stop if it gets out of hand yet floats. After the holes are drilled, put a paper clip through the Oil hole to be sure it is clear and ready for OIL.
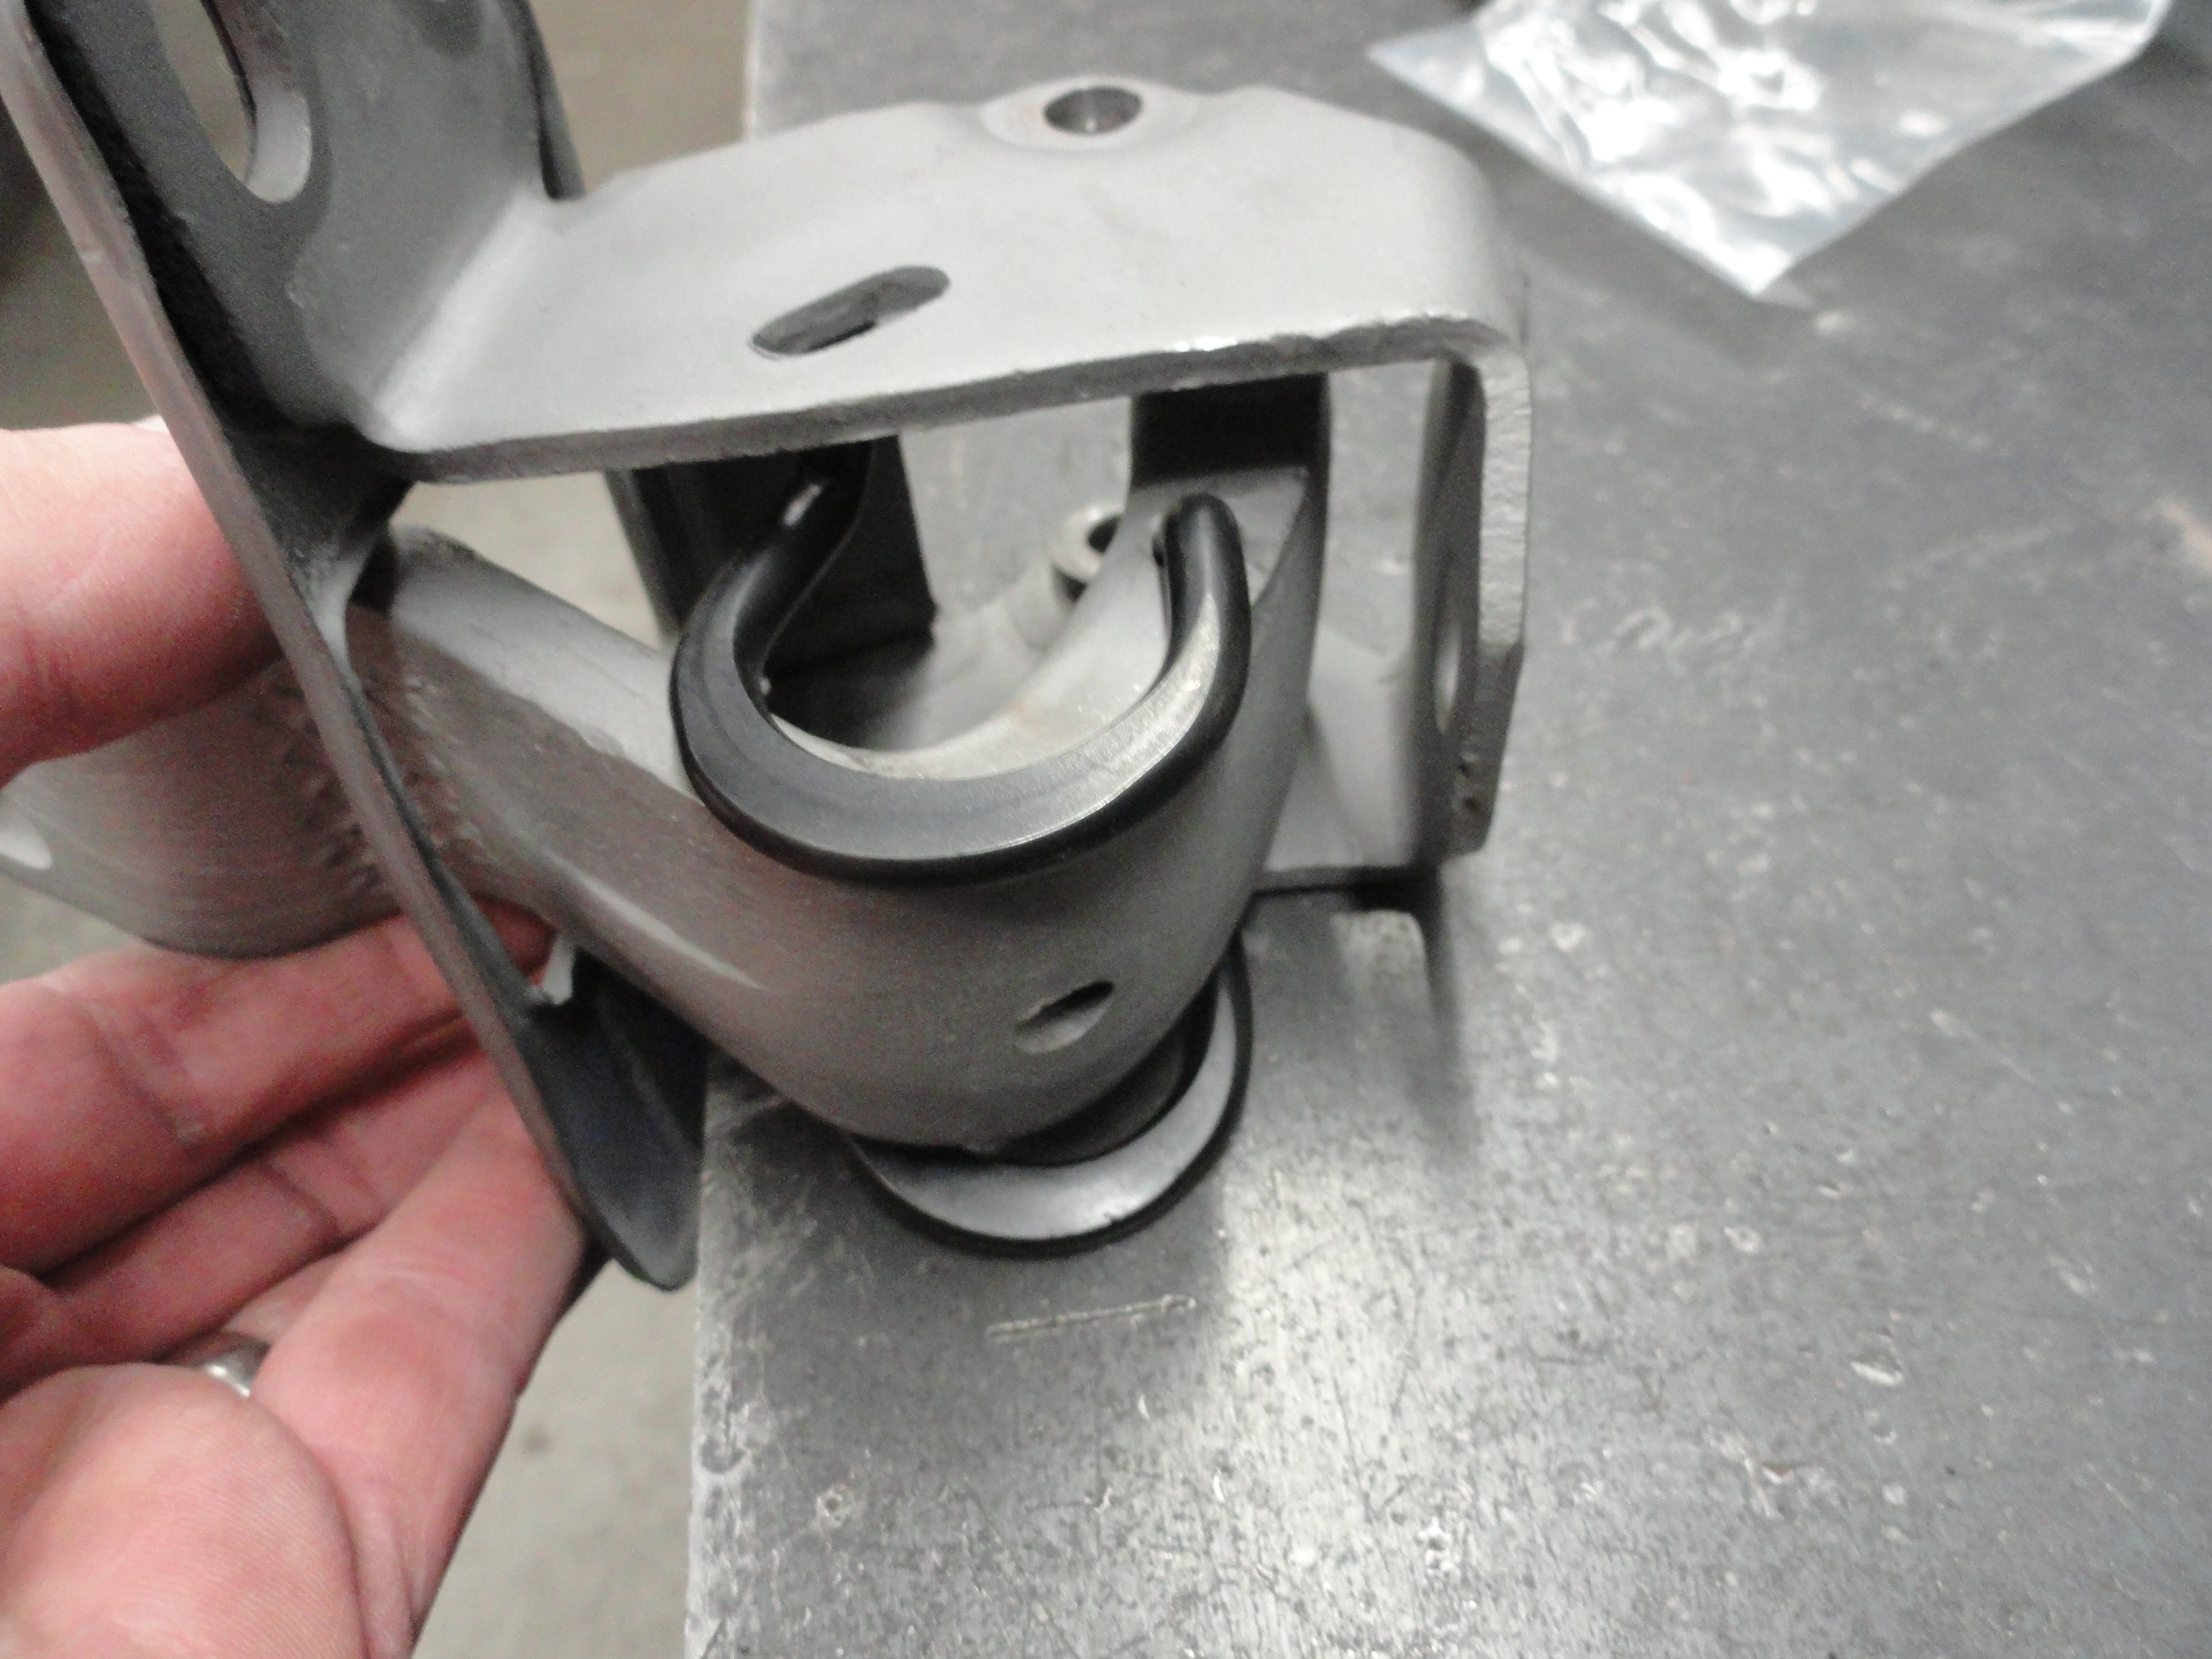
 The springs go in as shown. It is sort of a juggling thing, but set both springs in place with the hinge inside the frame as shown, then line up the pin. Set the Assembly on the edge of a table or anvil and drive the Pin in ALWAYS from the top of the hinge. The Pin Head should always be on top as assembled on the truck. Take the time to notice which way the hinge goes into the Cabs pocket before hammering the Pin into place. Drive the Pin all the way in. For the last 1/16" or so, I turned my Ball Peen Hammer over so I could hit the head of the Pin below the recess. If you did this correctly, and because you used a smaller Bit on the Hinge Frame, you will have a super tight Hinge with new springs, ready for long lasting service! Lastly, with a cutoff disc on your Grinder, cut off the excess pin. I like to leave about 1/4". Doing so will not get in the way of anything. Rinse and Repeat for the other three Hinges. The top Hinges are the only ones that get the springs. I find installing the Hinge Assembly into the Cab pockets first, THEN the Doors works best then adjust as needed.
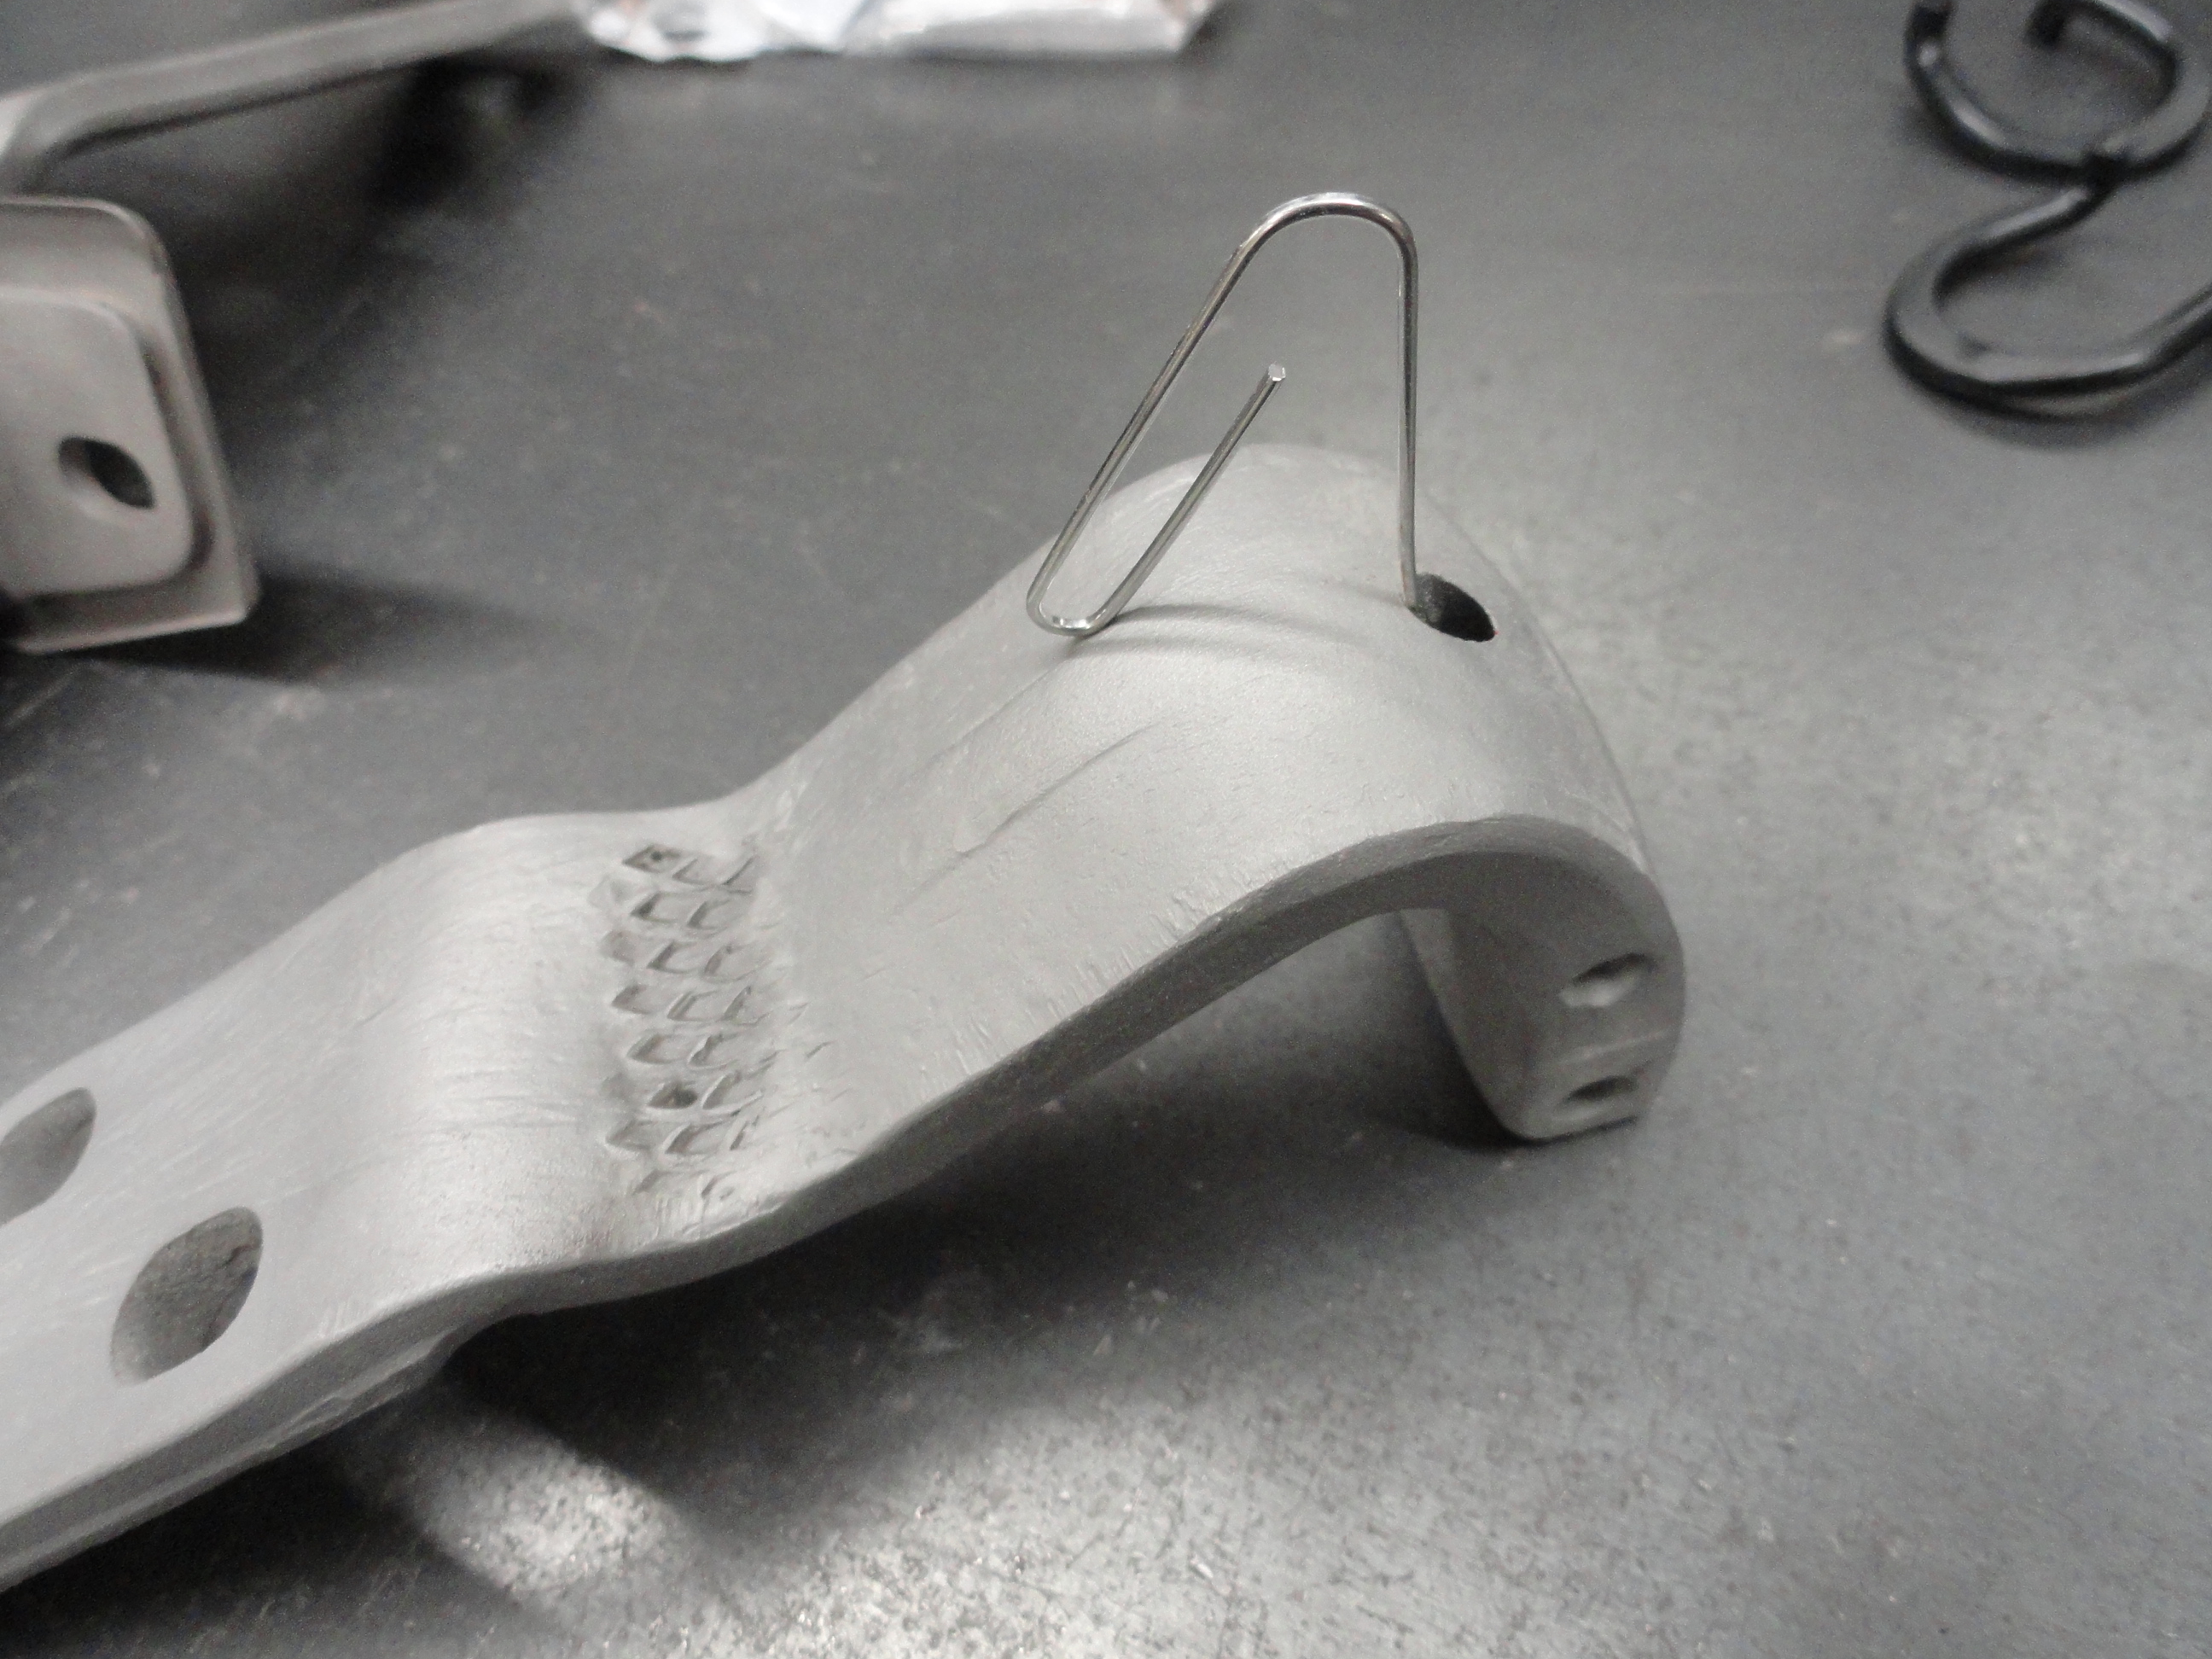
I have done about 12 sets of these hinges and this is what works the best for me. Of course there is no easy way to get that Pin out. I have a 20 ton shop press and I do not use it for this. The reason is, you need a shock value that the Hammer provides to break the rust loose. I have gone so far as to apply heat with an Acetylene Torch. but I always do that as a last resort. A very good punch and a large Hammer will break about 80% of them loose even with great effort. I encourage you to go to the Picture Archive to see all of the material I shot for this process. Remember, these Hinges have an Oil Hole! Be sure to oil them every now and then! My experience, the lower hinges are the hardest to get the pin out.
As always, I am happy to answer questions. Have a great week!