


 Welcome to Deves Technet.com Forums. I encourage everyone to register so we can get a better idea of the traffic and its usefulness. Please leave a word or two describing your stay and what we can do to make it more enjoyable. Thanks!
 Tweet
Tweet
1953 Bedwood Replacement Pt 2...
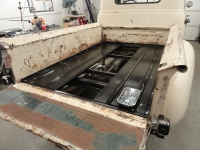
The 1953 was pretty beat up when I got it. Someone had removed the rear running board brackets and welded the ends of the running boards to the fender on each side! I will address this problem after I find a pair of rear running board brackets, but this means I have to do all of the work on the bedwood on the truck. Removing the bed and doing it on sawhorses would be preferred because there are some bolts that are VERY hard to get to with the truck's frame in the way. Once all of the painting was complete, it was time to install the boards. I started with the two 4 inchers that go under the bed side channel. This board on each side also has the back two special frame mounting holes. Providing I measured everything correctly, the bolts should just slide right into place right? They did! I went ahead and fastened and tightened everything down since those boards are not going to move at all due to the many bolt holes in the channel. The Frame Mount Kits you get from our vendors use Hardwood Blocks to keep the Bedwood off the frame. Two of them go on the second (to the back) cross rail.


The kit also comes with rubber padding. I did not want to fight the issue of getting everything aligned, so I used Gasket Sealer to hold them to the Blocks. The two with the offset holes are the ones that go on that second to the back cross rail. I noticed on this particular truck those two blocks were too tall by about 1/2". There is no way that was right, so I had to cut them down to level everything. You can see pretty easily when things are not straight.
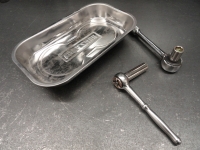
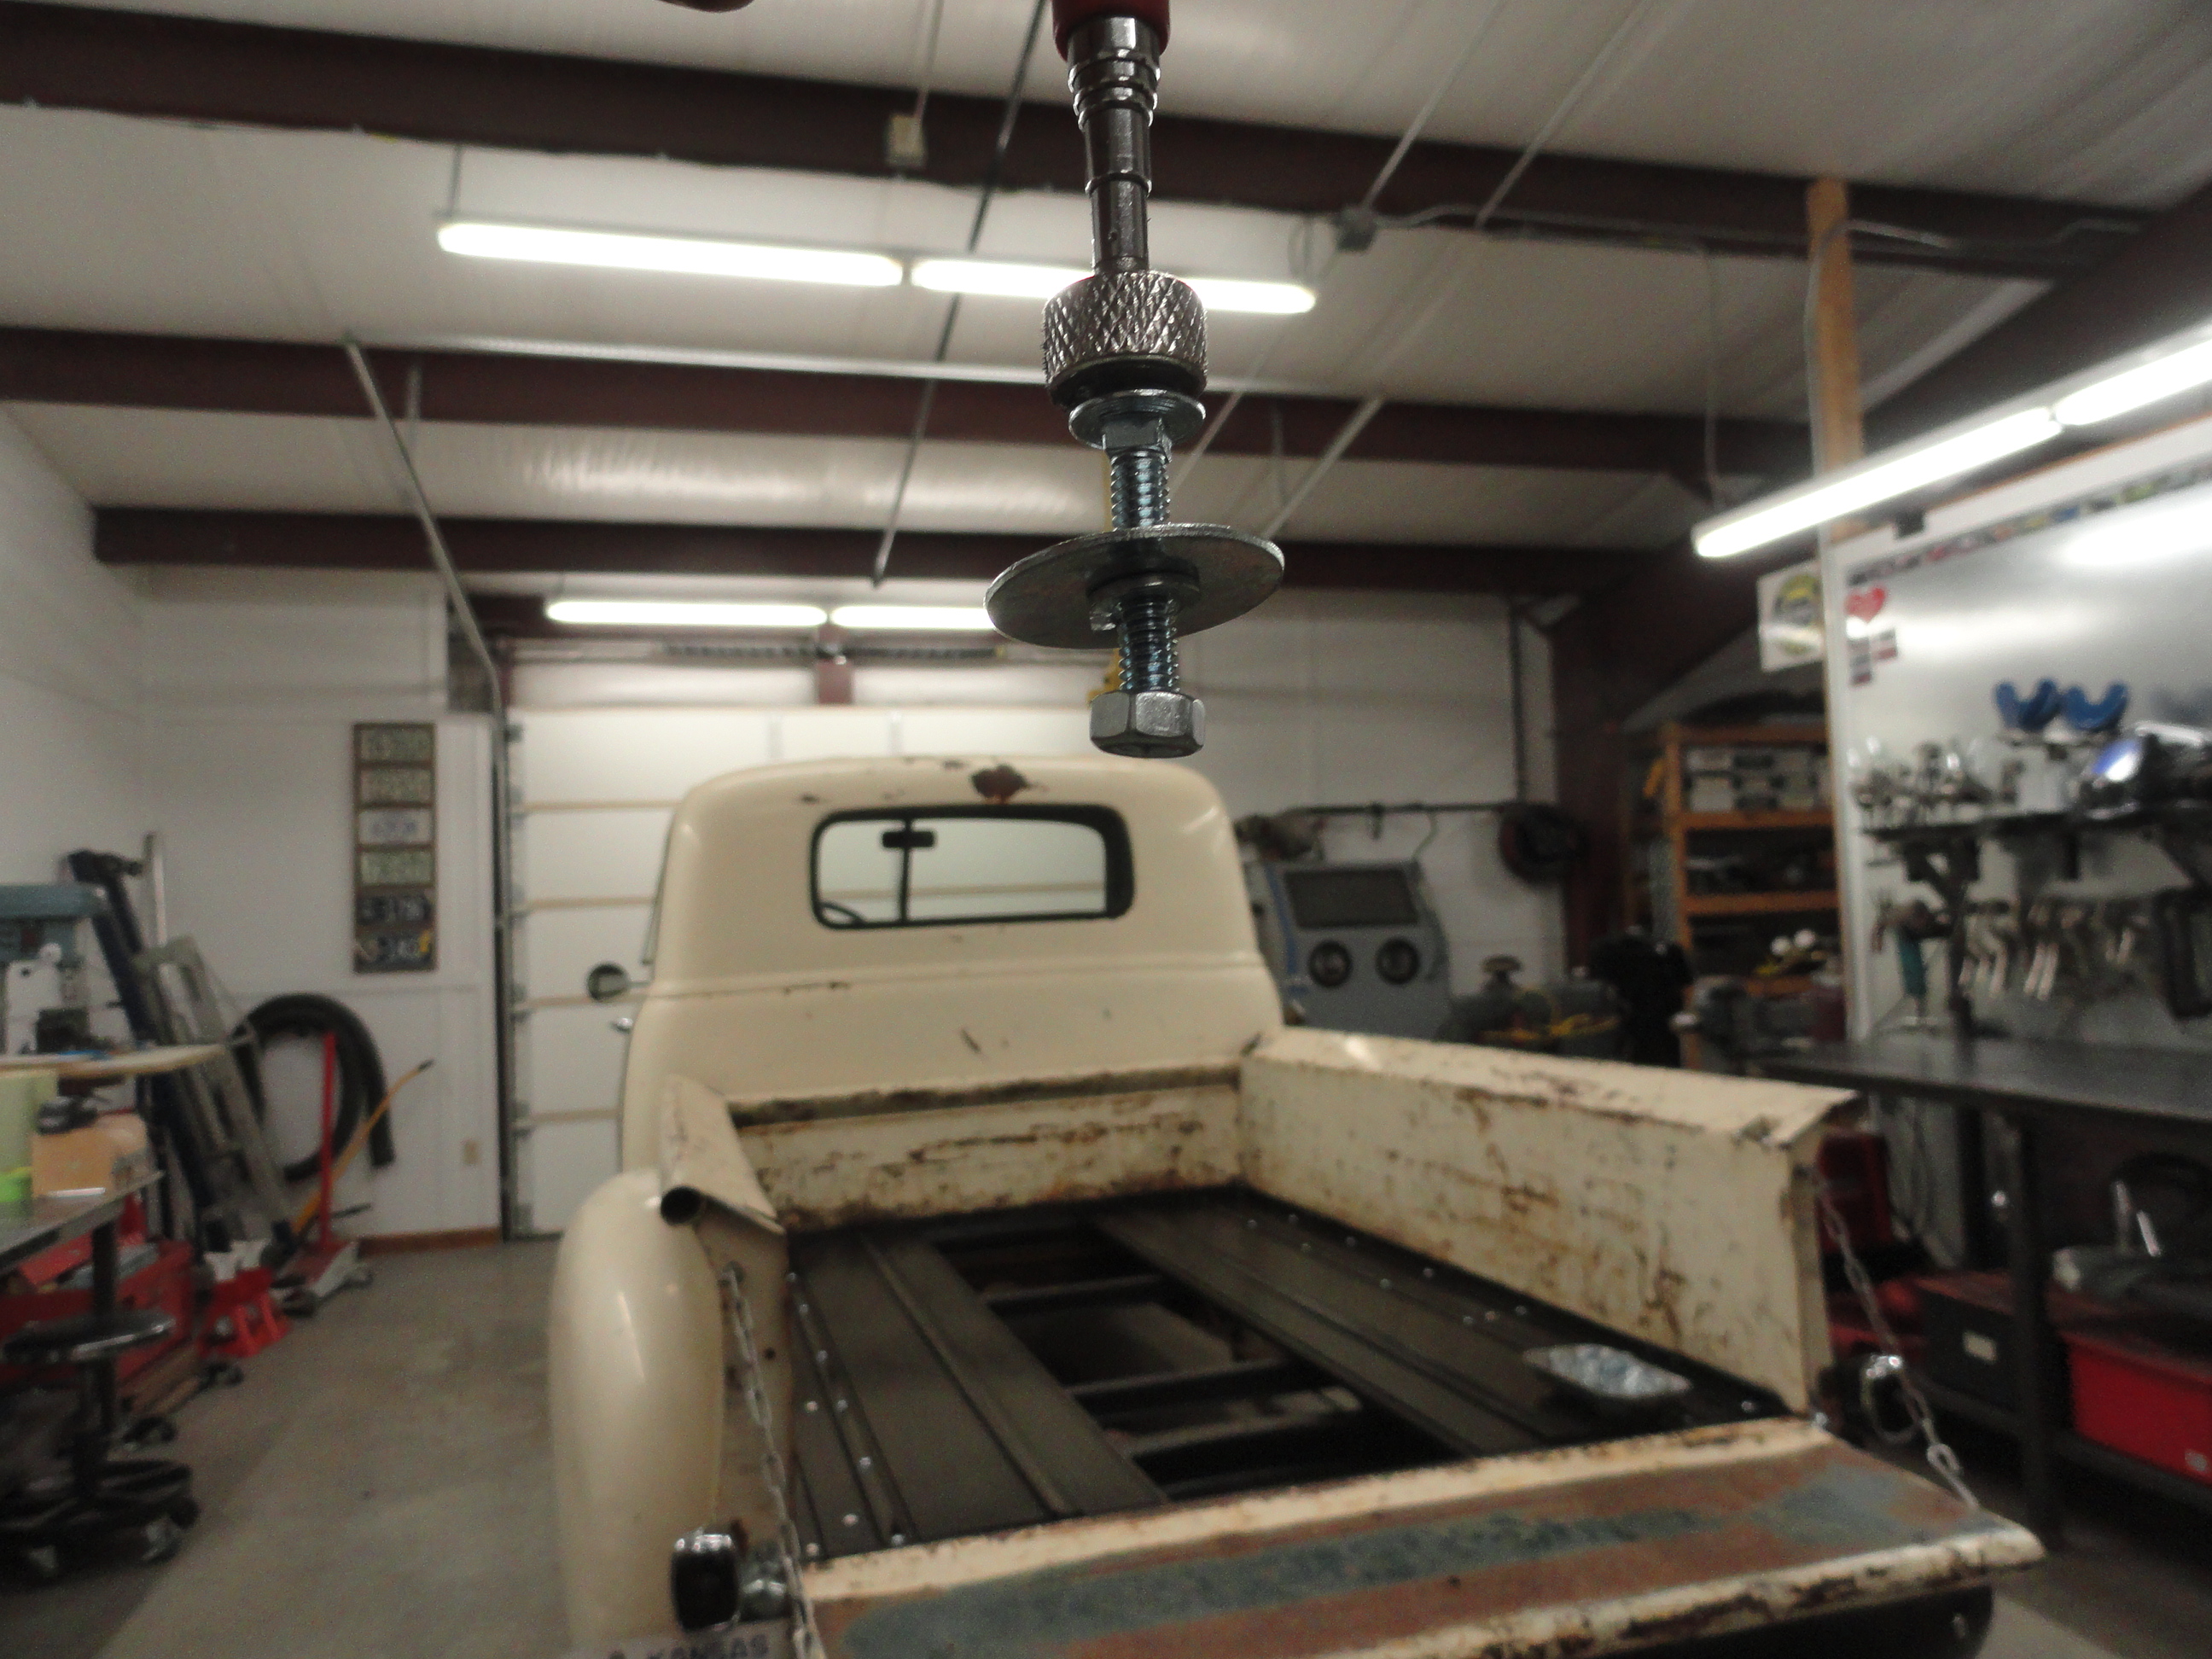
TIP: Working upside down under the truck isn't something I get too excited about, so make life easier and get one of those stainless and magnetic bowls to put your nuts and bolts in. Get the rectangular one with the two round magnets on them. The pic on the right is why. If you put the nut and bolt tray over the top of the bolts, you can easily push each washer on the downward protruding bolt without them falling off before you can get a nut on them. That really saved the day because some of those bolts are very hard to get to, and the last thing you need is to be fumbling around trying to get washers on them.
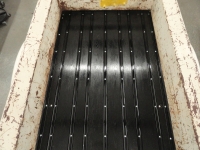
The next board is the 7-1/4" ones with the front frame mounting hole. The bed of this truck is not straight and there is not much you can do with the first two boards to change that because they mount to the frame. Everything came together well except I had a few gaps that were wider than I would have liked. Each board's measurements were precise so I am not sure why. If this is a common problem, the next time I will make sure to make the Router grooves a little shallower. The right is a pic of the stainless bolt tray I was referring to, as well as another tip that came in handy.. Stuff a piece of masking tape inside the 7/16" socket to keep the nut a little proud of the socket so it attaches a little easier.

Everything came together quite nicely in the end. If this was a nicer truck that was not going to be used as hard as I plan on using it, I would have used steel wool between coats, used stainless strips and stainless hardware, and also painted the bed sides prior to doing this. This will be a daily driver and crusty old engines and truck parts will be hauled in it regularly, so keeping it serviceable is really the main goal here.
This 1953 truck is now ready for prime time and the LAST thing I plan on doing of any major consequence is putting 3:55 Rear End Gears in the Torque Tube. This, by all who have done it, is by far the best upgrade you can do to your otherwise stock truck. The plan is to create a How-To article on how to do this ON THE TRUCK without having to remove anything from the Transmission end of the Torque Tube. This is an alternative to another method that is out there that is much more thorough. Stay Tuned and Seeya Next Week!
The 1953 was pretty beat up when I got it. Someone had removed the rear running board brackets and welded the ends of the running boards to the fender on each side! I will address this problem after I find a pair of rear running board brackets, but this means I have to do all of the work on the bedwood on the truck. Removing the bed and doing it on sawhorses would be preferred because there are some bolts that are VERY hard to get to with the truck's frame in the way. Once all of the painting was complete, it was time to install the boards. I started with the two 4 inchers that go under the bed side channel. This board on each side also has the back two special frame mounting holes. Providing I measured everything correctly, the bolts should just slide right into place right? They did! I went ahead and fastened and tightened everything down since those boards are not going to move at all due to the many bolt holes in the channel. The Frame Mount Kits you get from our vendors use Hardwood Blocks to keep the Bedwood off the frame. Two of them go on the second (to the back) cross rail.
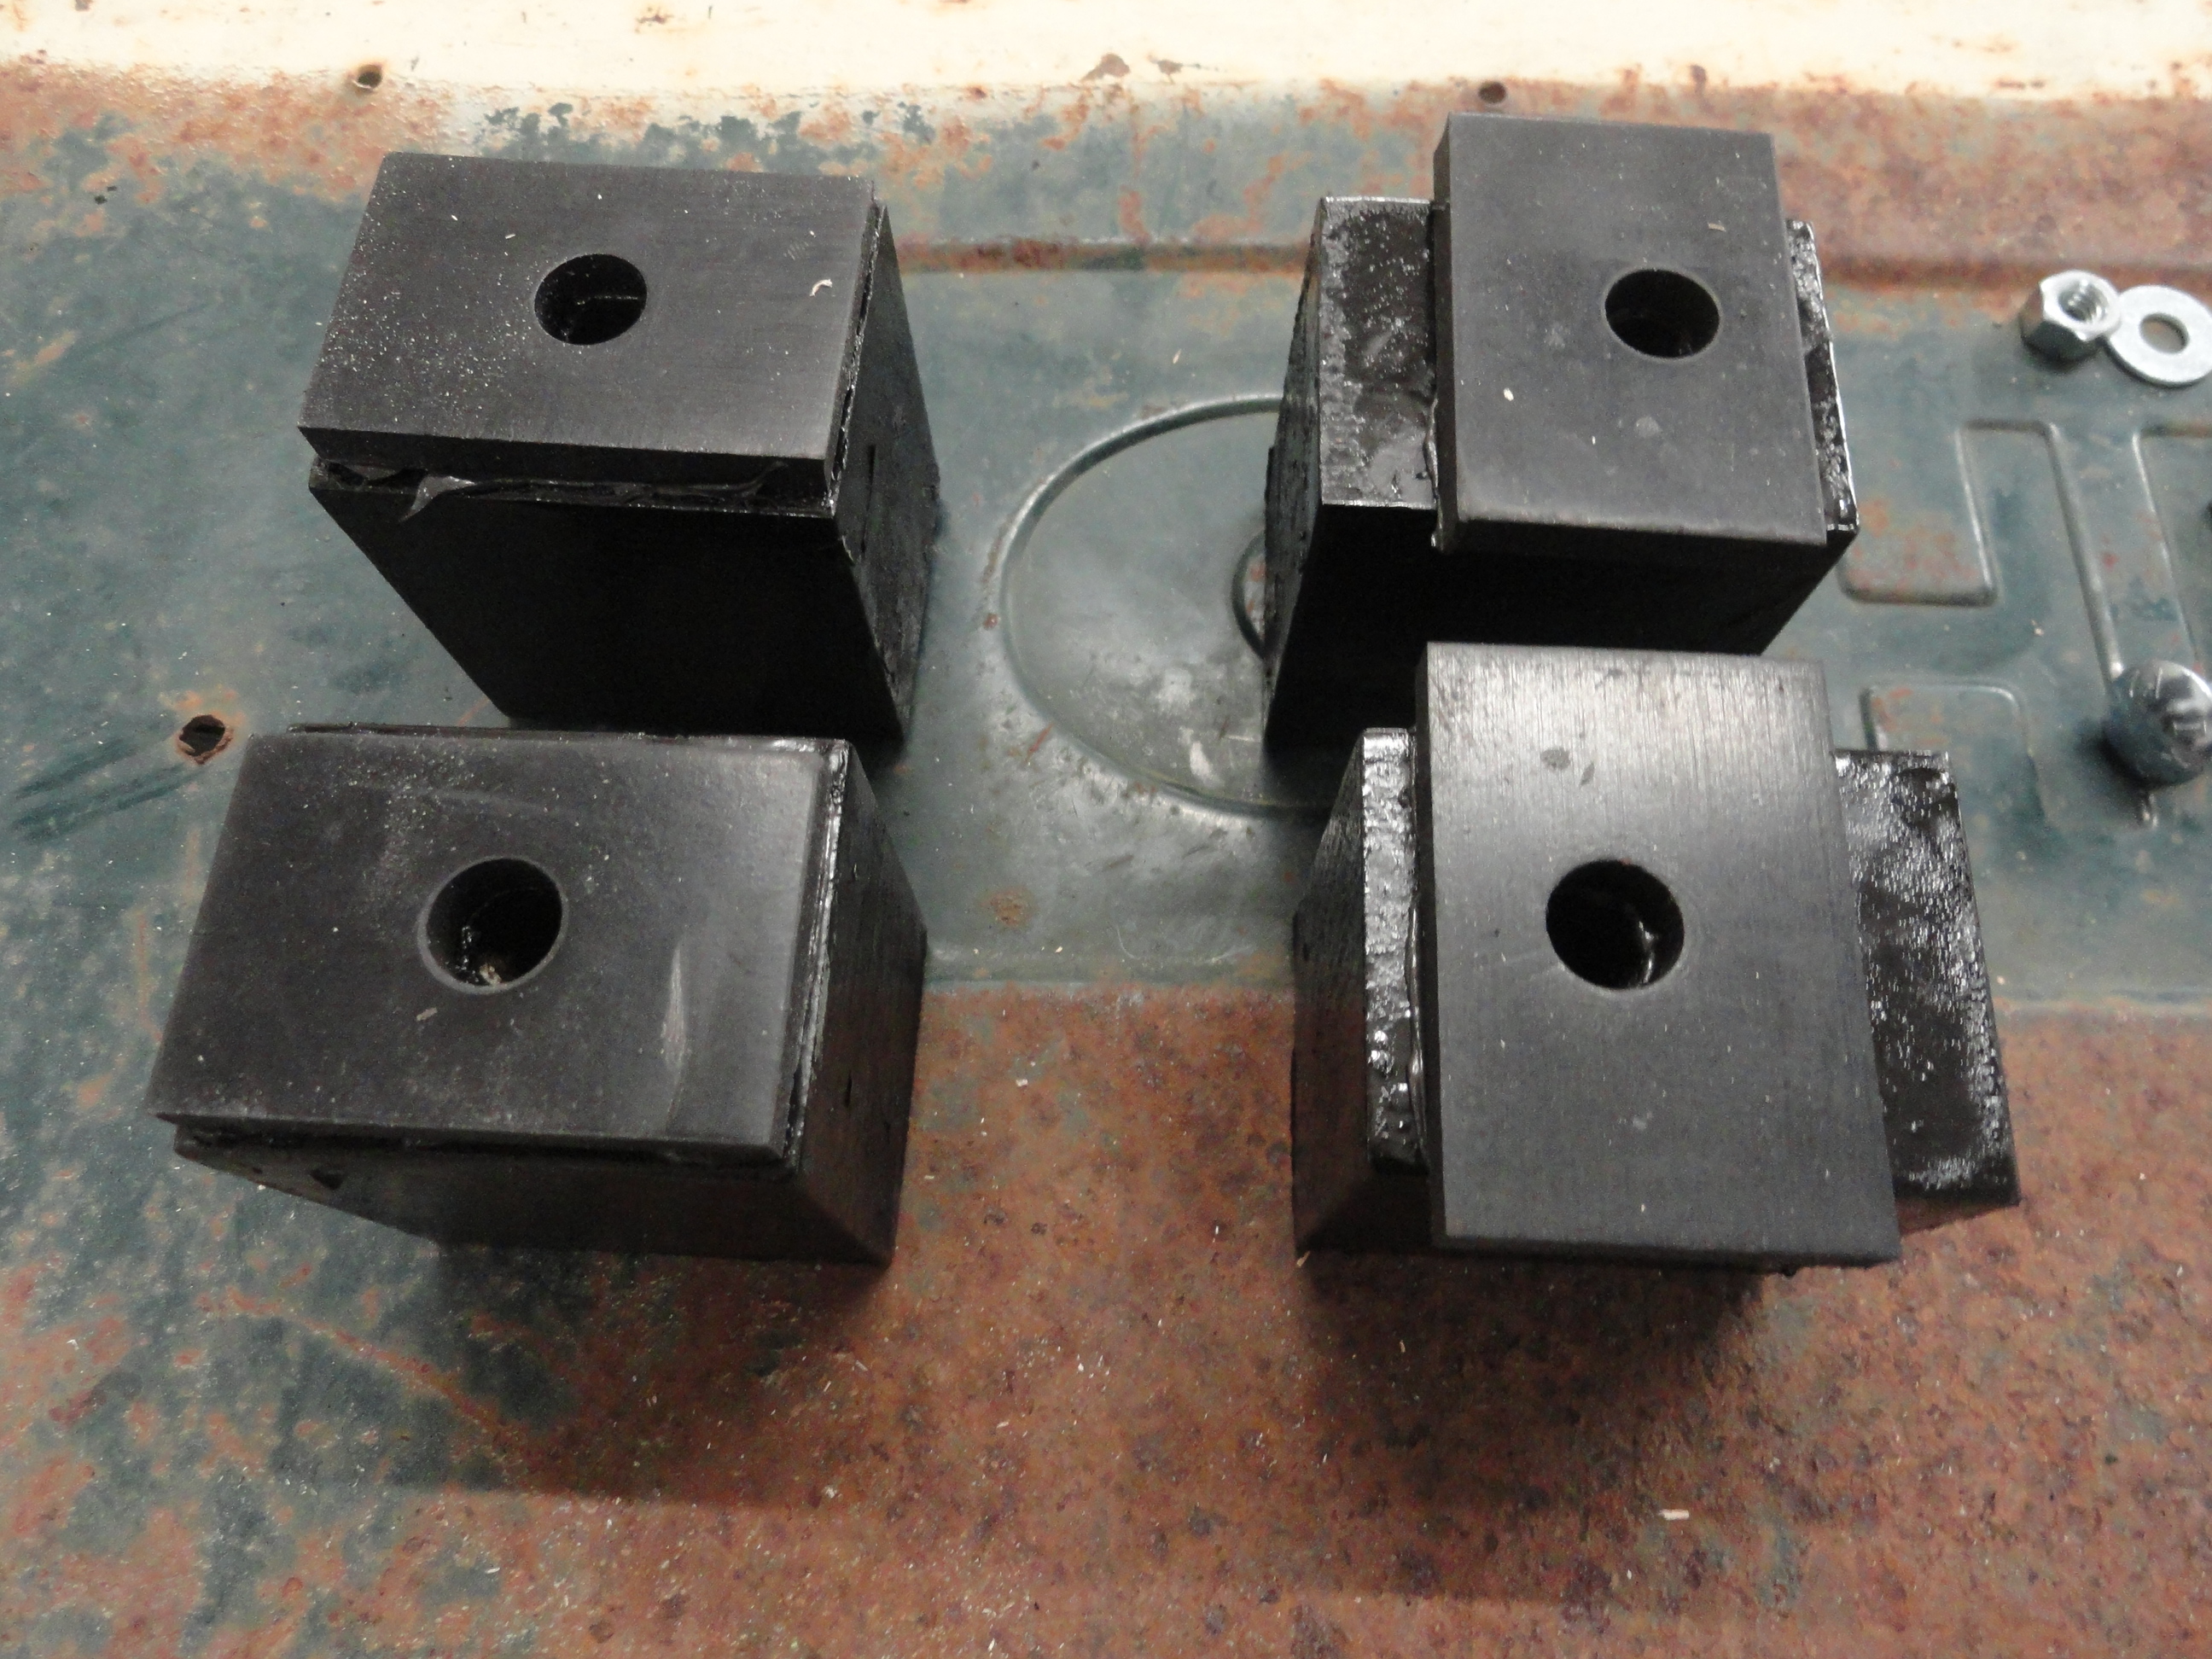
The kit also comes with rubber padding. I did not want to fight the issue of getting everything aligned, so I used Gasket Sealer to hold them to the Blocks. The two with the offset holes are the ones that go on that second to the back cross rail. I noticed on this particular truck those two blocks were too tall by about 1/2". There is no way that was right, so I had to cut them down to level everything. You can see pretty easily when things are not straight.
TIP: Working upside down under the truck isn't something I get too excited about, so make life easier and get one of those stainless and magnetic bowls to put your nuts and bolts in. Get the rectangular one with the two round magnets on them. The pic on the right is why. If you put the nut and bolt tray over the top of the bolts, you can easily push each washer on the downward protruding bolt without them falling off before you can get a nut on them. That really saved the day because some of those bolts are very hard to get to, and the last thing you need is to be fumbling around trying to get washers on them.
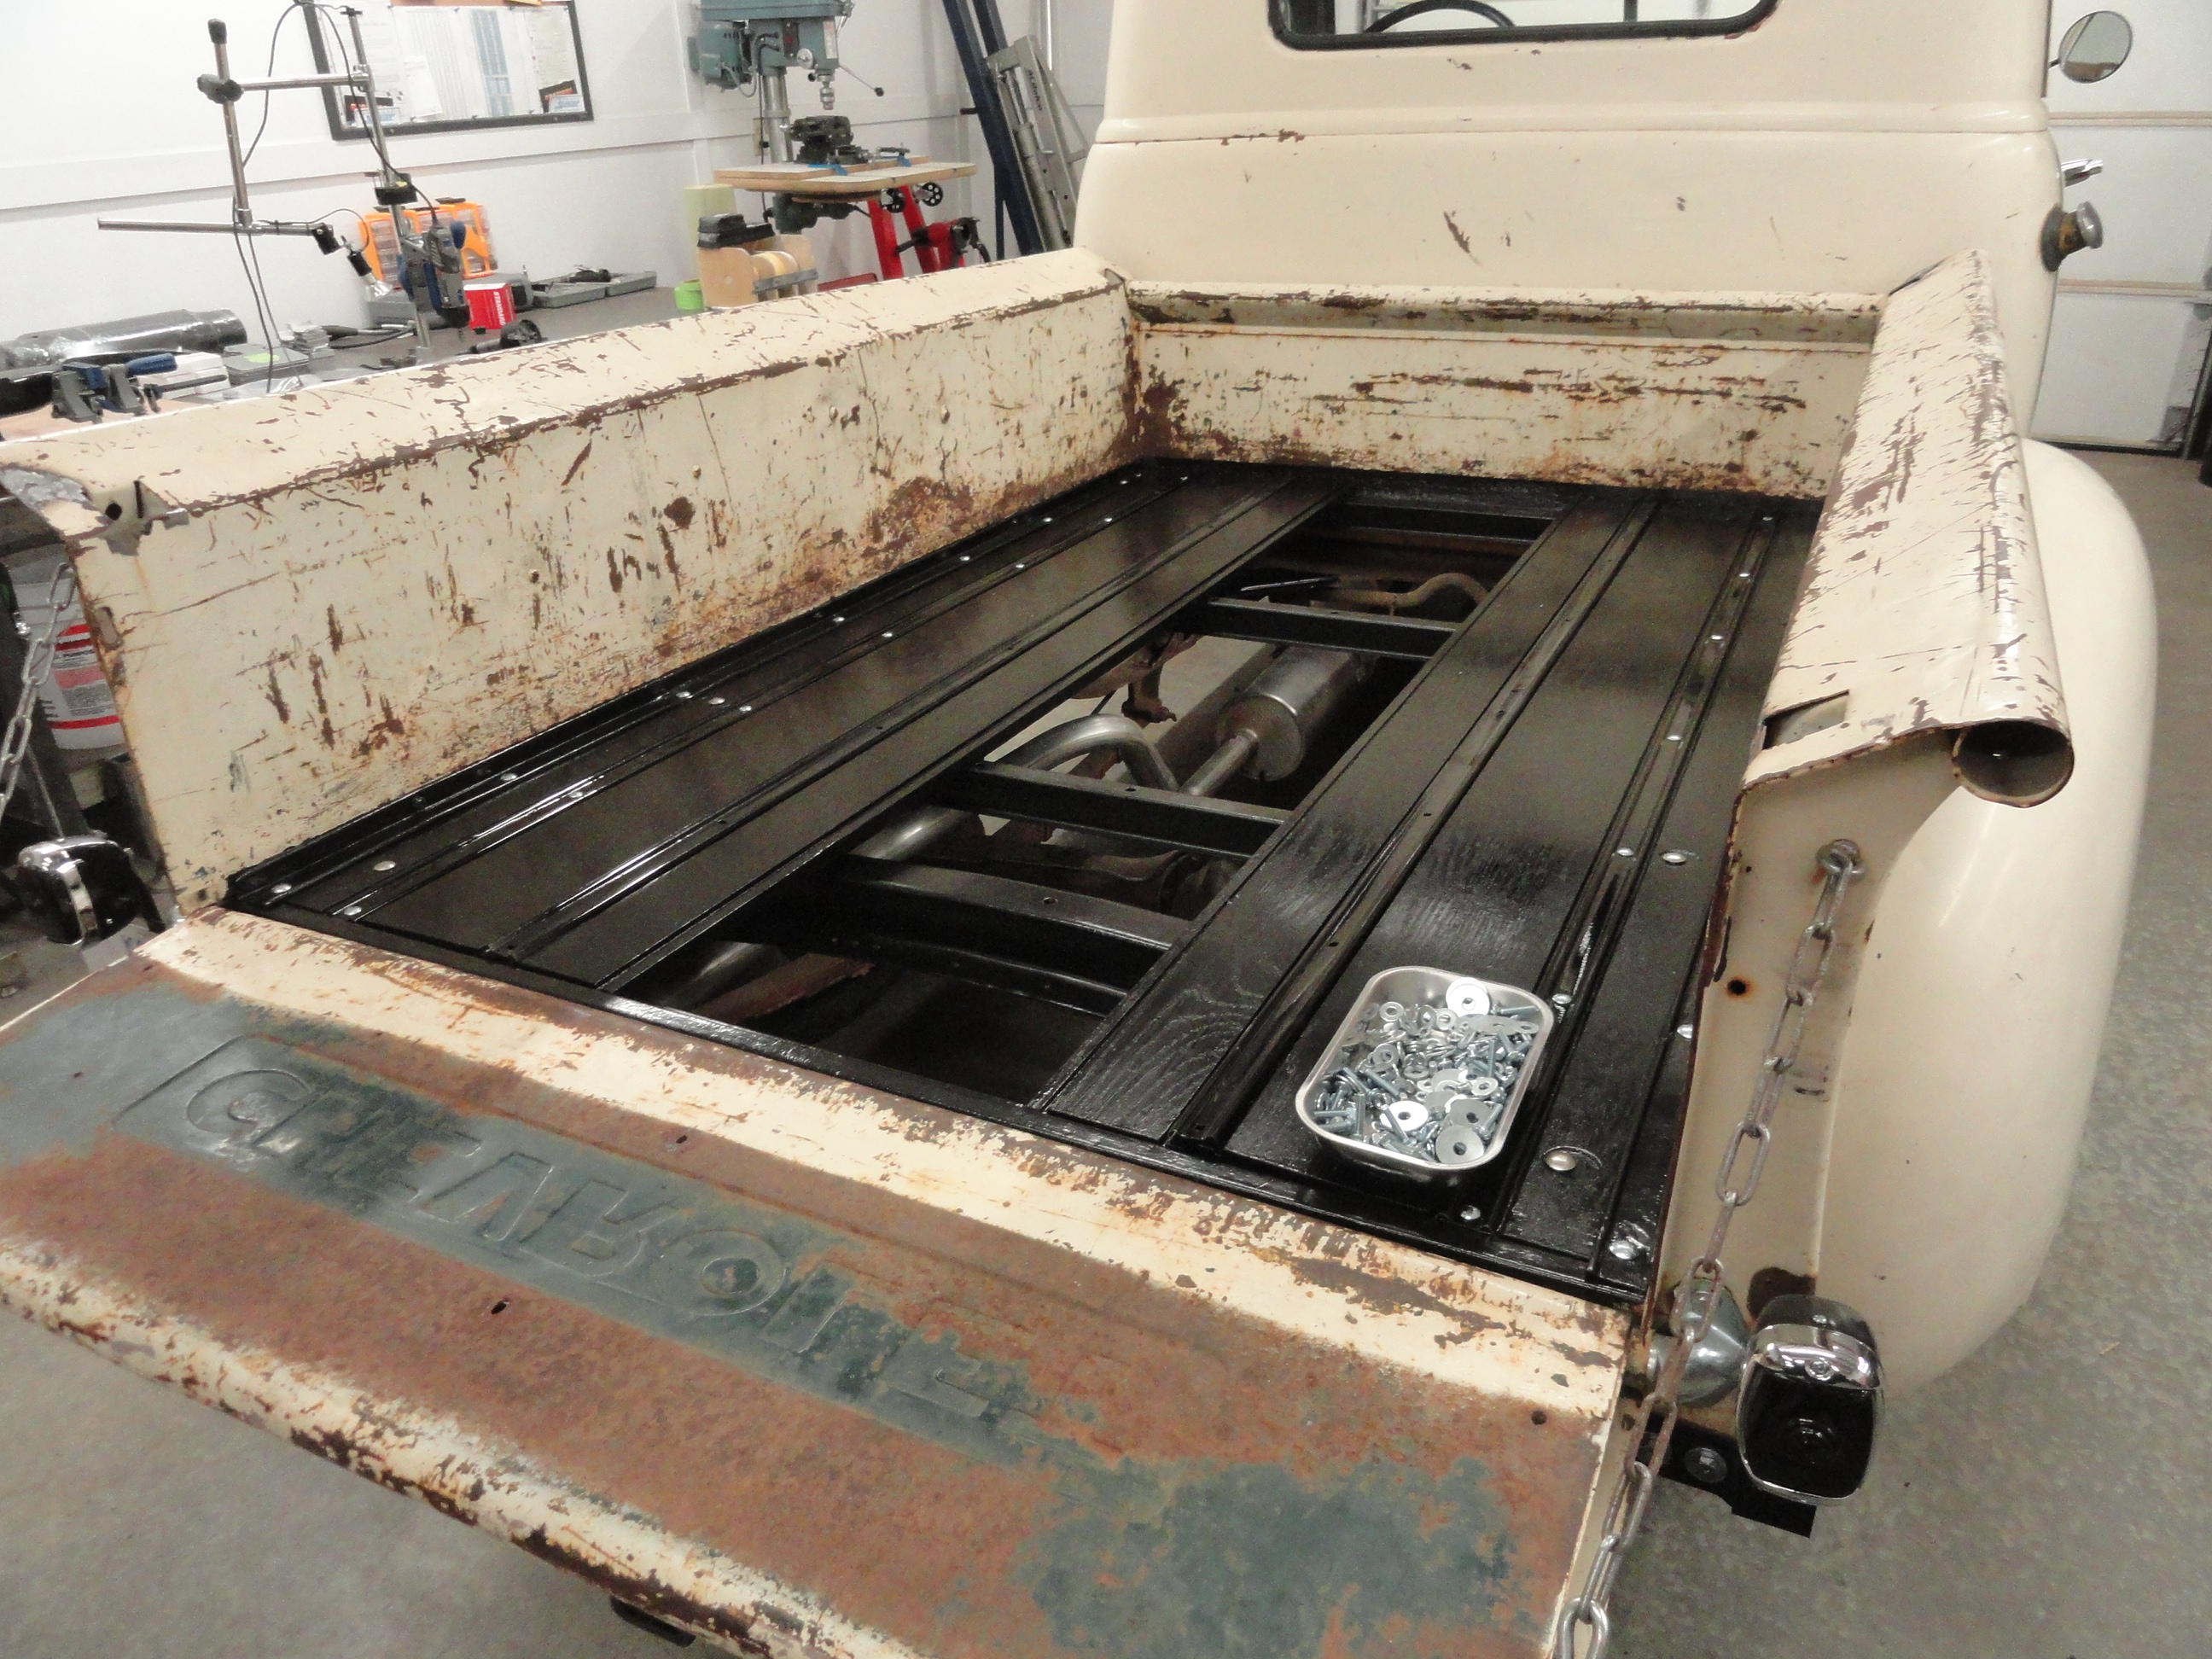
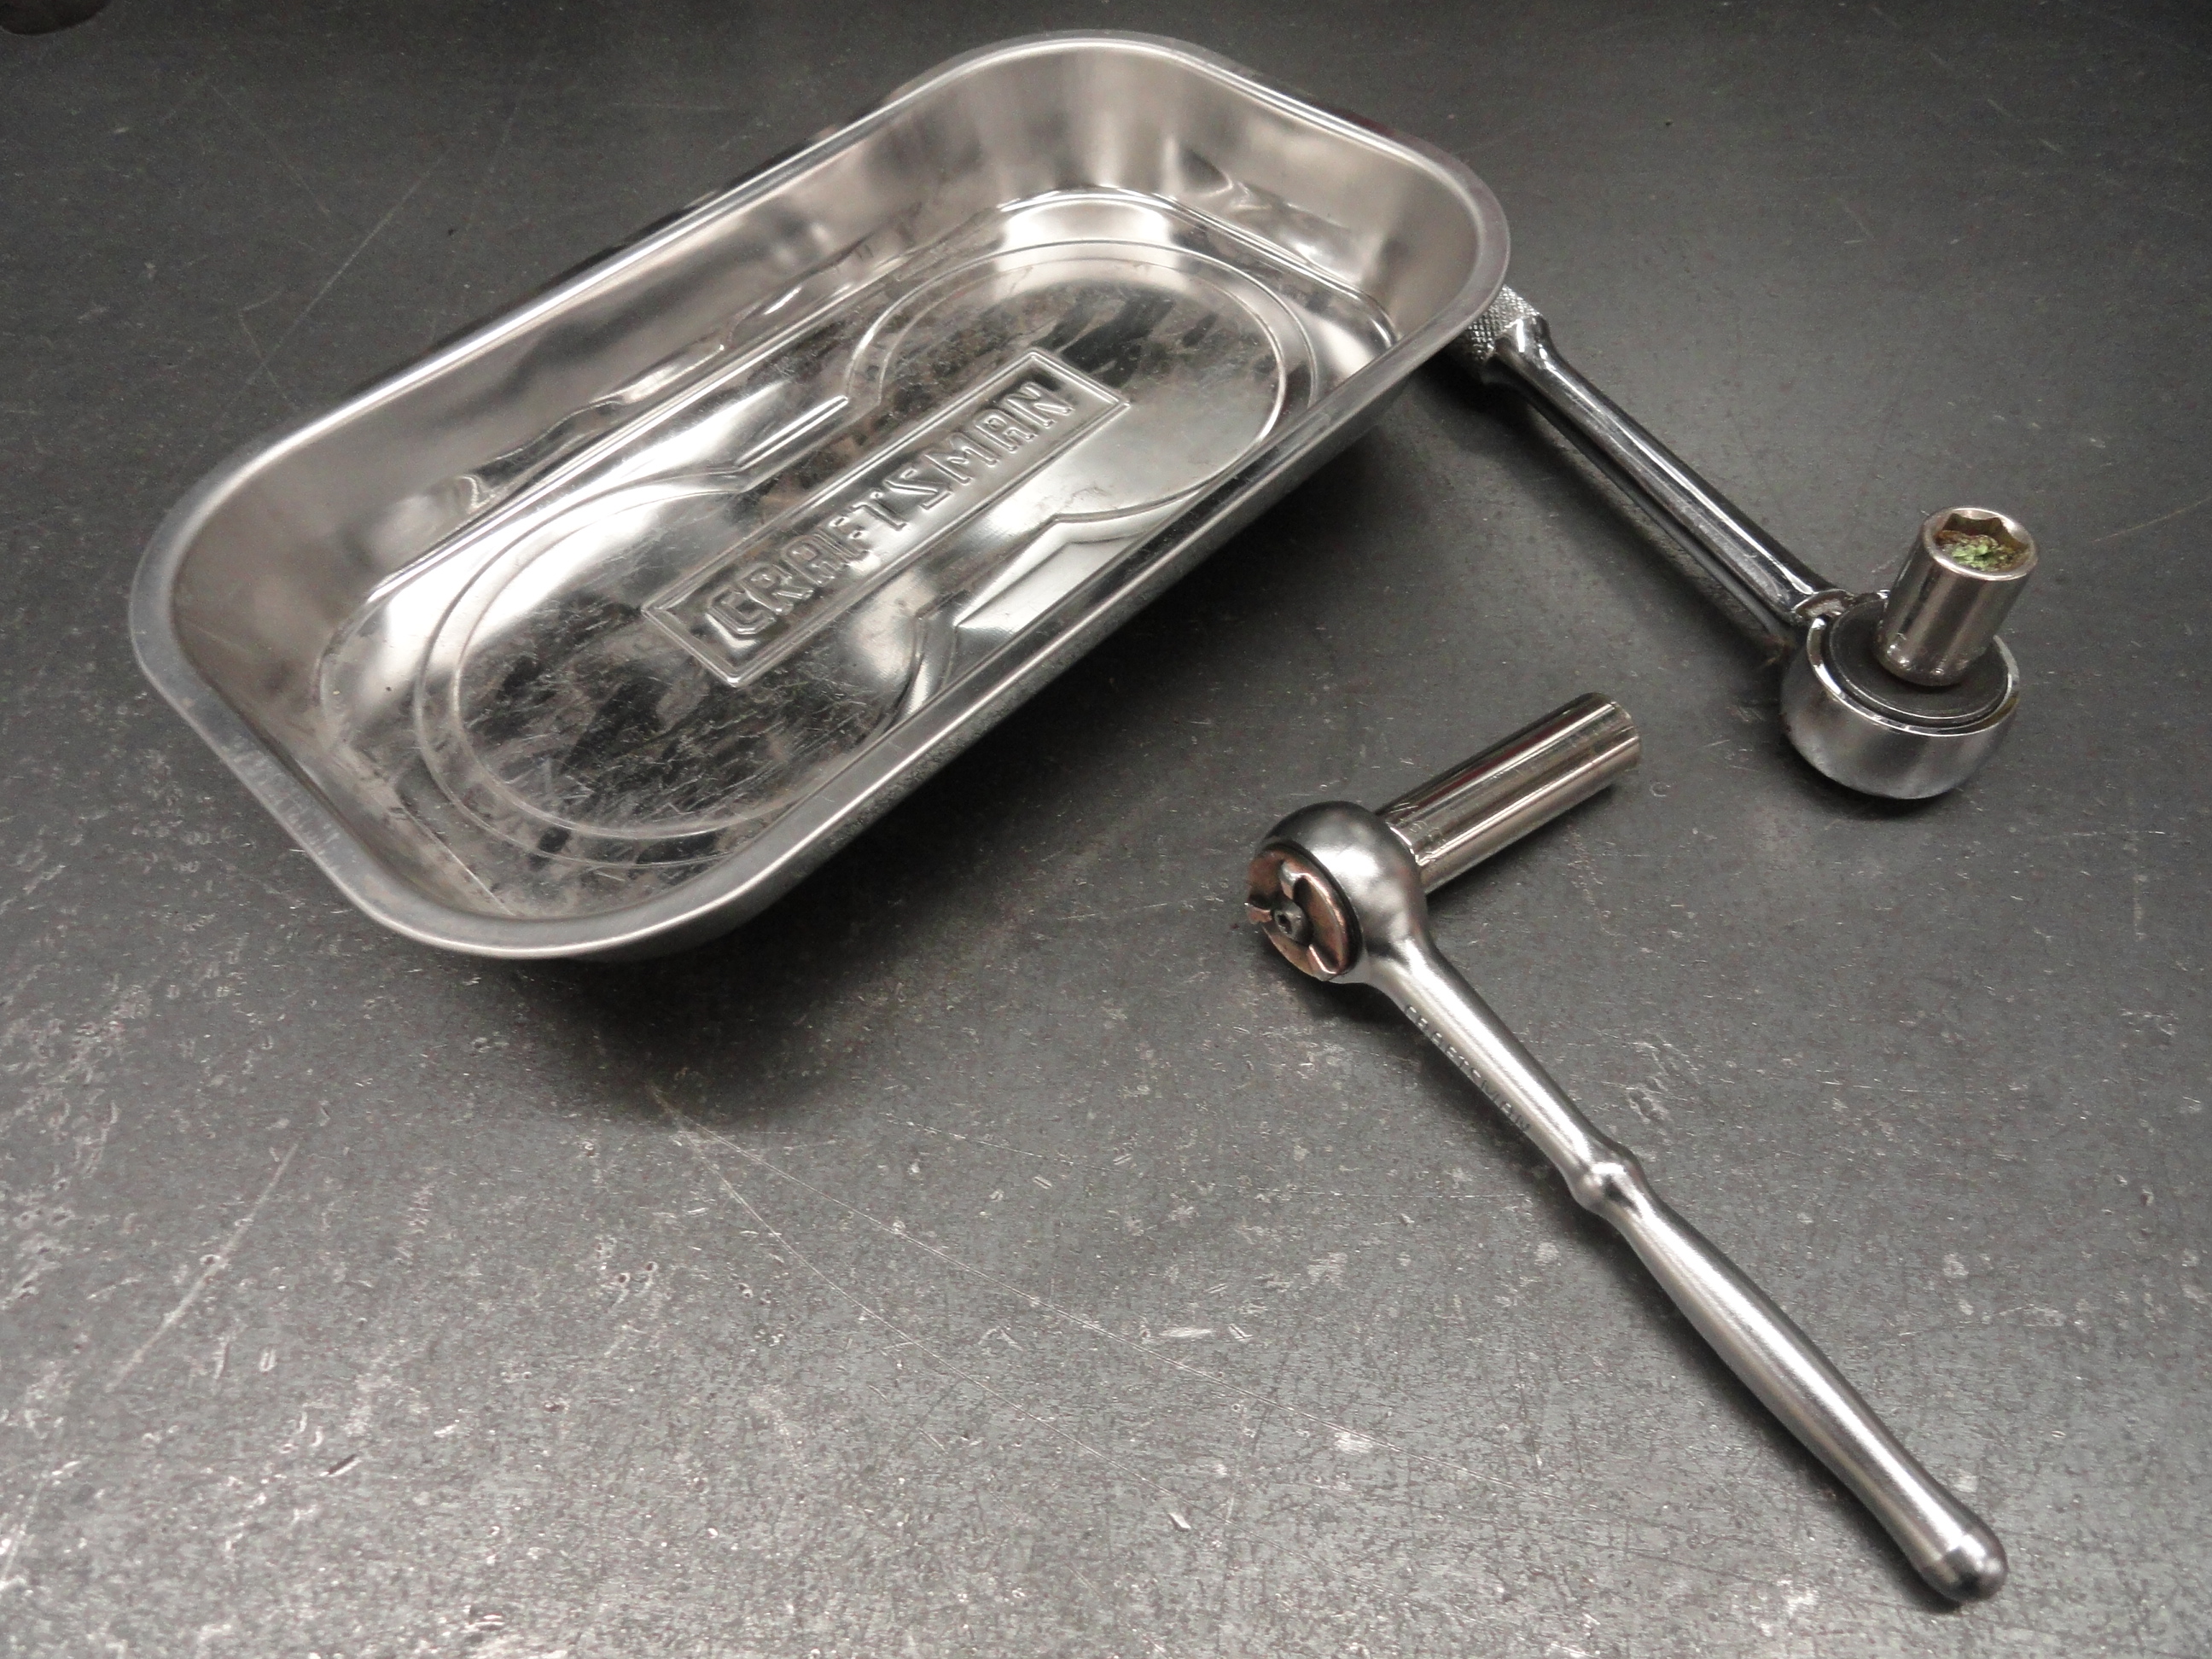
The next board is the 7-1/4" ones with the front frame mounting hole. The bed of this truck is not straight and there is not much you can do with the first two boards to change that because they mount to the frame. Everything came together well except I had a few gaps that were wider than I would have liked. Each board's measurements were precise so I am not sure why. If this is a common problem, the next time I will make sure to make the Router grooves a little shallower. The right is a pic of the stainless bolt tray I was referring to, as well as another tip that came in handy.. Stuff a piece of masking tape inside the 7/16" socket to keep the nut a little proud of the socket so it attaches a little easier.
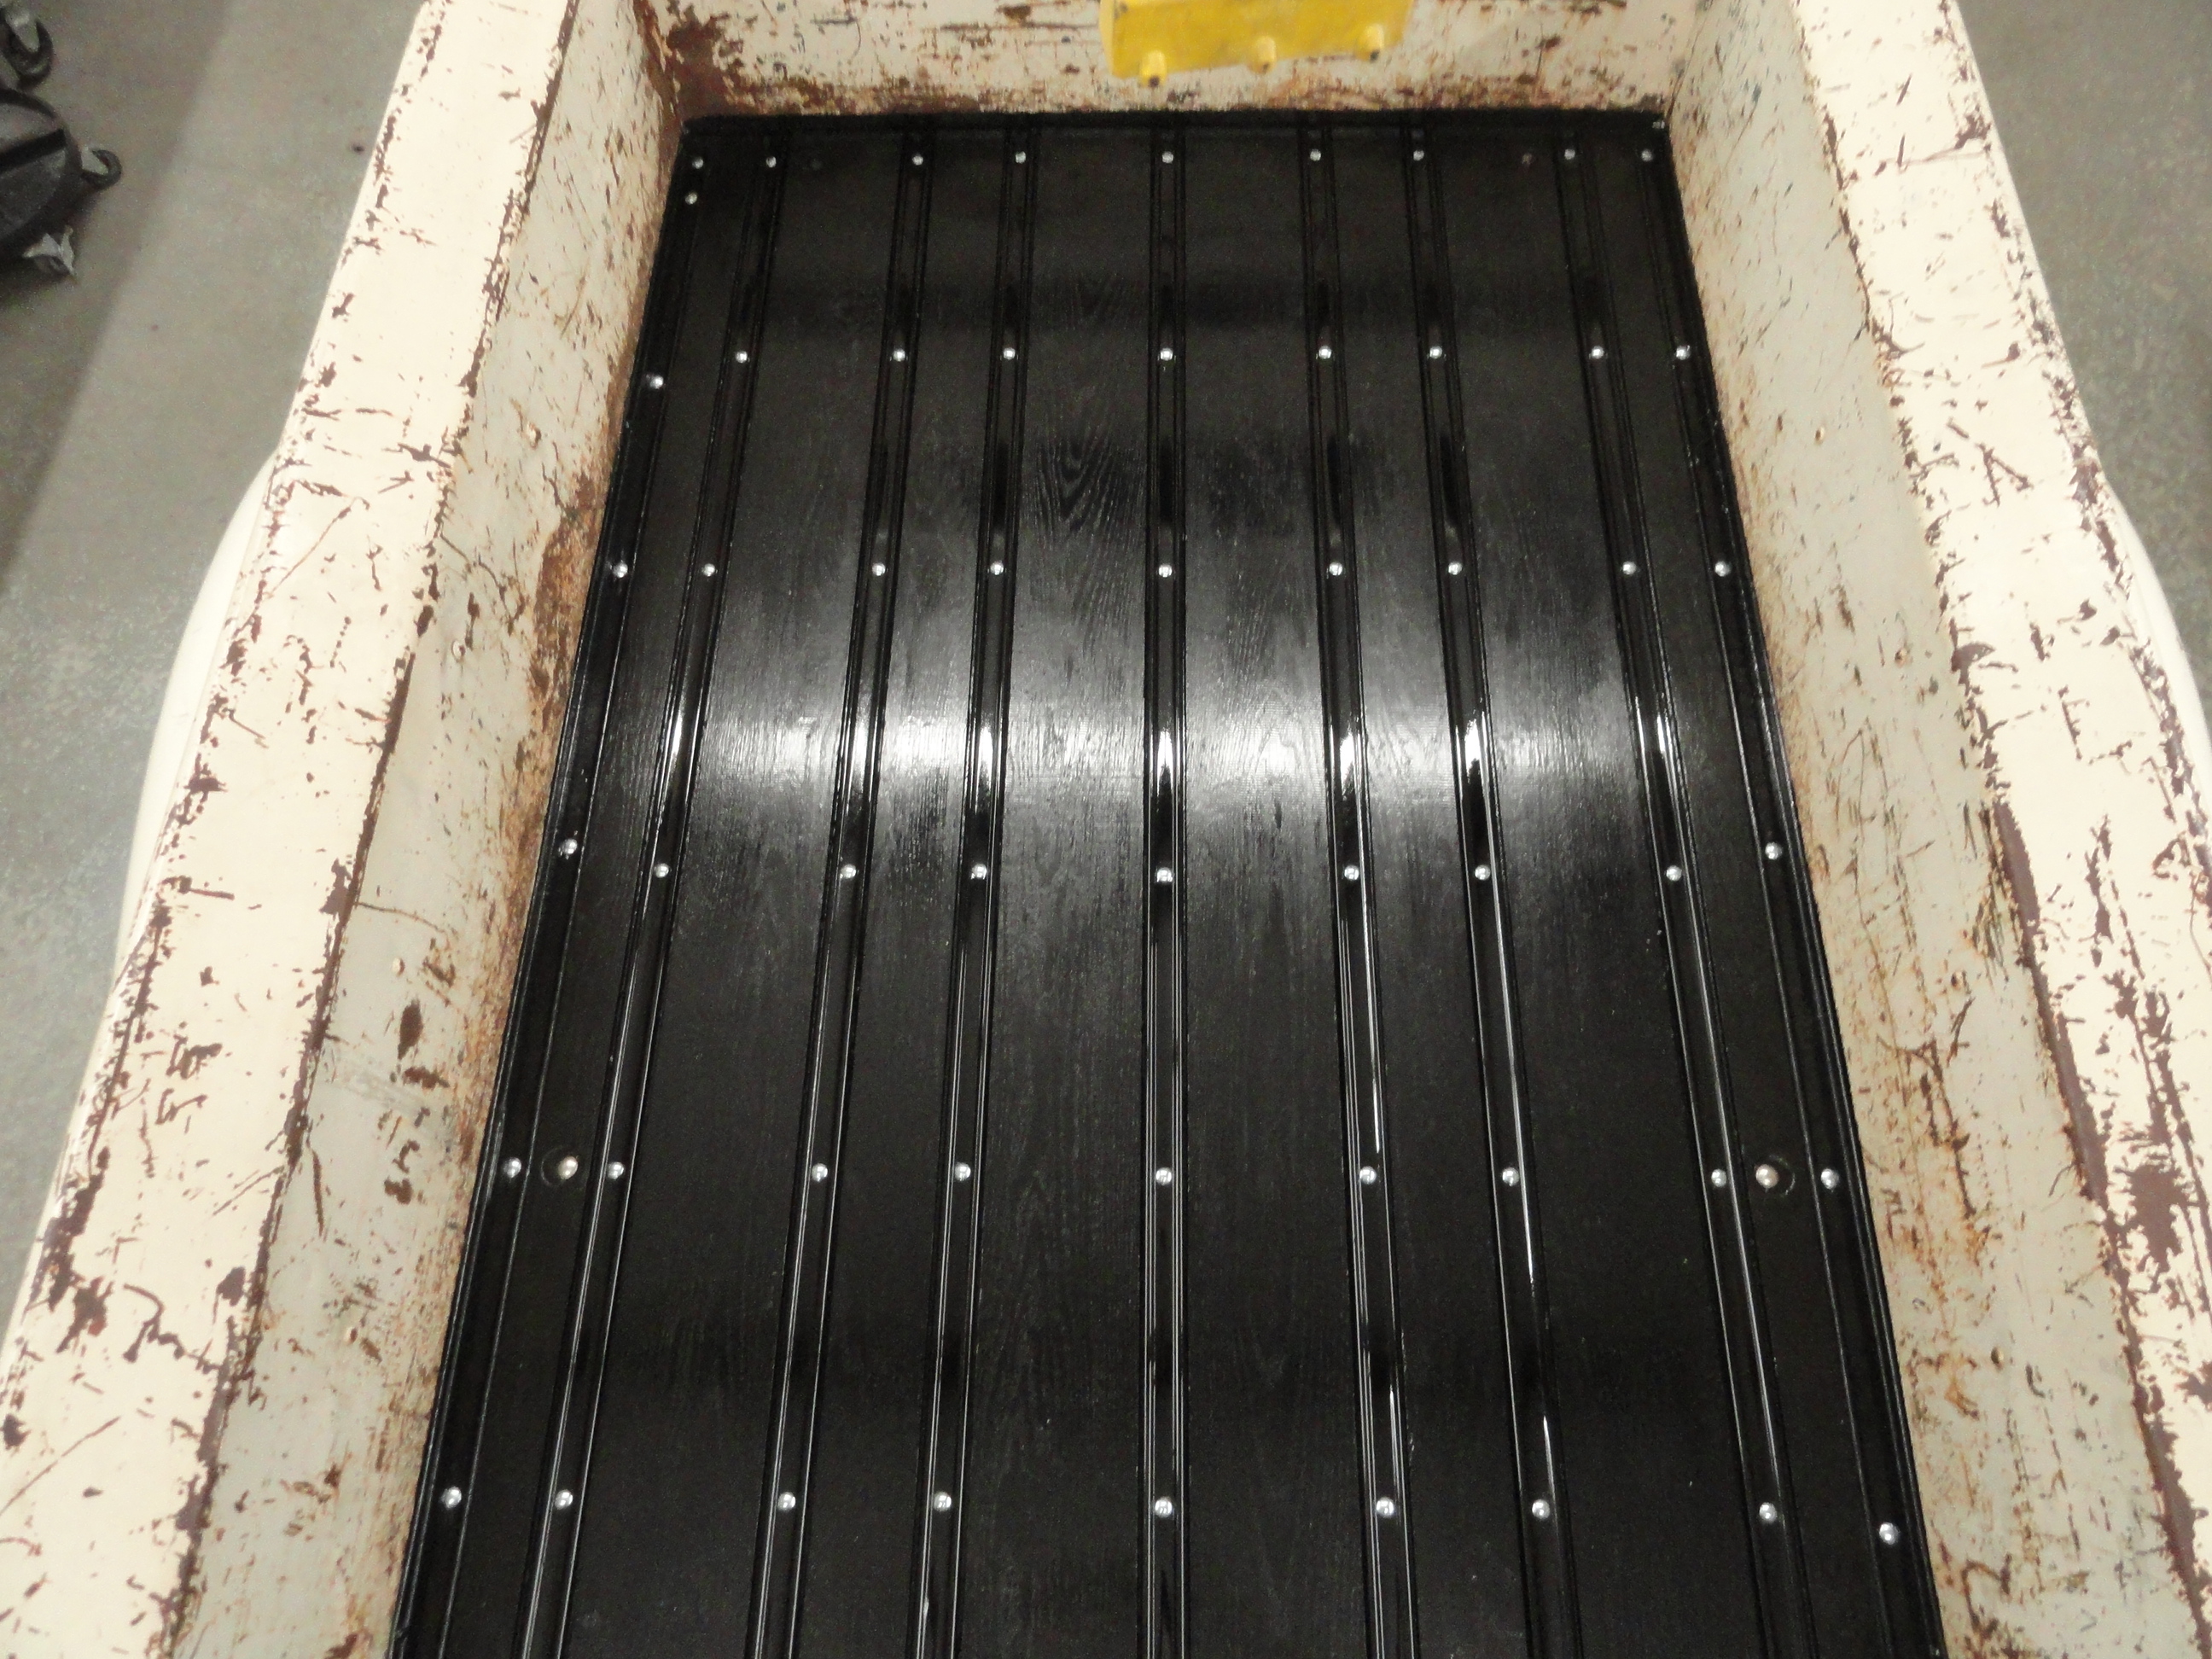
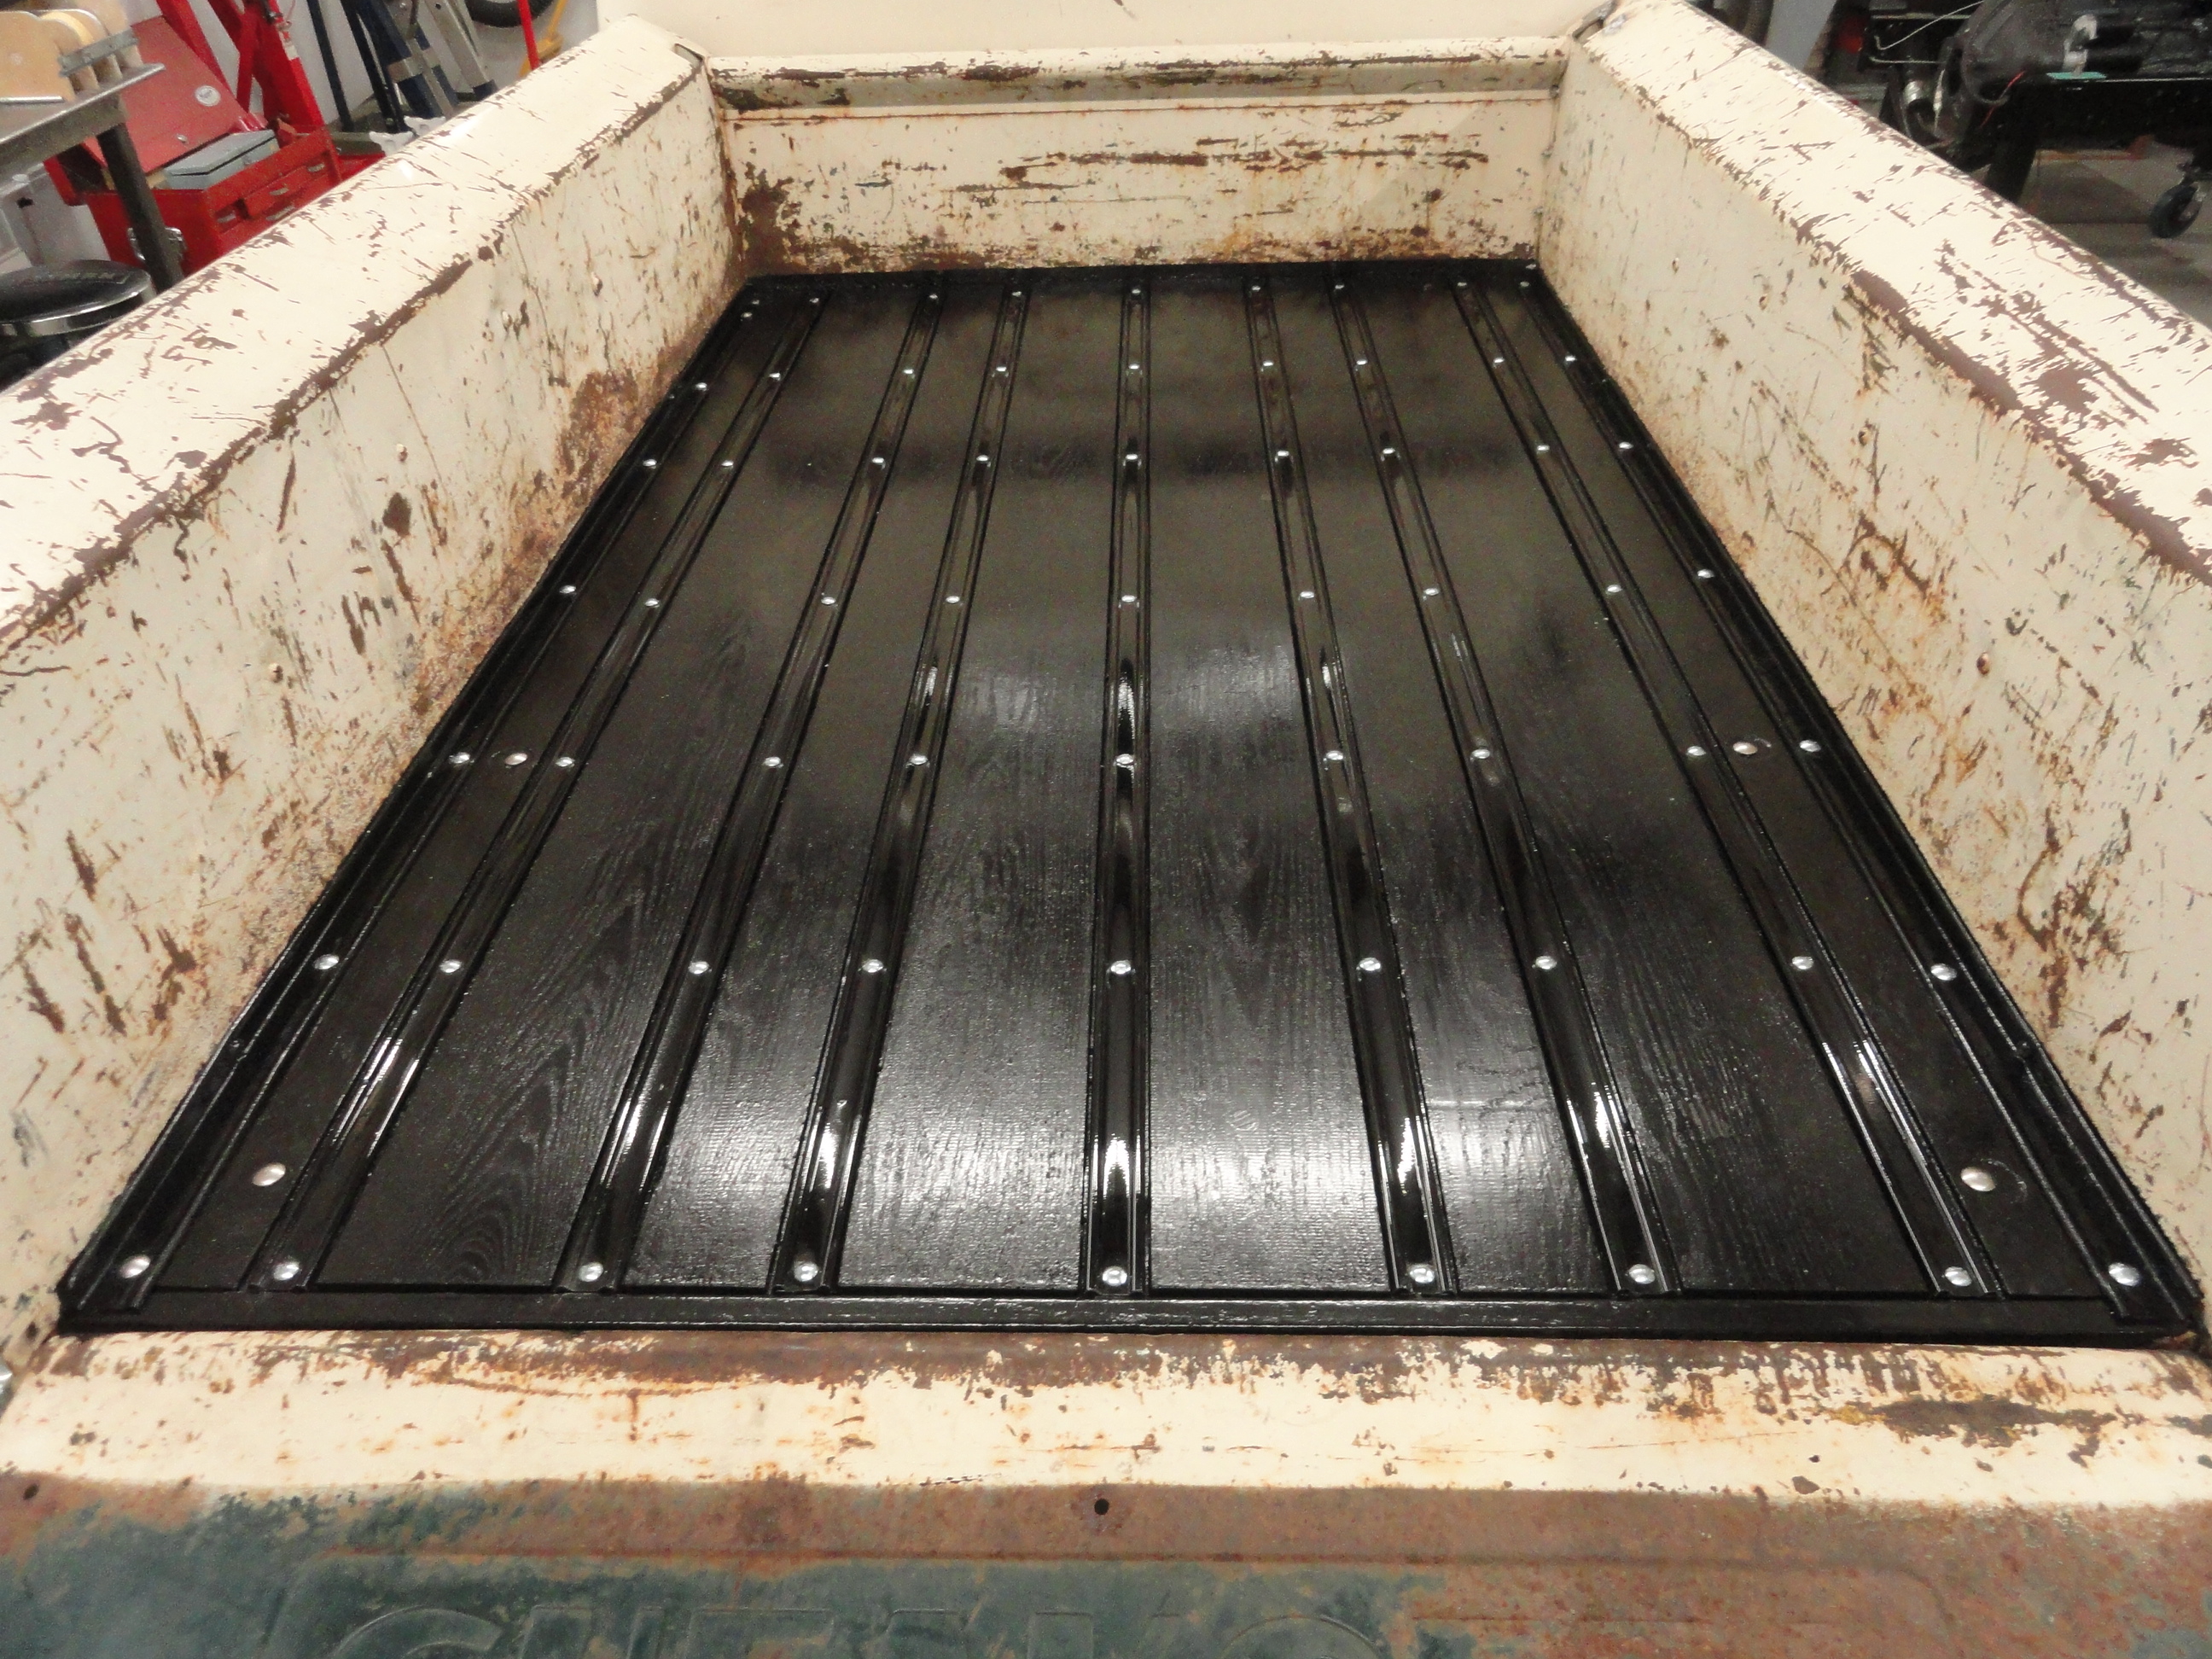
Everything came together quite nicely in the end. If this was a nicer truck that was not going to be used as hard as I plan on using it, I would have used steel wool between coats, used stainless strips and stainless hardware, and also painted the bed sides prior to doing this. This will be a daily driver and crusty old engines and truck parts will be hauled in it regularly, so keeping it serviceable is really the main goal here.
This 1953 truck is now ready for prime time and the LAST thing I plan on doing of any major consequence is putting 3:55 Rear End Gears in the Torque Tube. This, by all who have done it, is by far the best upgrade you can do to your otherwise stock truck. The plan is to create a How-To article on how to do this ON THE TRUCK without having to remove anything from the Transmission end of the Torque Tube. This is an alternative to another method that is out there that is much more thorough. Stay Tuned and Seeya Next Week!