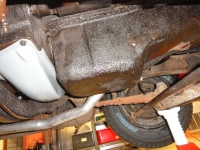
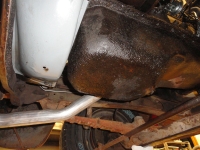
Welcome to the 49th straight Tip of the Week! This week we will discuss how to replace the Rear Main Seal and proper Shimming of a 1962 235 Engine while the engine is in the truck. As you can tell by the pictures, this old 1953 3100 has a leaky engine. Another symptom was ZERO Oil Pressure at Idle and 24 PSI at speed. This is caused by a few things. Too loose bearing clearances, and a worn seal. Both are about equally responsible for the leakage. It is so bad that I get about a 5 inch puddle of oil on the ground right away after parking it. One of the nice things about NOT being an engine professional, is I can listen to all of them and ascertain for myself what is worthy of mention and what is not. I do not just 'decide', I actually take this advice and try it on a real engine. I then report to you what makes sense and what doesn't.
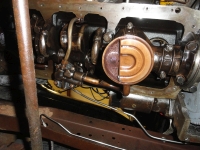 This engine has Insert Bearings and full pressure oiling. The 1954-1962 235 or 261 Engine is the perfect replacement for a 1947-1953 216/235 because of its more modern bearing/oil system. The nice thing about these engines is they have Insert Bearings. So for those of you who do not already know, from the beginning of engines until 1954, to make the crankshaft spin accurately, bearings were created from a Lead derivative called Babbit. This is a process, NOT a product. Bearing Caps have cavities in them where this 'Babbit' is poured into them to give the proper clearance. It is a very imprecise thing, where it is absolutely necessary to add Shim material to get the tolerances to where they are needed. This and the fact that they were low pressure engines were their eventual downfall. It just took too much time and effort to 'clearance' each individual bearing. Add to that the Splash Oiling on these old engines.. which were nicknamed 'Babbit Splashers', and you have good reason to move on to the next generation engine (1954-1962) for your older vehicles.
The problems with the next generation (1954-1962) Chevy 6's were not as obnoxious, however, they did have their problems. Having only 4 crankshaft bearing caps (4 places the crankshaft is secured) and vintage machining capabilities (in the original creation of the parts), the crankshafts ALL have a certain degree of wobble in them. Couple that with close, but not overly close tolerances that machine shops cannot overcome COMPLETELY, and you have a close, but not close enough system to install a 'one size fits all' Insert Bearing system. Of course they come in Undersizes, however, this is only close enough for the Government and those who accept mediocrity as the norm. Having rebuilt many of these engines and using several different machine shops, it becomes apparent there is something wrong with this picture.
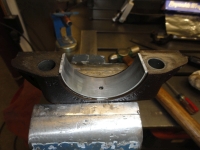
An example is after spending a few thousand dollars in machine shop work, the machine shop gives you the .010 undersize bearing set. This means the machine shop used their very best machining techniques to turn the Crankshaft down on all 4 main Journals down to .010 less meat on them than original. They did their very best and then sent with the newly machined engine the proper .010 undersize Clevite (good quality) bearings.
Herein lies the problem... When installing this set of bearings, you are allowed .001 to .003 clearance between the crankshaft and the new bearings. As a general rule, you can expect the machine shop to do competent work and give you about .003 to .005 clearance. Too tight is not good at all, so too loose by a few thousandths is better. Most engine rebuilders feel this is just another day and let it go out the door at .003 to .005. What are the ramifications to the end vehicle owner? With .003 clearance, you can expect your oil pressure gauge to move a few PSI between idle and high RPM. With .005 clearance, you can expect a few more PSI movement on the oil pressure gauge. Once an engine has been running awhile, the clearances can be .008 or more. When that happens, you can have ZERO oil pressure at Idle, and maybe 25 PSI at higher RPM. A decent machinist will check and make sure there is .002 on every main bearing in the engine. This ensures you have the longest possible longevity of that rebuild.
But how is this done on this vintage of engine (1954-1962)? SHIMS is how! This era is one generation removed from Shims being a necessity, so it stands to reason a Shim here and there would really tighten things up. Those of you who do everything half fast probably quit reading hours ago, but I am about to share with you a trick that will give your engine THE longest life possible at the rebuild stage. Take it or leave it, but this works and is used by many very qualified engine specialists for generations. Let's talk about how the engine bearings actually wear...
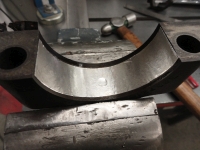
On the Firing stroke, the explosion slams the piston downward HARD, then it is yanked back upwards, a 180 degree turn in a matter of tenths of a second. This puts far more pressure on the bottom half of the main bearings and most of the bearing wear over time is found on the bottom bearing caps. This is very convenient for the guys working on the engine IN the vehicle because generally the only main bearing wear is in the removable caps! The part that is inaccessible is getting the least amount of wear.
So a .010 undersized bearing when plasti-gauged with Green Plastigauge (.001 to .003) showing NO smashing can be as far off as .008 but only on the bottom half! This causes very erratic oil pressure, rear main seal leaks like crazy because bearing clearances adversely affect seal effectiveness. So can we say SHIMS boys and girls? Yes we can. But, nobody sells shims for insert bearings because it's just a given that you have to accept something less than perfect. Can you guess what we are going to use to make this bearing system perfect?
Reynolds Metals pioneered the development of aluminum siding in 1945, and Richard S. Reynolds began predicting a growing demand for additional aluminum during peacetime. He believed new aluminum-producing facilities would need to be built to meet demand. Enter the infamous Reynolds Wrap! Thanks Richard! We are especially interested in the Heavy Duty .0015 thickness variety of Tin Foil! By dropping the main bearing caps and removing the existing bearing, then adding stages of shims between the Cap and the Bearing, we can get this bearing system perfect at .002 in an intelligent way. First, a long strip the length of the bearing, Second, a medium strip about 3/4 the length of the bearing, then a short strip about 1/2 the length of the bearing under the bearing cap will provide a good place to start. With this in place, torque to 110 foot pounds with a piece of Plastigage Green the full length across the bearing installed and see where you stand, then adjust from there.
IMPORTANT: Put a Jack under the flywheel and push the flywheel tight against the top main bearings. This puts all the slack on the bottom. I used a barrel jack with a piece of hardwood between the Jack and the flywheel teeth. Do this for the rear bearing cap. Then move the Jack to a secure place on the crankshaft close to the next bearing cap, etc.
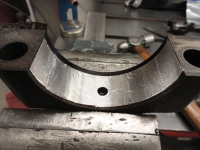
If you find that 3 progressively smaller strips do not do the job, use 4 or 5 progressively smaller strips. This of course depends on engine wear over time. Something important to keep in mind is shimming clear up to the top of the caps means you are DOUBLING the amount of Shim because the .0015 shims are effectively across from each other. This can squeeze against the crankshaft and because you Plasti-gauged at the bottom, never realize you got it too tight along the top of the cap. Always be sure to rotate the crankshaft after torquing each cap to ensure it is not binding. If you are getting really erratic oil pressure and rear main seal leakage, this Tip is for you, but we are not done yet!
Piston Rod Bearings also benefit from this technique! Here is a great tip that will help put you on the right track. Take the top bearing of the bearing set on each rod and put it on the bottom and the bottom one on top. Why? Because Rod Bearings wear unevenly too. The cylinder explosion creates excessive downward force, and of the four strokes of a four stroke engine, only the intake stroke puts pressure on the bottom/cap bearing. This causes the top bearing half to wear faster than the bottom half. By switching them, THEN shimming the bottom cap, we can get a more balanced bearing system. Use the same shimming procedure as described for main bearings for the Rod Bearings as well. Remember, oil pressure is kept higher when ALL bearings in the system are properly clearanced. The Rod Bearings are just as important as the Main Bearings. Torque the Rod Bearings in this engine to 45 Foot Pounds and enjoy much tighter tolerances, more stable oil pressure and less oil on your driveway!
Swapping out the Rear Main Seal
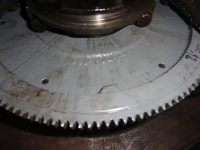
As you can see from the picture, the oil was slinging everywhere! To do this on the truck is pretty difficult. I did not have the pleasure of doing a Rope-type Seal, rather since the rear bearing caps have the proper groove for a two-piece rubber seal (all 235's from 1956 to 1962 have this feature), I found a rubber seal in the engine and replacing it was as easy as pushing the old one out with a small screwdriver. You may have to use a small hammer to shock the rubber into moving, but it really comes right out without any problems. Be sure to follow the instructions that come with the Seal as far as orientation. The higher side points towards the engine. Use Assembly Lube liberally to put the new one in place.
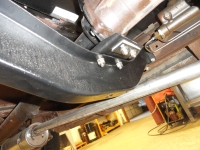
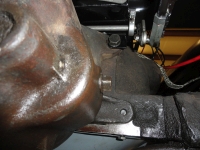
But what if you have a Rope Seal? To get a rope seal in there is tricky and starts with removing the torque tube bracket from the mid cross member, then removing the 4 bolts holding on the transmission. We need to slide the tranny back about 1/4 inch or so for the front bearing retainer to clear the pilot hole in the bell housing. This allows the transmission and crankshaft to drop together enough to remove and replace the upper seal. With everything loose, the Transmission will slide back easily, then we can proceed to loosen all four Crankshaft Main Caps. Do not remove them, just loosen. You want the crankshaft to drop down about 1/4" or so in the back so loosen the Front Cap but leave it in place, then loosen the mid/front cap a little more, then the mid/rear cap even a little more, then remove the rear cap completely. This may take some tweaking, loosening, etc, but you get the idea. With the caps sufficiently loose, the crank will come down enough to get the new seal in place.
Using Needle Nose Pliers, grab one end of the upper seal and pull down. Pull the old seal out of the cap as well. You will need to form the new upper seal in the cap first to ease installation in the block groove. Form it before cutting the seal. You want it to be extra long at this point. After the seal is formed you will be sliding it into place into the engine block. This can be done in many ways. There is a tool called a Sneaky Pete that grabs one end of the seal for pulling it around the crank and into place. It is also possible to poke safety wire through the seal near the end, feed the wire through the seal groove and pull the seal into place. Once the seal is in place, push the crank temporarily into place to seat the seal in its groove. This can be done by putting a jack under the flywheel. After the seal has been seated you will let the crank drop back down for cutting the ends. Once the crank is back down, slide a thin piece of metal against the crank side of the seal ends to support them while cutting them flush with the block. Once that is done, you can tighten and torque the front three main caps and put the transmission and mount back into place.
Form the seal in the cap and cut the seal ends leaving a slight bit of each end protruding. You want it longer so the two pieces sort of squash up against each other. Lay a thin path of gasket sealer from the seal area over to where the pan end gasket attaches and install and torque the rear cap. Torque the main bearing caps to 105 foot pounds and the rods to 40 foot pounds.
I did not have the pleasure of doing the rope seal, but thanks to Dave for writing up the above instruction. Understand that if you have a 56-62 235 or 261, you can pull the rope seal out and just slide a new Best Gasket Rubber Seal Part Number 4519S in place. This of course is contingent on the condition of the crank seal surface not being pitted or grooved too badly.
The Test Drive - Another decent Kansas day, time for a drive! Now before you start putting this engine through its paces, you need to follow sort of a procedure. This is because you just got done rebuilding most of the lower engine and things may be a little tight. You do not want to overheat your rear main seal or the bearings. First, fire it up for 10 seconds or just long enough to see oil pressure. Let it cool down for about a half hour. Next fire it up for 30 seconds and let it cool down for a half hour. Next fire it up for 2 minutes and let it cool down for about an hour. Then you are ready for a mild test drive. Just take the drive slow and keep the RPM under 1500 or so for the first 10 minutes, then drive it normally. This should be enough to properly break in the engine. The results? Another GREAT day! 30 PSI ROCK SOLID through all RPM's and zero oil leaks! Now I can pull up into someones driveway without getting cursed as I drive away! Life is good! So, this BEGS the question.. How did Deve get so smart? He didn't! He knows people who are! Dave Folsom is a second generation Chevy Engine Specialist who learned this tip and many more from his Dad and his own experiences in the craft. These tips are invaluable and this is the kind of information you will not find anywhere else because we strongly believe that passing this information on before it's GONE forever is essential to the successful continuation of our craft. Seeya Next Week!


 Welcome to Deves Technet.com Forums. I encourage everyone to register so we can get a better idea of the traffic and its usefulness. Please leave a word or two describing your stay and what we can do to make it more enjoyable. Thanks!