


 Welcome to Deves Technet.com Forums. I encourage everyone to register so we can get a better idea of the traffic and its usefulness. Please leave a word or two describing your stay and what we can do to make it more enjoyable. Thanks!
 Tweet
Tweet
Part Three of Electric Fuel Pumps
Welcome to Tip of the Week 55! This week we answer a lot of questions that I know I had about our Fuel System. Until now, I haven't done any actual testing to see how they work. For example, when we install a fuel pressure gauge between the mechanical pump and the Carburetor we can expect about 2.5 PSI of constant pressure indicated to the Carb. Mechanical pumps are very simple and pump the very same the entire time the engine is on. There is a check valve that allows the fuel to go only towards the Carb so contrary to what you might think, fuel does not drip back down the fuel line. The loss of pressure after the engine sits awhile is just a matter of evaporation (or possible leakage). With that out of the way, we can move to installing an electric pump to see how it behaves acting alone.
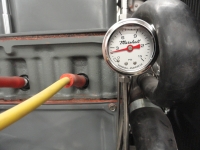
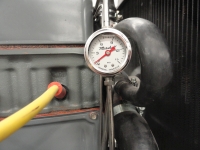
I fully expected to see about the same 2.5 PSI when starting the engine as seen with the mechanical one installed, but nope, it appears to barely keep up! This is apparently by design. The electric pump seems to pump less as less fuel is needed and more when more fuel is needed. Learn something new everyday! The left pic is the mechanical pump indication and the right pic is the electric fuel pump counterpart. Yet running this electric pump through its paces, at any RPM, gunning the engine, didn't matter, it kept up just fine. Both mechanical and electrical are rated at 3.5 PSI and 25 gallons per hour.
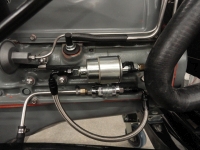 The idea of using the same mounting surface and bolt holes for the electric pump from where the mechanical pump used to be worked great. There may be some minor tweaking of the hard line to get it to fit, but may save having to recreate hard lines. This is more true with the 1940-1953 pumps (mechanical) that have the inlet and outlet directly across from each other. If you have one that has offset in's and out's, you may need new hard lines to the carb at least. One Important Caveat; The electric pump works great in the same location as the mechanical pump IF you went to the PCV system. The road draft tube gets in the way and cannot be used if mounting the electric pump there. If you are not running PCV, you should be! There is a instruction on how to do that yourself here.

 So now that we have sorted out the workings of each type of pump, I wonder if we can augment the mechanical one with an electric one. What does this do that is desireable? This configuration acts as a redundant backup system so your fuel pump will never leave you stranded. The word 'redundant' gets a bad name. It is a very desireable thing in the aircraft industry. There are very few airplanes out there that do not have two of everything. Redundant backup systems are mainstay on Airplanes. I mean, think about it.. you are flying your single engine airplane at night when all of the sudden the fuel pump dies. There is this notsofunny joke that says.. in a situation like that, when you get close to the ground, turn your lights on so you can see. If you do not like what you see, turn the lights back off! So, it may not be life or death being stranded in your Chevy Truck, but it is an annoyance you can avoid with redundancy.
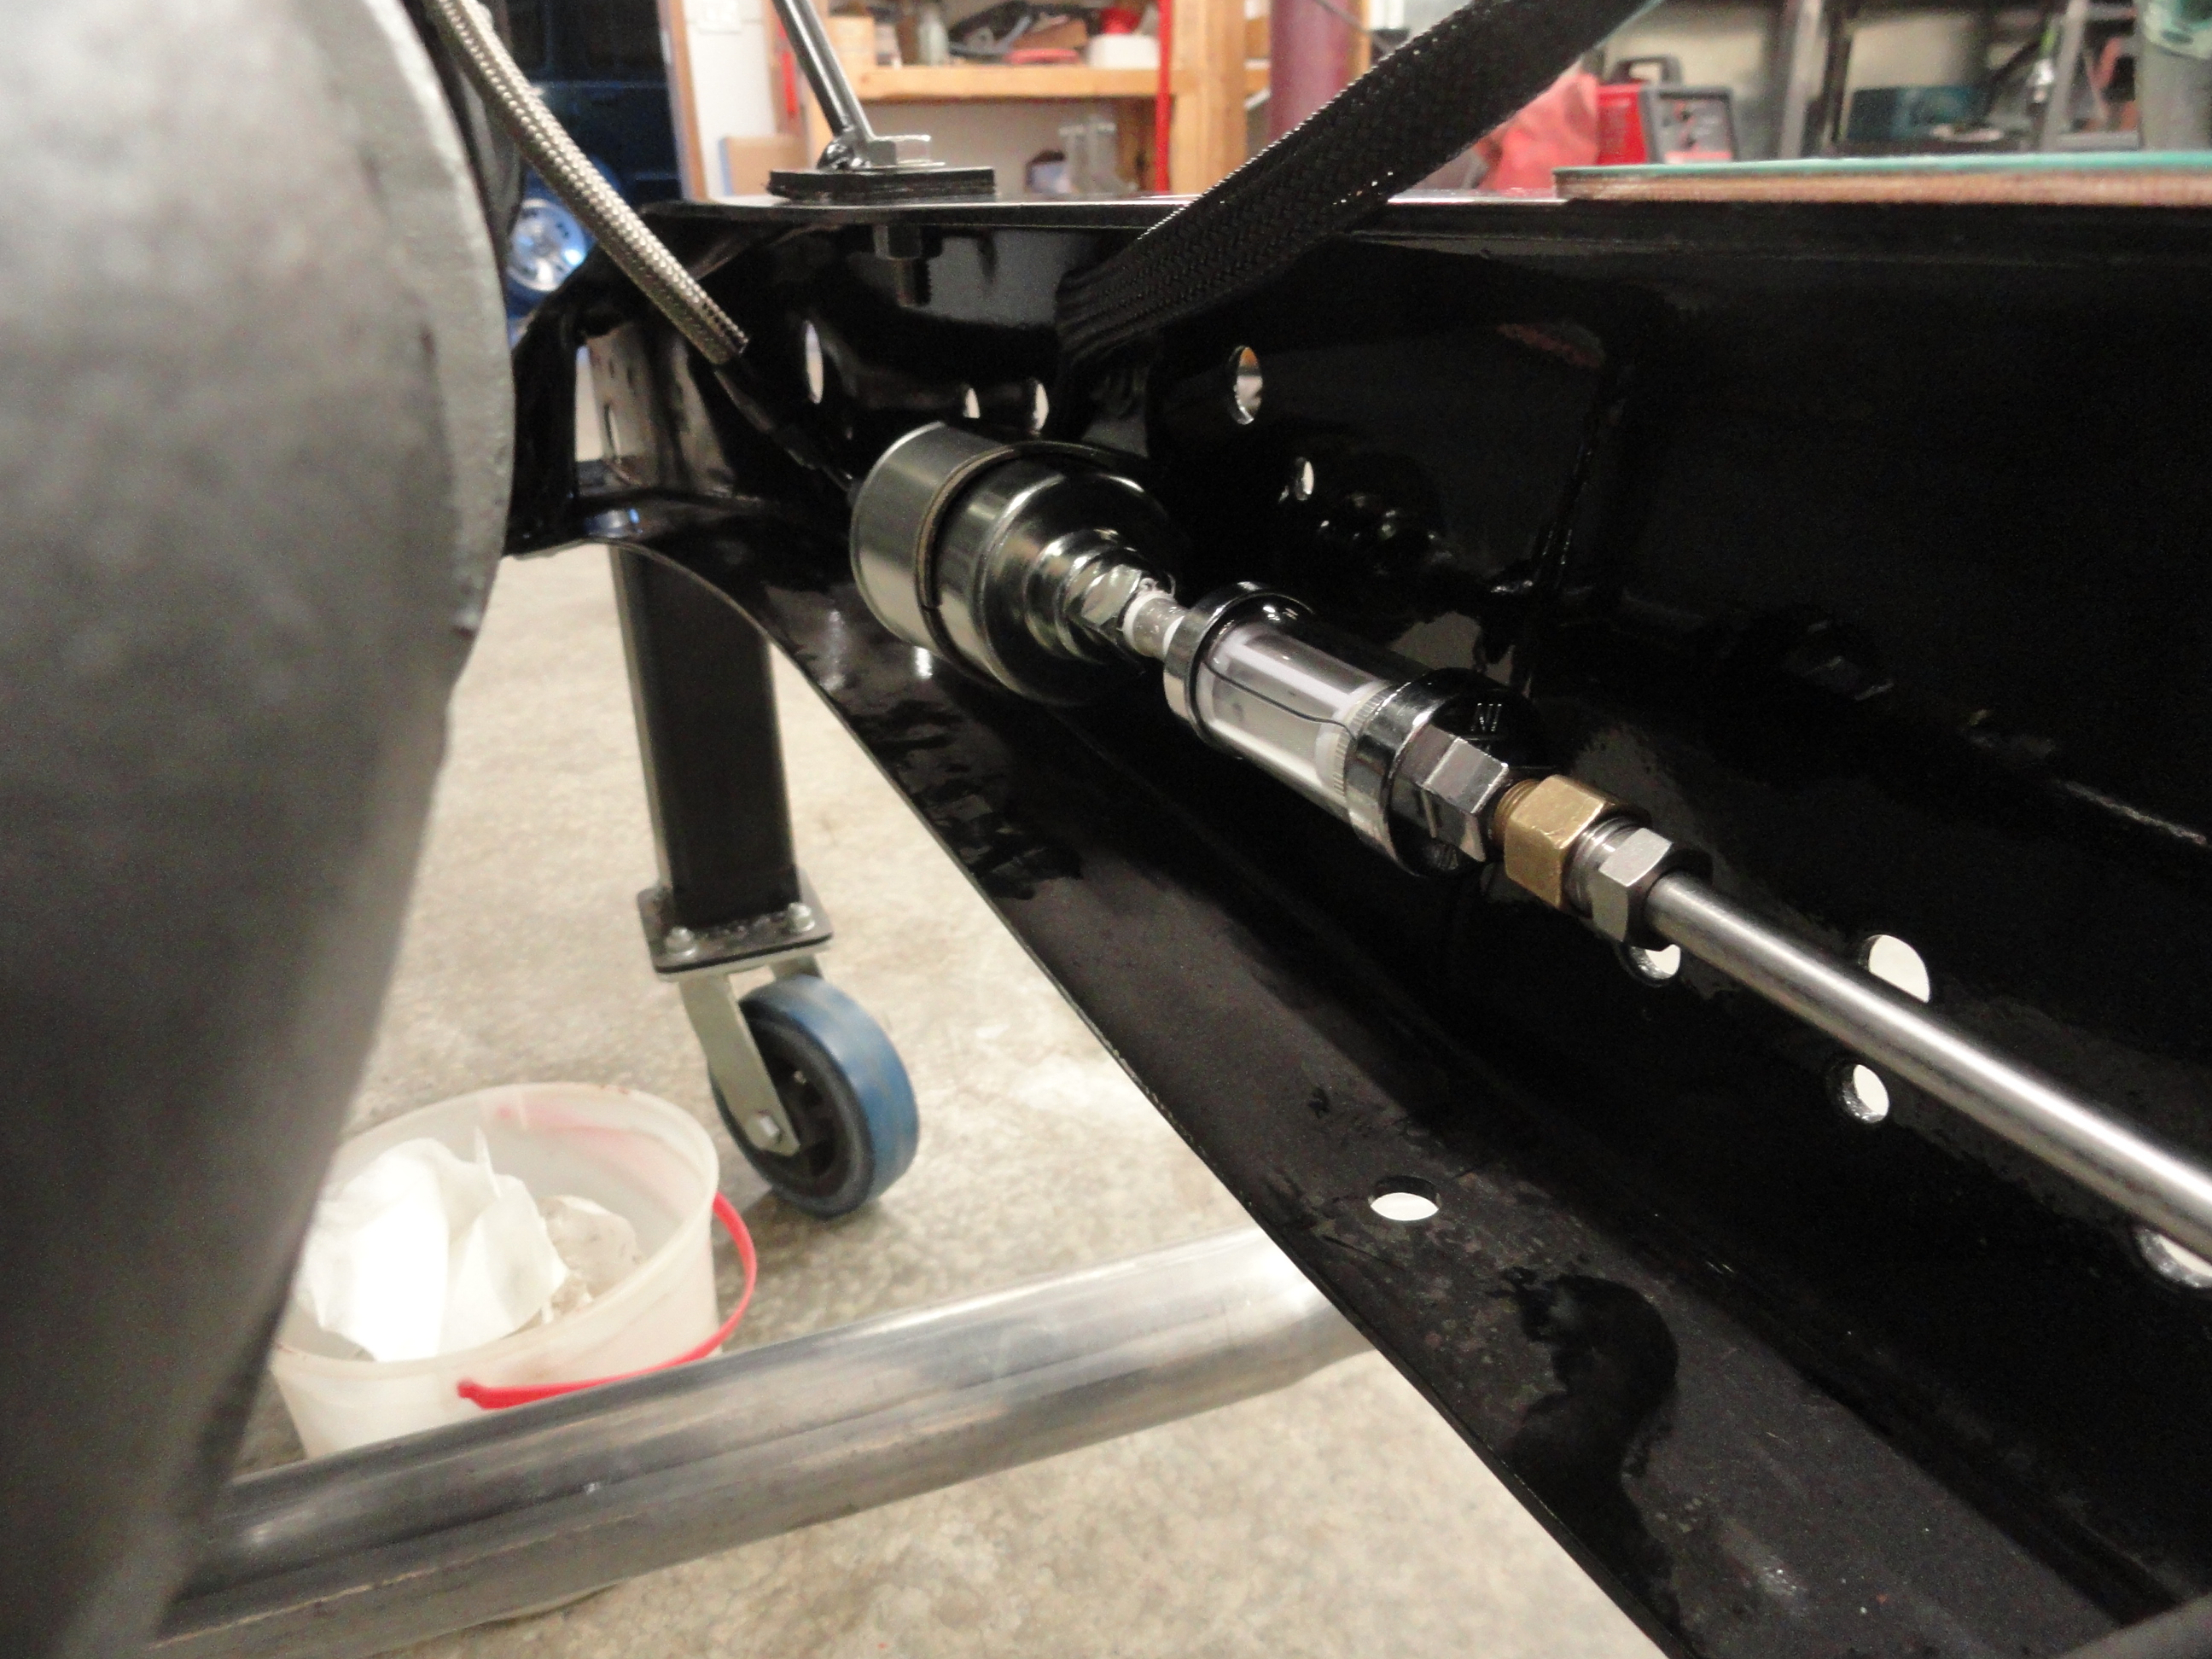
Hooking up both pumps is very straightforward. Going backwards, its Carb, Mechanical Pump, Electric Pump, Fuel Filter, Fuel Tank. The mechanical pump will pass fuel through it just fine so the electric one is merely insurance. But wait! There is one super nice advantage that we can implement with this configuration. Again, if you are annoyed by how long you have to crank the starter after the vehicle has been sitting for awhile, the electric pump eliminates that issue with the AutoPrime feature. This is true with either using only the Electric Pump or Augmenting your Mechanical one. What is AutoPrime?
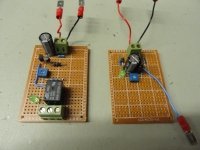
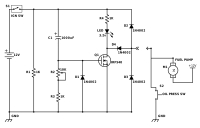
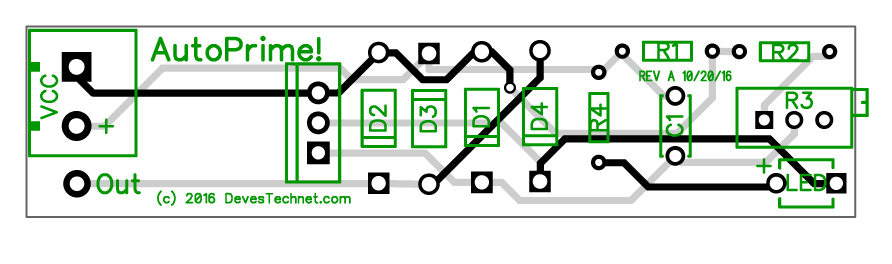
AutoPrime is a circuit you can make yourself or get in Kit form that will fill the Carbs fuel bowl automatically upon hitting the Ignition Switch. Once the 10 second timer (adjustable) fills the carb bowl, the circuit defers to the Oil Pressure/Fuel Pump Safety Switch. Now, the vehicle starts as fast each and every time while still providing you with the OEM safety features. Here is the latest circuit diagram. Again, thanks to Dave (inwo on All About Circuits). His help has been instrumental in getting this circuit just right. In last weeks version, we had two small transistors and one mechanical relay. As you can see from the old vs new prototype (left) it is far and away a better design. Since mechanical relays have a limited number of cycles, I am pleased that Dave figured out a way to eliminate possible fault issues by going to a single Power Transistor called a MOSFET. No moving parts and good old reliable electronic parts that will probably outlast US. This AutoPrime circuit is (c)2016 DevesTechnet which means you can make one for yourself using the circuit diagram or tell your friends to order them ready made from the website. This circuit will be perfect for vintage automotive and marine applications. The one we will offer in the kit will be encased in a 1 inch round PVC pipe and come with a 1" Stainless Adel Clamp for mounting anywhere you choose. If there is a way to make peoples lives better by offering something ready made, we will be there to design it! Stay tuned to the Farm-It-Out page on the web site. There will be a few kits available in the coming weeks. One with the mounting adapter plate for mounting the Electric Pump in the Mechanical location, and one with all of the bracketry for the Redundancy solution with options on both for the AutoPrime System. Seeya Next Week!
Welcome to Tip of the Week 55! This week we answer a lot of questions that I know I had about our Fuel System. Until now, I haven't done any actual testing to see how they work. For example, when we install a fuel pressure gauge between the mechanical pump and the Carburetor we can expect about 2.5 PSI of constant pressure indicated to the Carb. Mechanical pumps are very simple and pump the very same the entire time the engine is on. There is a check valve that allows the fuel to go only towards the Carb so contrary to what you might think, fuel does not drip back down the fuel line. The loss of pressure after the engine sits awhile is just a matter of evaporation (or possible leakage). With that out of the way, we can move to installing an electric pump to see how it behaves acting alone.

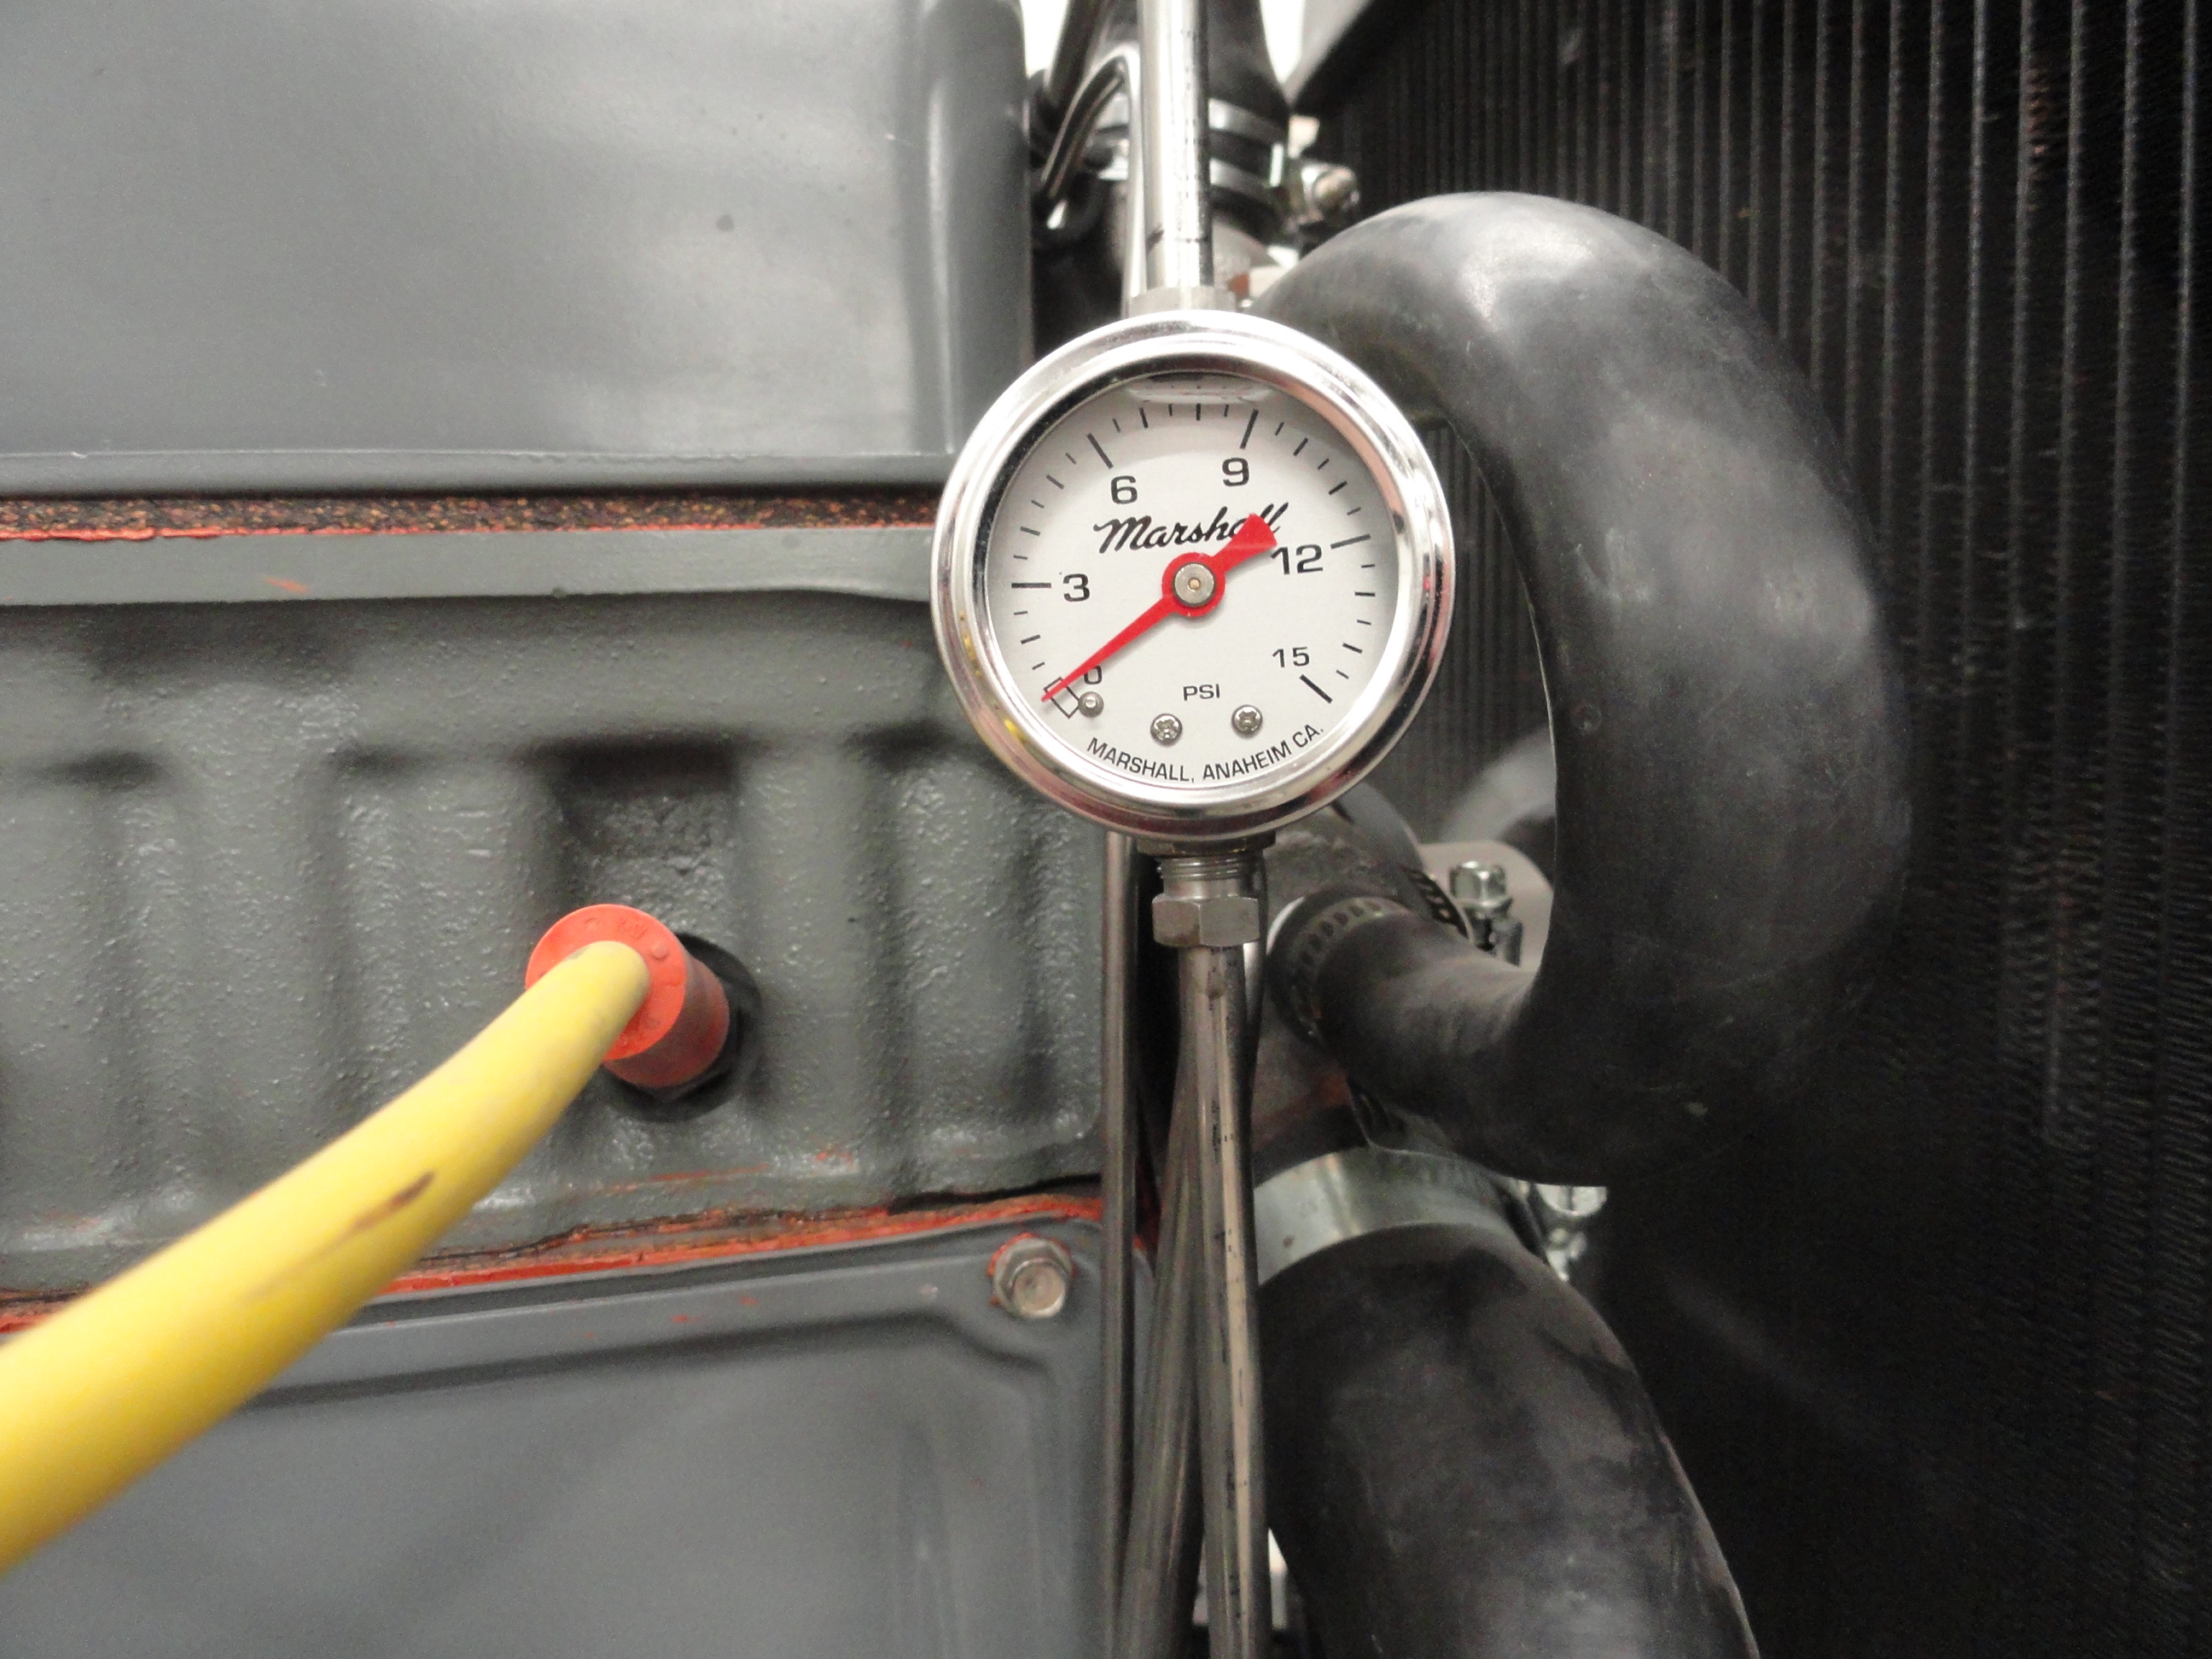
I fully expected to see about the same 2.5 PSI when starting the engine as seen with the mechanical one installed, but nope, it appears to barely keep up! This is apparently by design. The electric pump seems to pump less as less fuel is needed and more when more fuel is needed. Learn something new everyday! The left pic is the mechanical pump indication and the right pic is the electric fuel pump counterpart. Yet running this electric pump through its paces, at any RPM, gunning the engine, didn't matter, it kept up just fine. Both mechanical and electrical are rated at 3.5 PSI and 25 gallons per hour.
 The idea of using the same mounting surface and bolt holes for the electric pump from where the mechanical pump used to be worked great. There may be some minor tweaking of the hard line to get it to fit, but may save having to recreate hard lines. This is more true with the 1940-1953 pumps (mechanical) that have the inlet and outlet directly across from each other. If you have one that has offset in's and out's, you may need new hard lines to the carb at least. One Important Caveat; The electric pump works great in the same location as the mechanical pump IF you went to the PCV system. The road draft tube gets in the way and cannot be used if mounting the electric pump there. If you are not running PCV, you should be! There is a instruction on how to do that yourself here.
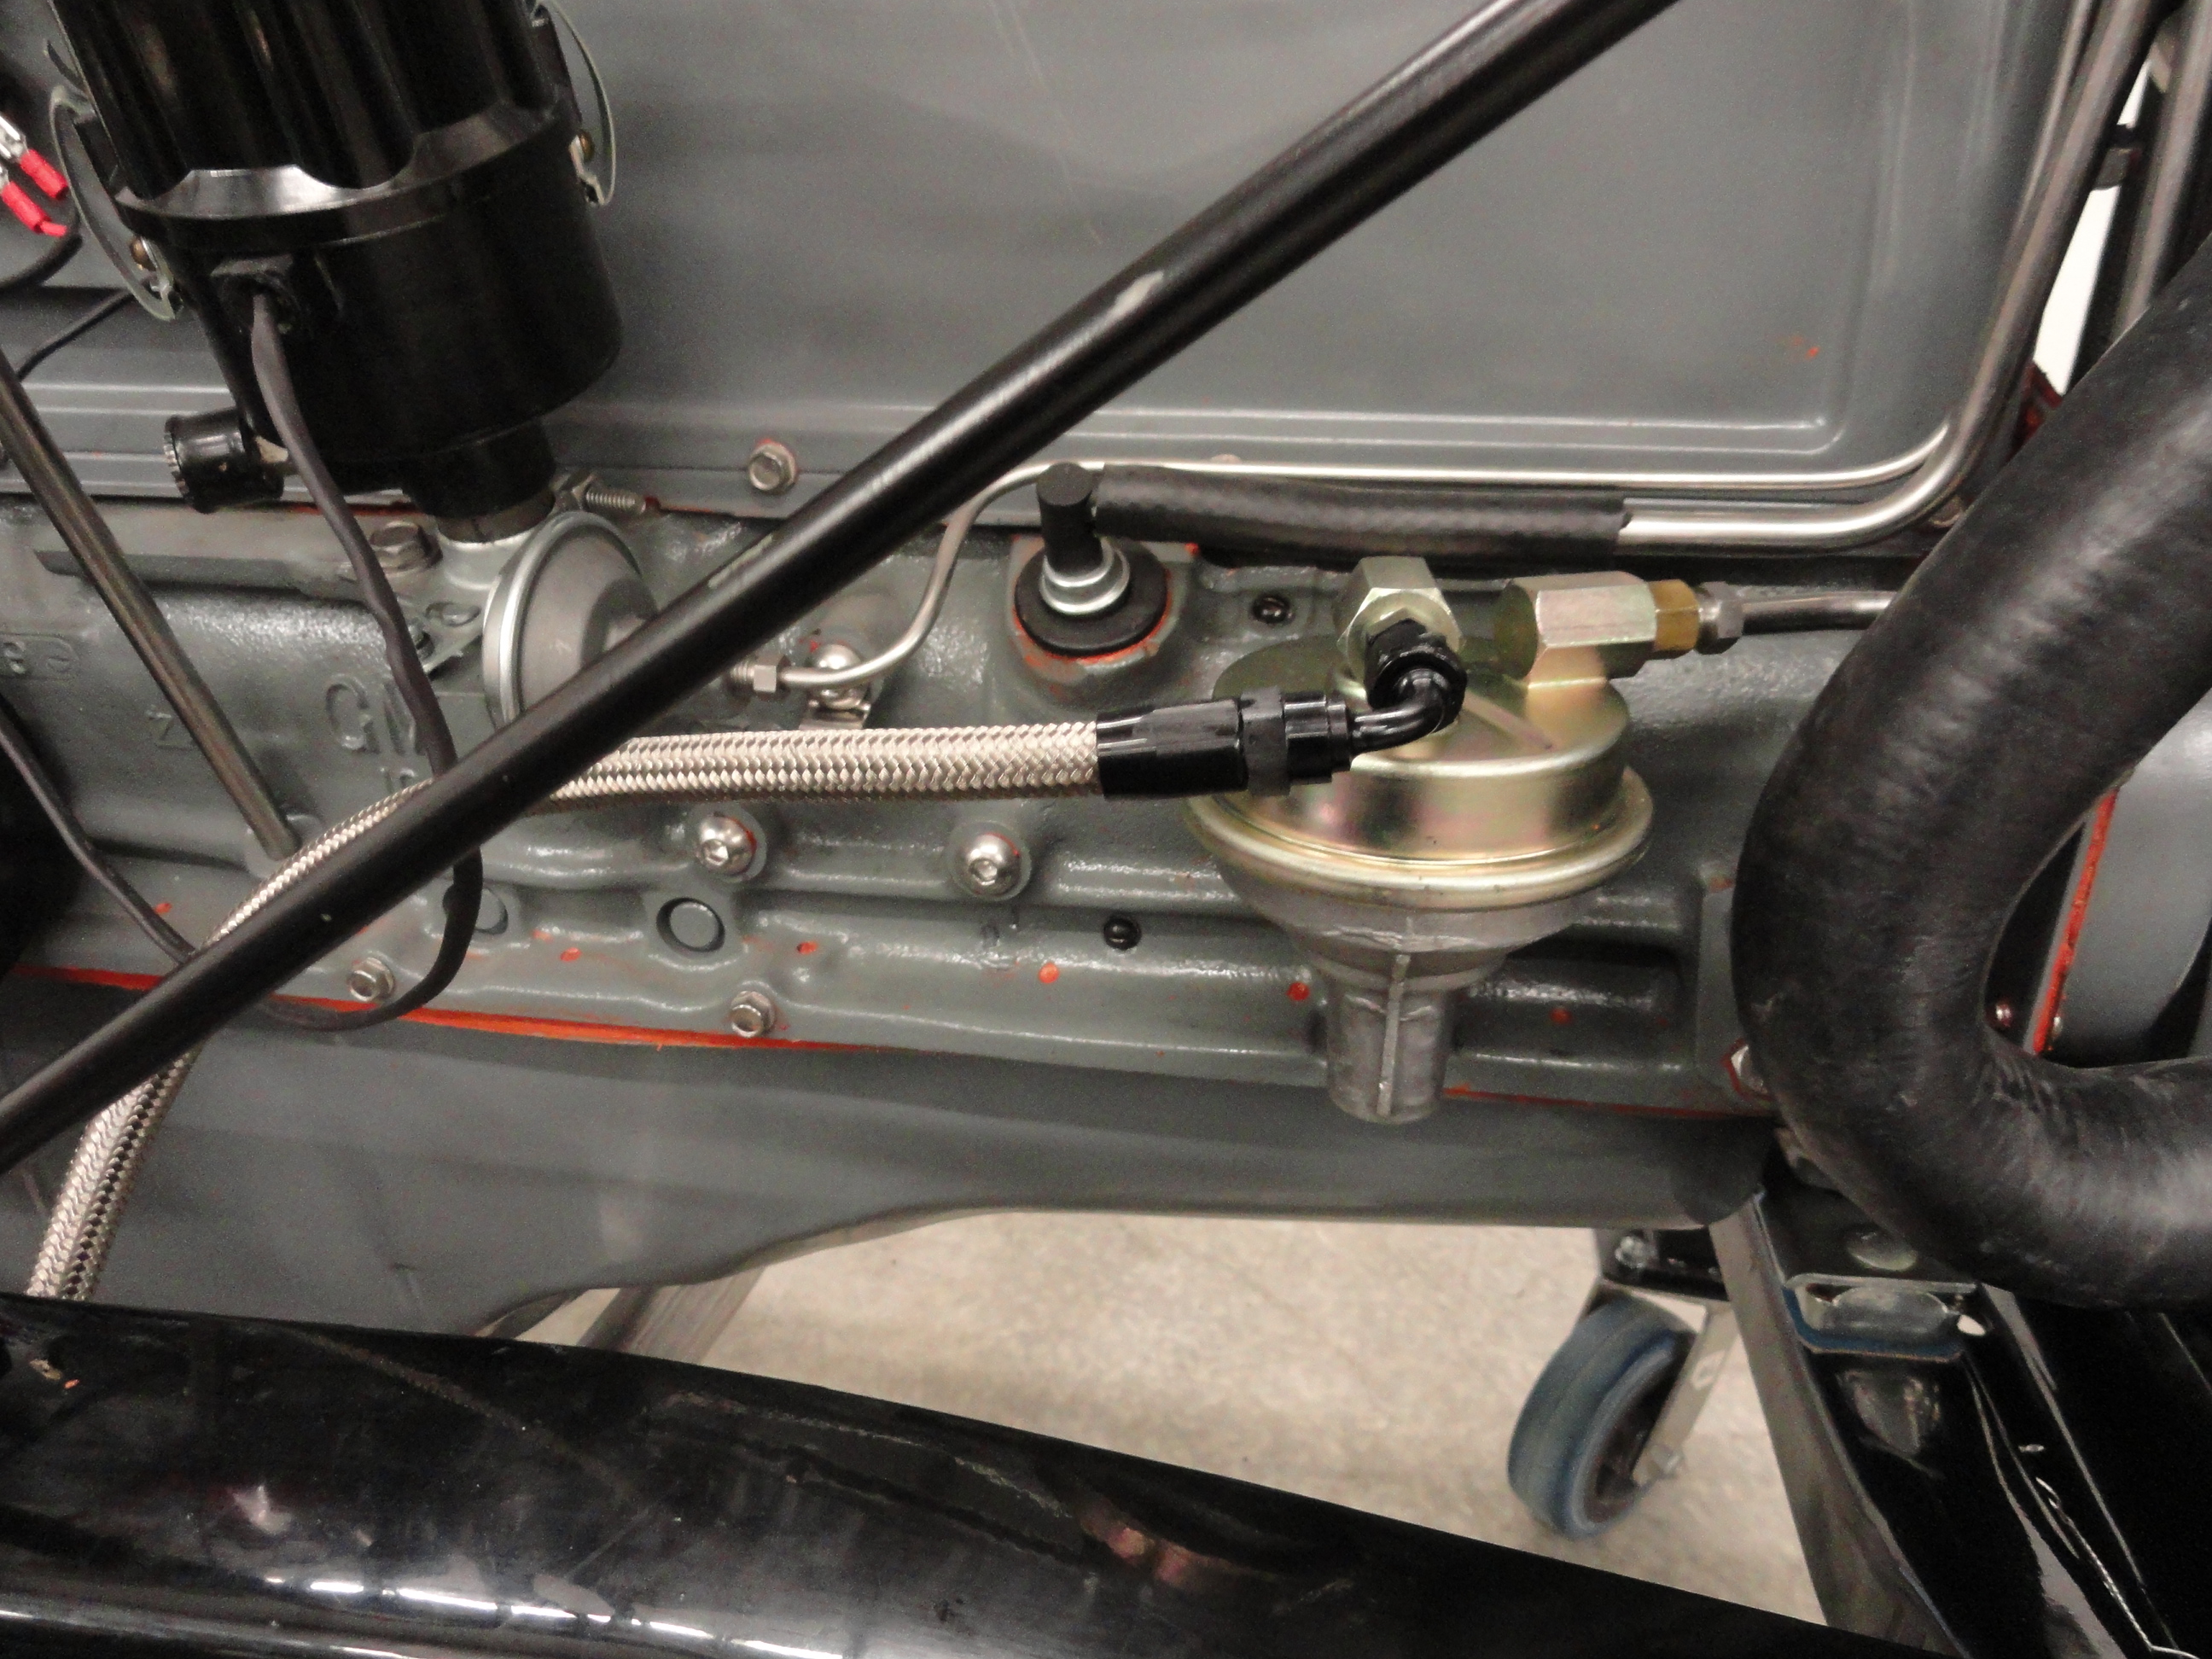
 So now that we have sorted out the workings of each type of pump, I wonder if we can augment the mechanical one with an electric one. What does this do that is desireable? This configuration acts as a redundant backup system so your fuel pump will never leave you stranded. The word 'redundant' gets a bad name. It is a very desireable thing in the aircraft industry. There are very few airplanes out there that do not have two of everything. Redundant backup systems are mainstay on Airplanes. I mean, think about it.. you are flying your single engine airplane at night when all of the sudden the fuel pump dies. There is this notsofunny joke that says.. in a situation like that, when you get close to the ground, turn your lights on so you can see. If you do not like what you see, turn the lights back off! So, it may not be life or death being stranded in your Chevy Truck, but it is an annoyance you can avoid with redundancy.
Hooking up both pumps is very straightforward. Going backwards, its Carb, Mechanical Pump, Electric Pump, Fuel Filter, Fuel Tank. The mechanical pump will pass fuel through it just fine so the electric one is merely insurance. But wait! There is one super nice advantage that we can implement with this configuration. Again, if you are annoyed by how long you have to crank the starter after the vehicle has been sitting for awhile, the electric pump eliminates that issue with the AutoPrime feature. This is true with either using only the Electric Pump or Augmenting your Mechanical one. What is AutoPrime?
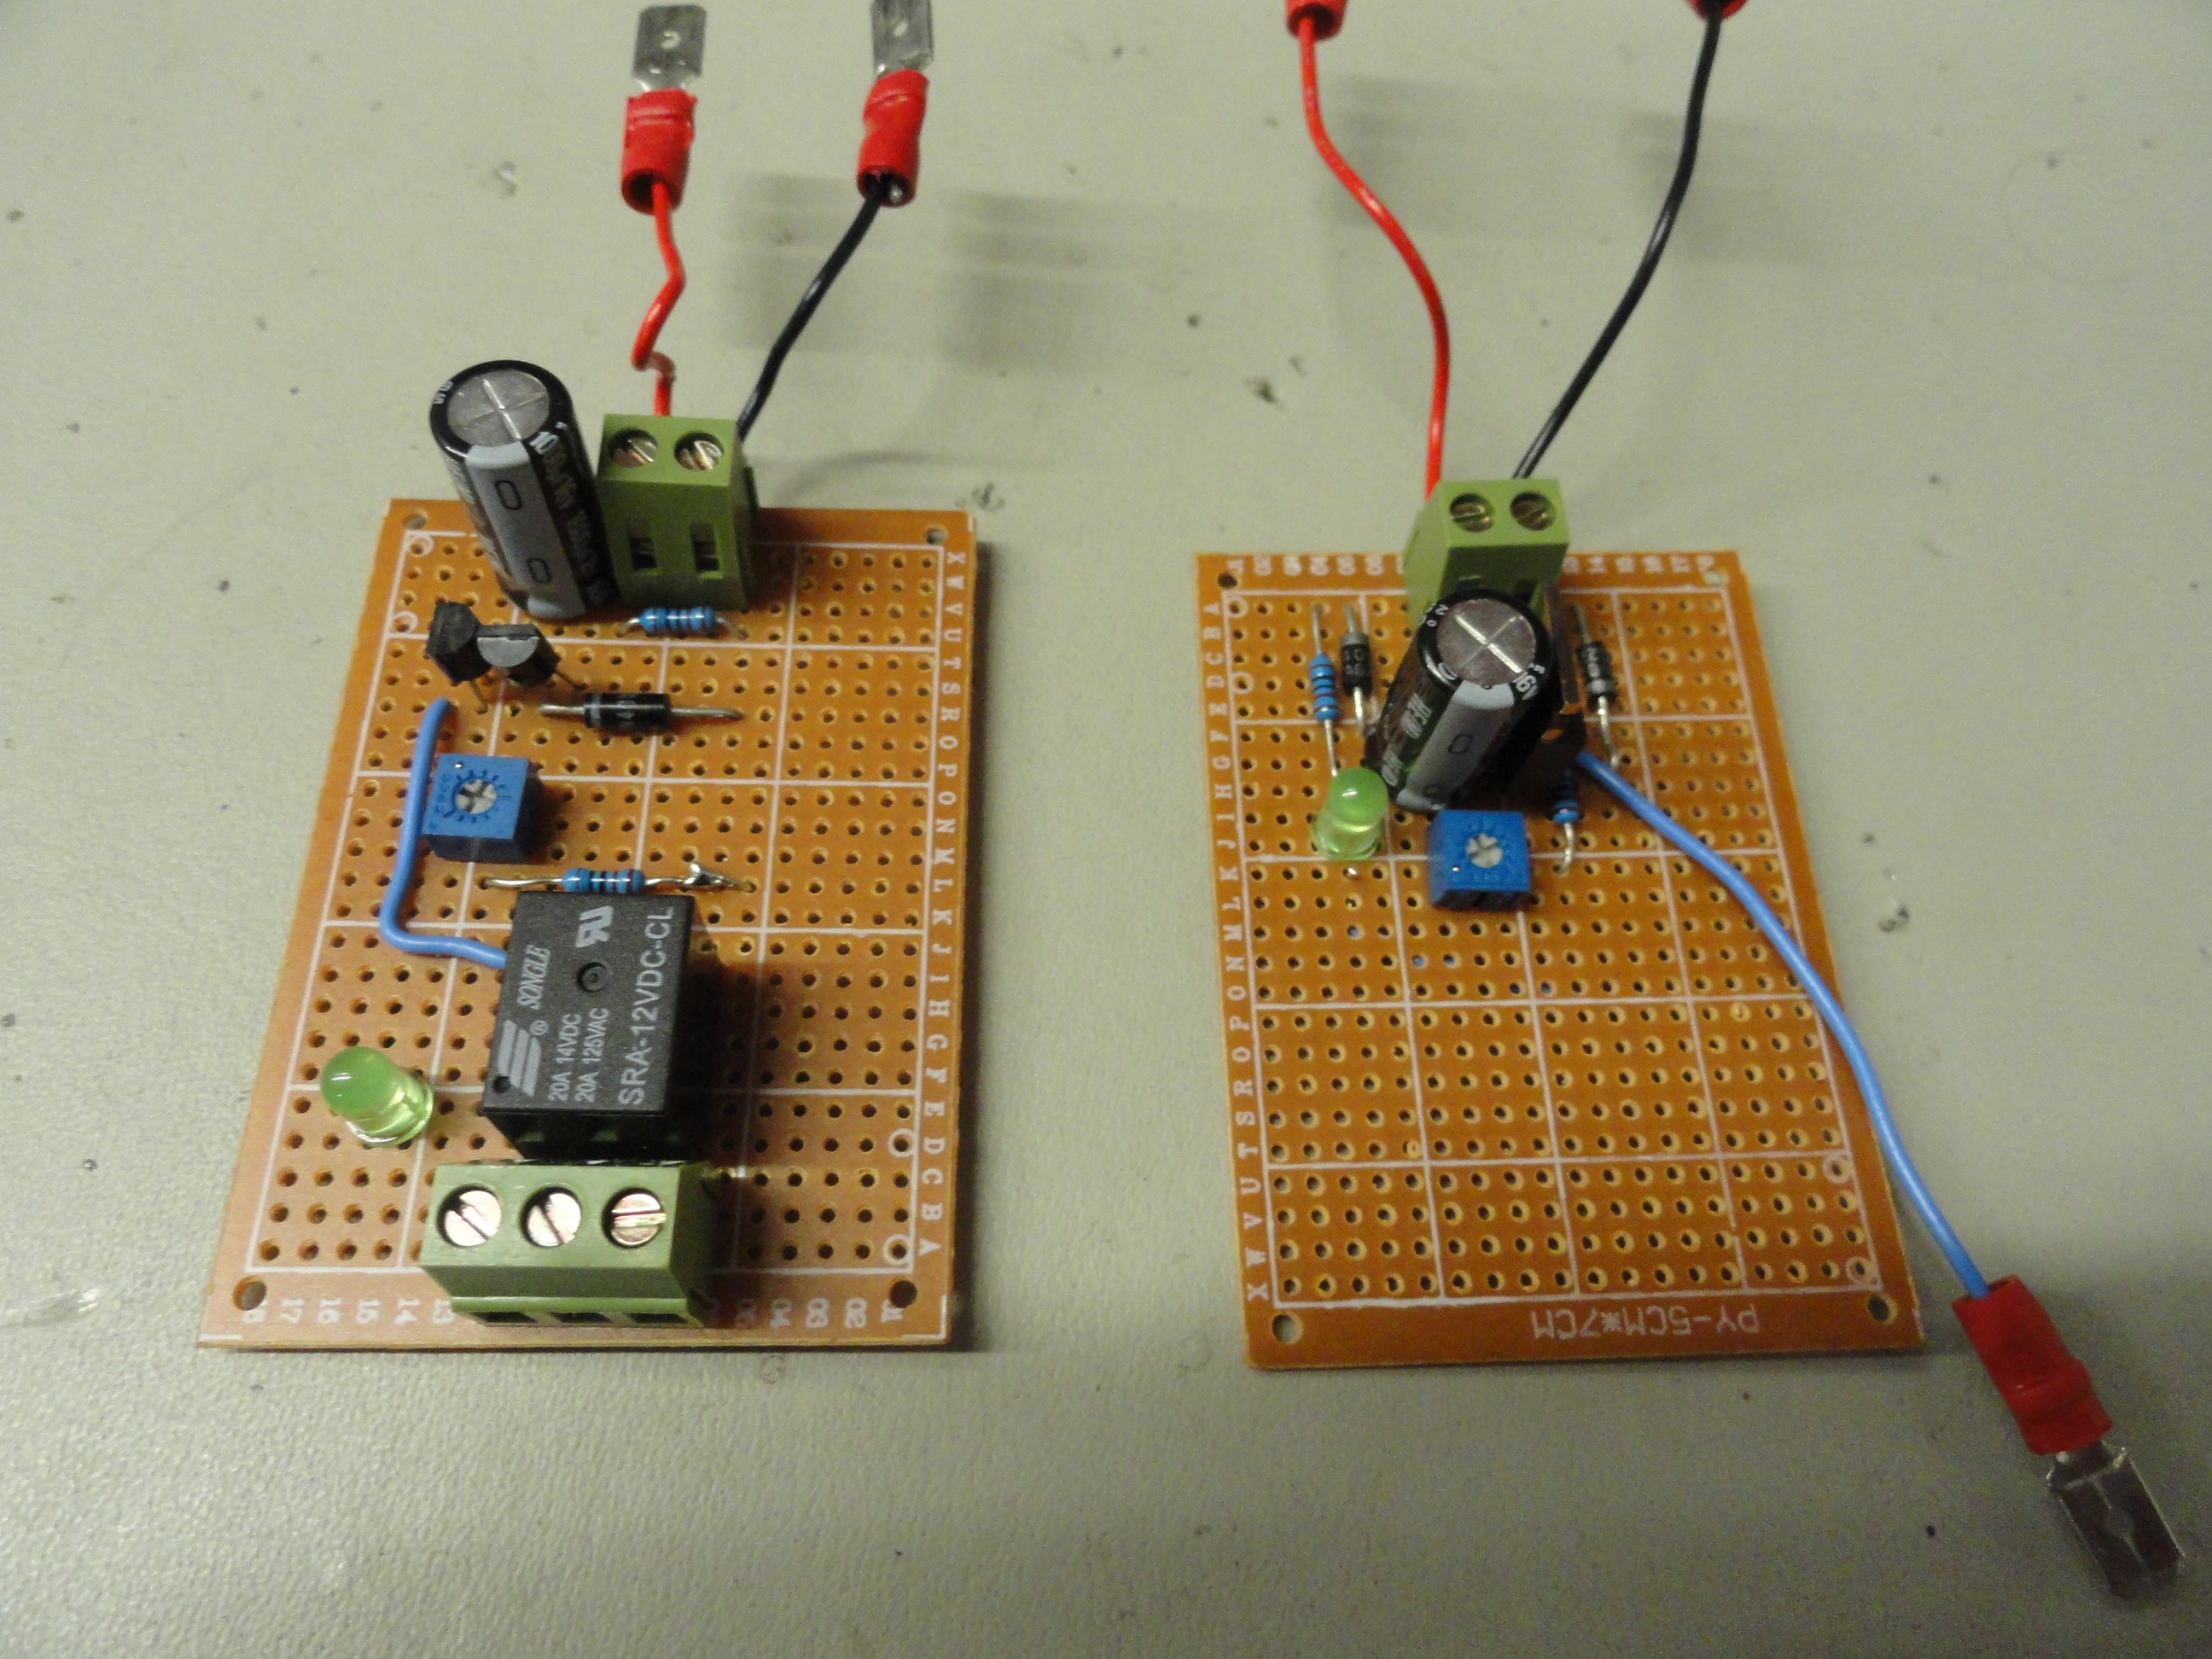

AutoPrime is a circuit you can make yourself or get in Kit form that will fill the Carbs fuel bowl automatically upon hitting the Ignition Switch. Once the 10 second timer (adjustable) fills the carb bowl, the circuit defers to the Oil Pressure/Fuel Pump Safety Switch. Now, the vehicle starts as fast each and every time while still providing you with the OEM safety features. Here is the latest circuit diagram. Again, thanks to Dave (inwo on All About Circuits). His help has been instrumental in getting this circuit just right. In last weeks version, we had two small transistors and one mechanical relay. As you can see from the old vs new prototype (left) it is far and away a better design. Since mechanical relays have a limited number of cycles, I am pleased that Dave figured out a way to eliminate possible fault issues by going to a single Power Transistor called a MOSFET. No moving parts and good old reliable electronic parts that will probably outlast US. This AutoPrime circuit is (c)2016 DevesTechnet which means you can make one for yourself using the circuit diagram or tell your friends to order them ready made from the website. This circuit will be perfect for vintage automotive and marine applications. The one we will offer in the kit will be encased in a 1 inch round PVC pipe and come with a 1" Stainless Adel Clamp for mounting anywhere you choose. If there is a way to make peoples lives better by offering something ready made, we will be there to design it! Stay tuned to the Farm-It-Out page on the web site. There will be a few kits available in the coming weeks. One with the mounting adapter plate for mounting the Electric Pump in the Mechanical location, and one with all of the bracketry for the Redundancy solution with options on both for the AutoPrime System. Seeya Next Week!
Comment