


 Welcome to Deves Technet.com Forums. I encourage everyone to register so we can get a better idea of the traffic and its usefulness. Please leave a word or two describing your stay and what we can do to make it more enjoyable. Thanks!
 Tweet
Tweet
Installing a Rivnut, Nutsert or Rivsert made easy!
This week I wanted to share something pretty cool in the way of tools. If you are like me you are always looking for an excuse to try something different. I spend a lot of time working with metal to make the various adapters, brackets, assemblies, etc. and one of the things that I have to do from time to time is weld a nut onto a piece of flat metal. While this is the best and most solid method of allowing for bolt assembly, there is another intriguing method commonly known as the NUTSERT or RIVNUT. This method has become a mainstay in vehicle restoration because it is very solid, easy and requires no welding meaning, no loss of paint around the involved area.

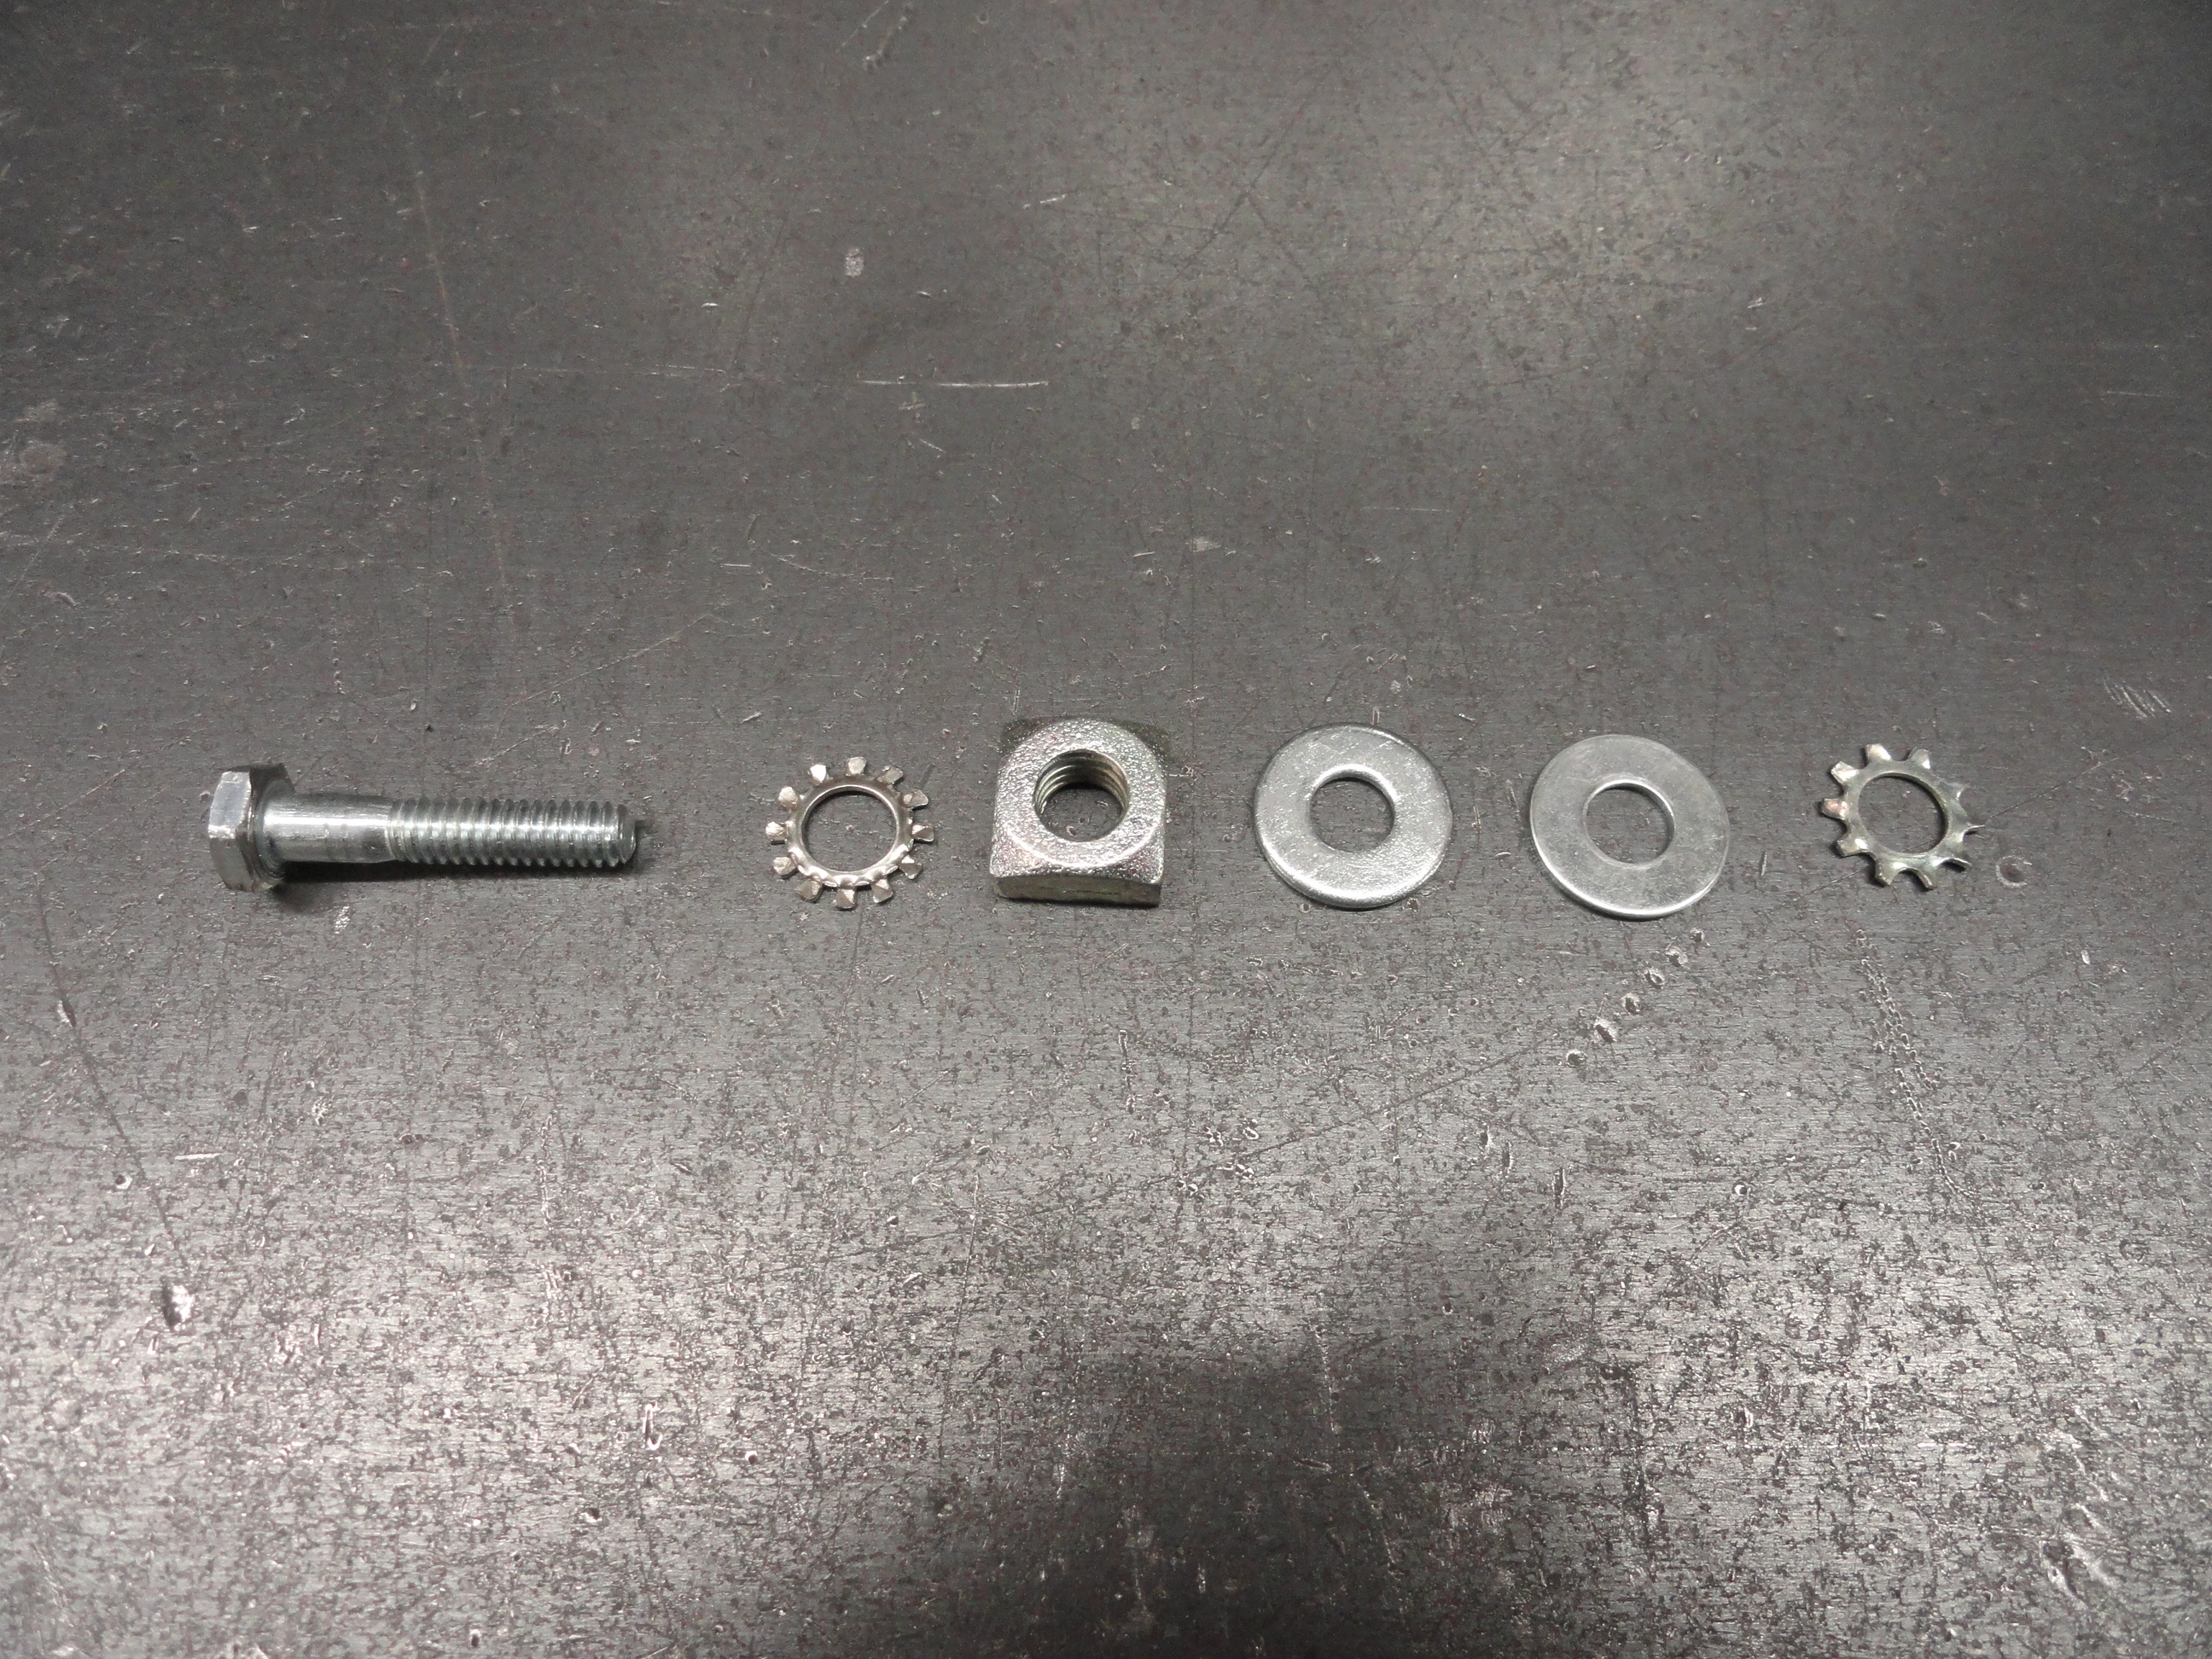
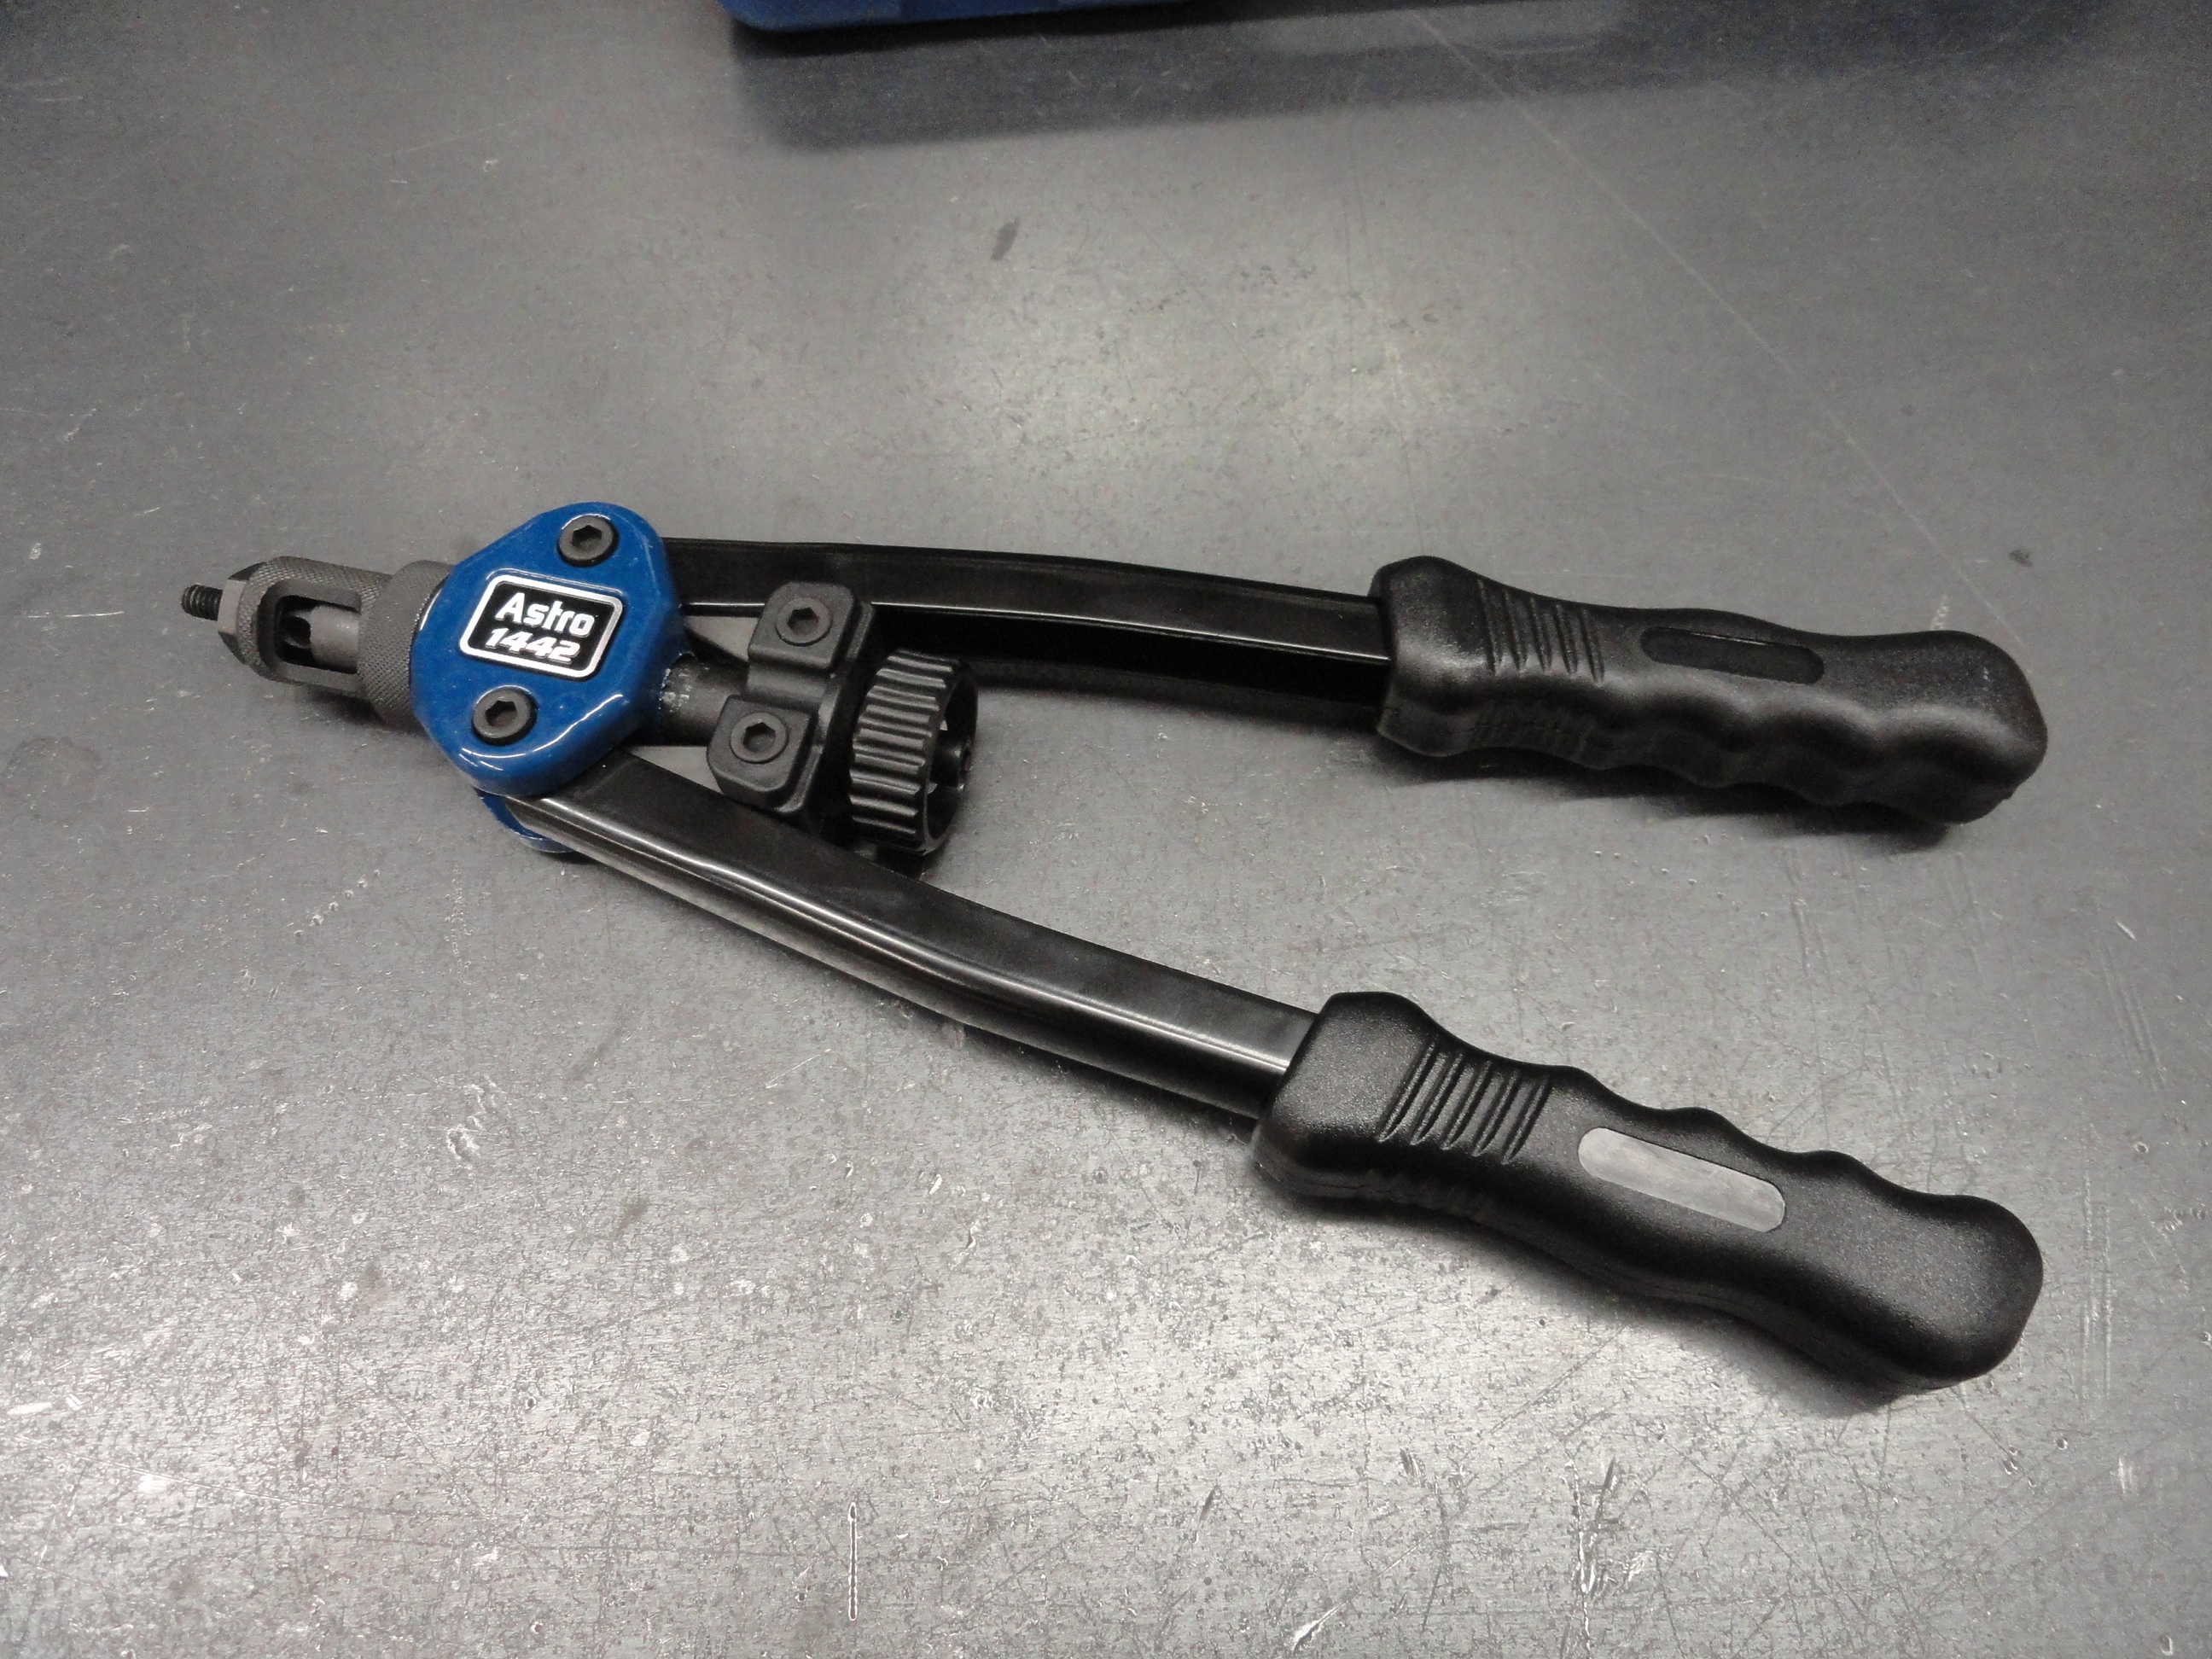
There are almost free ways to set a Nutsert or it can be expensive to set a Nutsert. The parts on the left combine to make the tool you need to set them for almost free. The tool on the right is a professionally made Nutsert Tool at the cost of about $70. The idea is to have them both because there are some tight places you may wish to put in a nutsert, but can't get the tool into the space. The Pro Tool is better far and away because it gives repeatedly perfect results every single time. Using the homemade version you need to pay close attention to getting everything aligned straight.
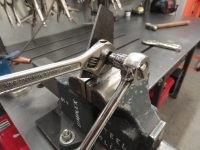

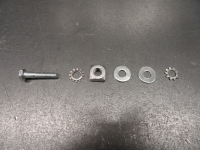
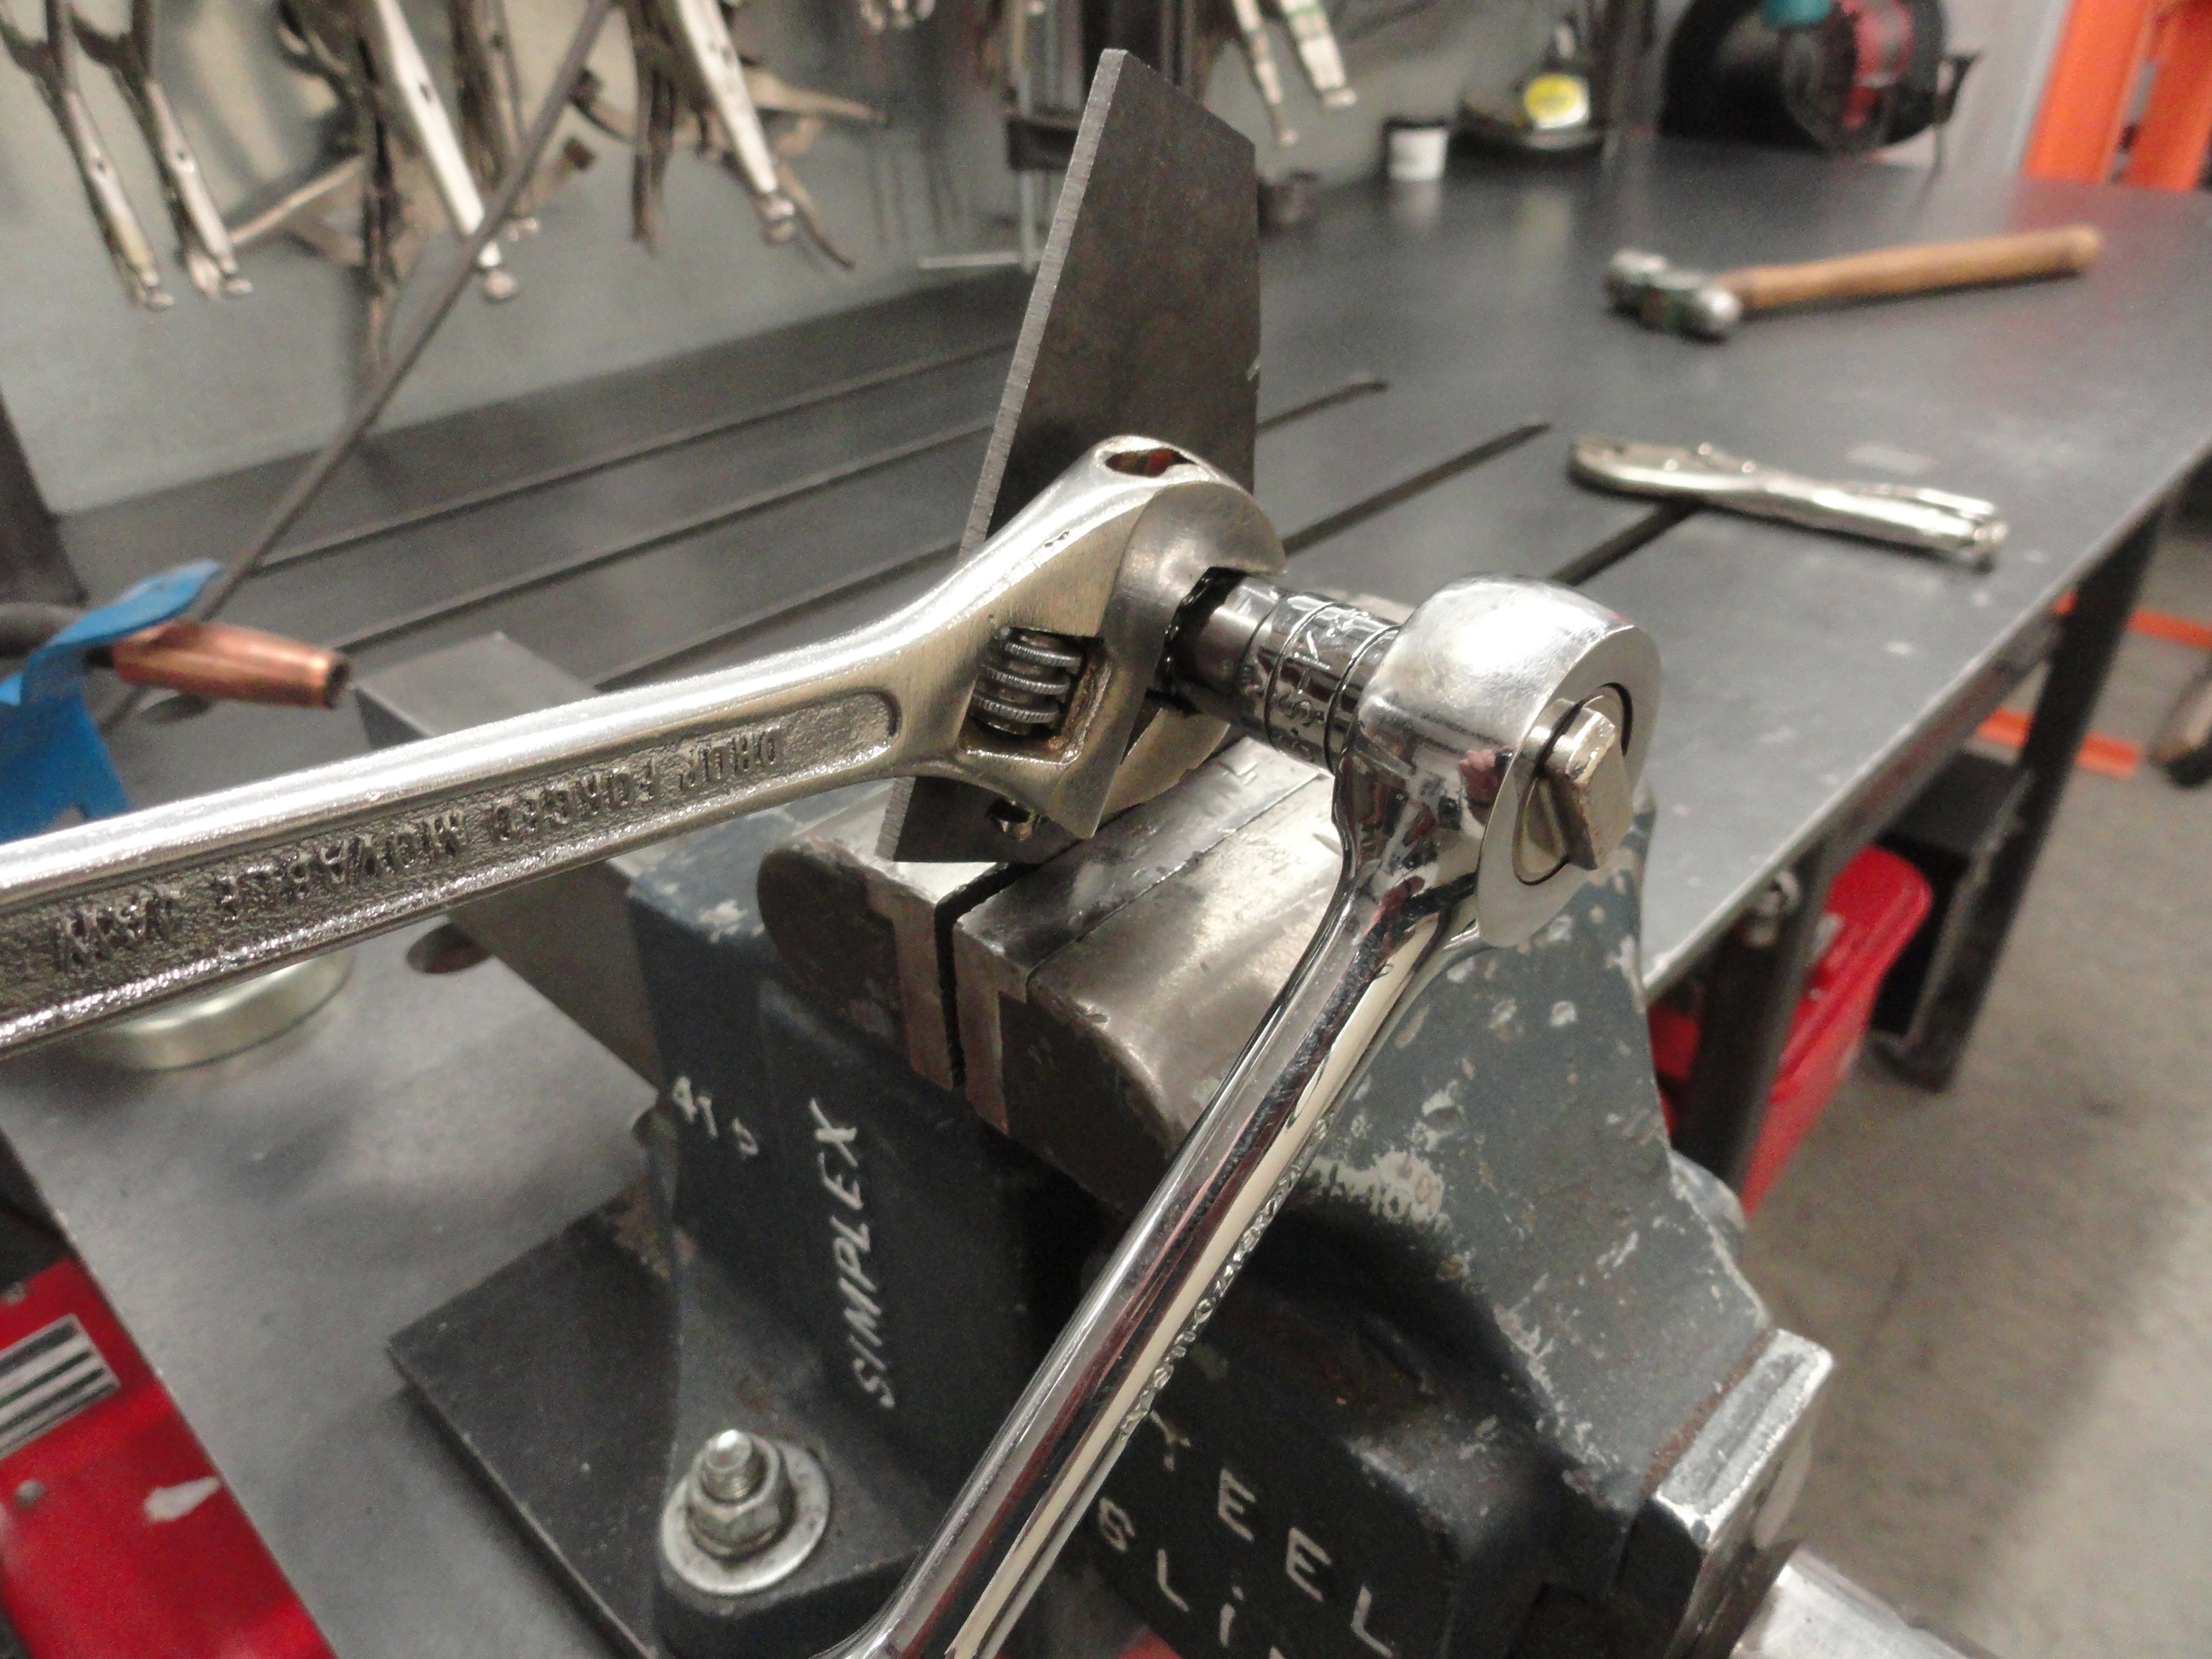
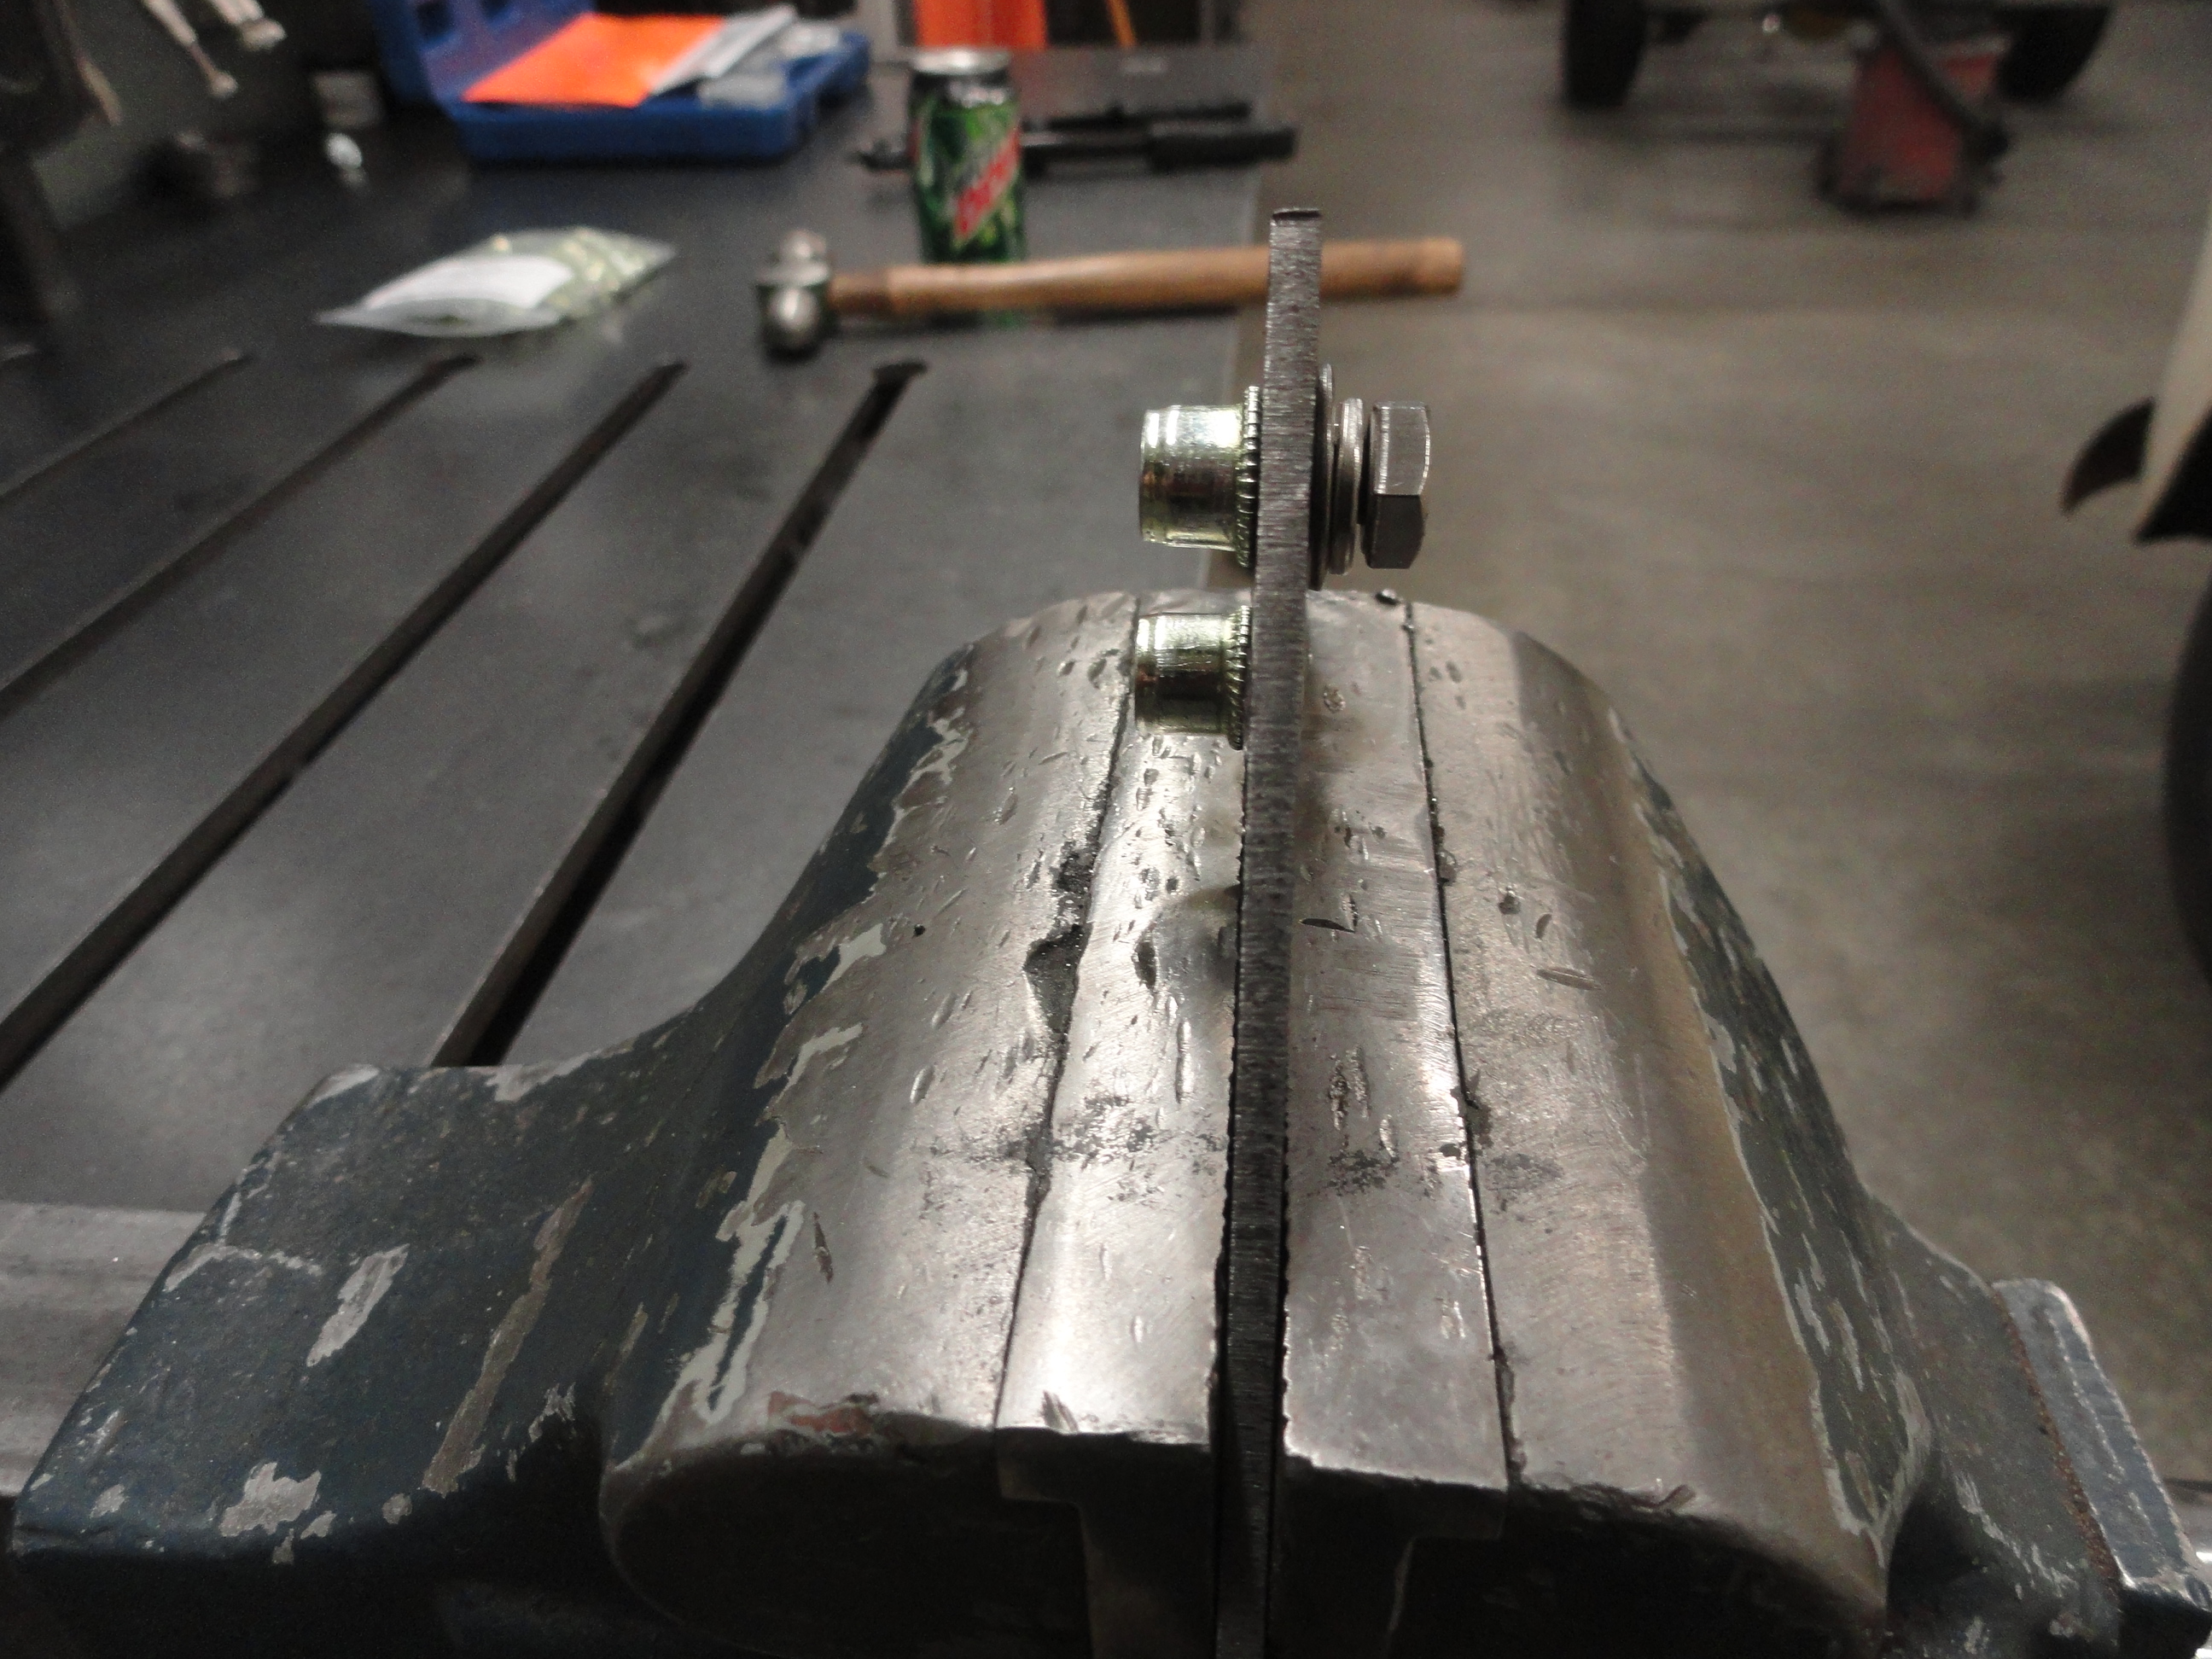
For a 1/4" Nutsert, we drill a 25/64" hole in whatever metal you want a Nutsert in and assemble a long 1/4" screw with a 3/8" square nut and the washers in the sequence above. The idea is for the square nut and washers to provide sufficient gap to grip with the crescent wrench and the lock washers are to keep the nutsert from turning. Once the Nutsert is placed in the hole all the way in, simply ratchet the 1/4" bolt into position holding everything tight against the metal and straight. By cranking the bolt, you are squashing the Nutsert into place. This method works fairly well if you pay attention, however, the professional tool is much easier to use. Also, when you get it sufficiently squashed, you need to stop before you break the bolt off!
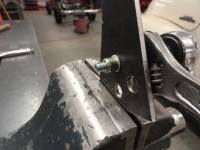
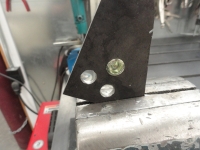
As you can see, there are indentions on the outside of the Nutsert that are made by the lock washer. This is a necessary sacrifice since in this method you are turning the Nutsert tight and with the Professional Model you are simply pulling the Nutsert tight. In both cases the bolt will not spin the Nutsert when it is installed and really showcases the possibilities. An observation that you can make is the Nutsert sticks out and looks ugly on the back side, so strategic placement of these is sort of essential when you are as picky as I am.


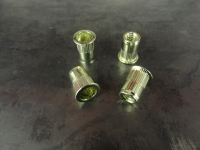
These two are for comparison purposes. You can see the Nutsert on the bottom is not squashed as cleanly as the one on the top. On the other side, you can see the indentions I mentioned before. Clearly the Professional Tool is the better way to go, but again, sometimes you can't get into tight places so the alternate tool is necessary. These Nutserts are also referred to as RivNuts and are available in all of the smaller sizes. The reason for not using them above 5/16" is because of overall strength issues. Anything below that however, and these Rivserts are really the way to go!


I purchased the tool shown here on Ebay and it seems to work very nicely. This is not a tool that will be used all that often, but when you need it, it will be nice knowing it is ready for action. Everyone have a Happy Thanksgiving and Seeya Next Week!

This week I wanted to share something pretty cool in the way of tools. If you are like me you are always looking for an excuse to try something different. I spend a lot of time working with metal to make the various adapters, brackets, assemblies, etc. and one of the things that I have to do from time to time is weld a nut onto a piece of flat metal. While this is the best and most solid method of allowing for bolt assembly, there is another intriguing method commonly known as the NUTSERT or RIVNUT. This method has become a mainstay in vehicle restoration because it is very solid, easy and requires no welding meaning, no loss of paint around the involved area.
There are almost free ways to set a Nutsert or it can be expensive to set a Nutsert. The parts on the left combine to make the tool you need to set them for almost free. The tool on the right is a professionally made Nutsert Tool at the cost of about $70. The idea is to have them both because there are some tight places you may wish to put in a nutsert, but can't get the tool into the space. The Pro Tool is better far and away because it gives repeatedly perfect results every single time. Using the homemade version you need to pay close attention to getting everything aligned straight.
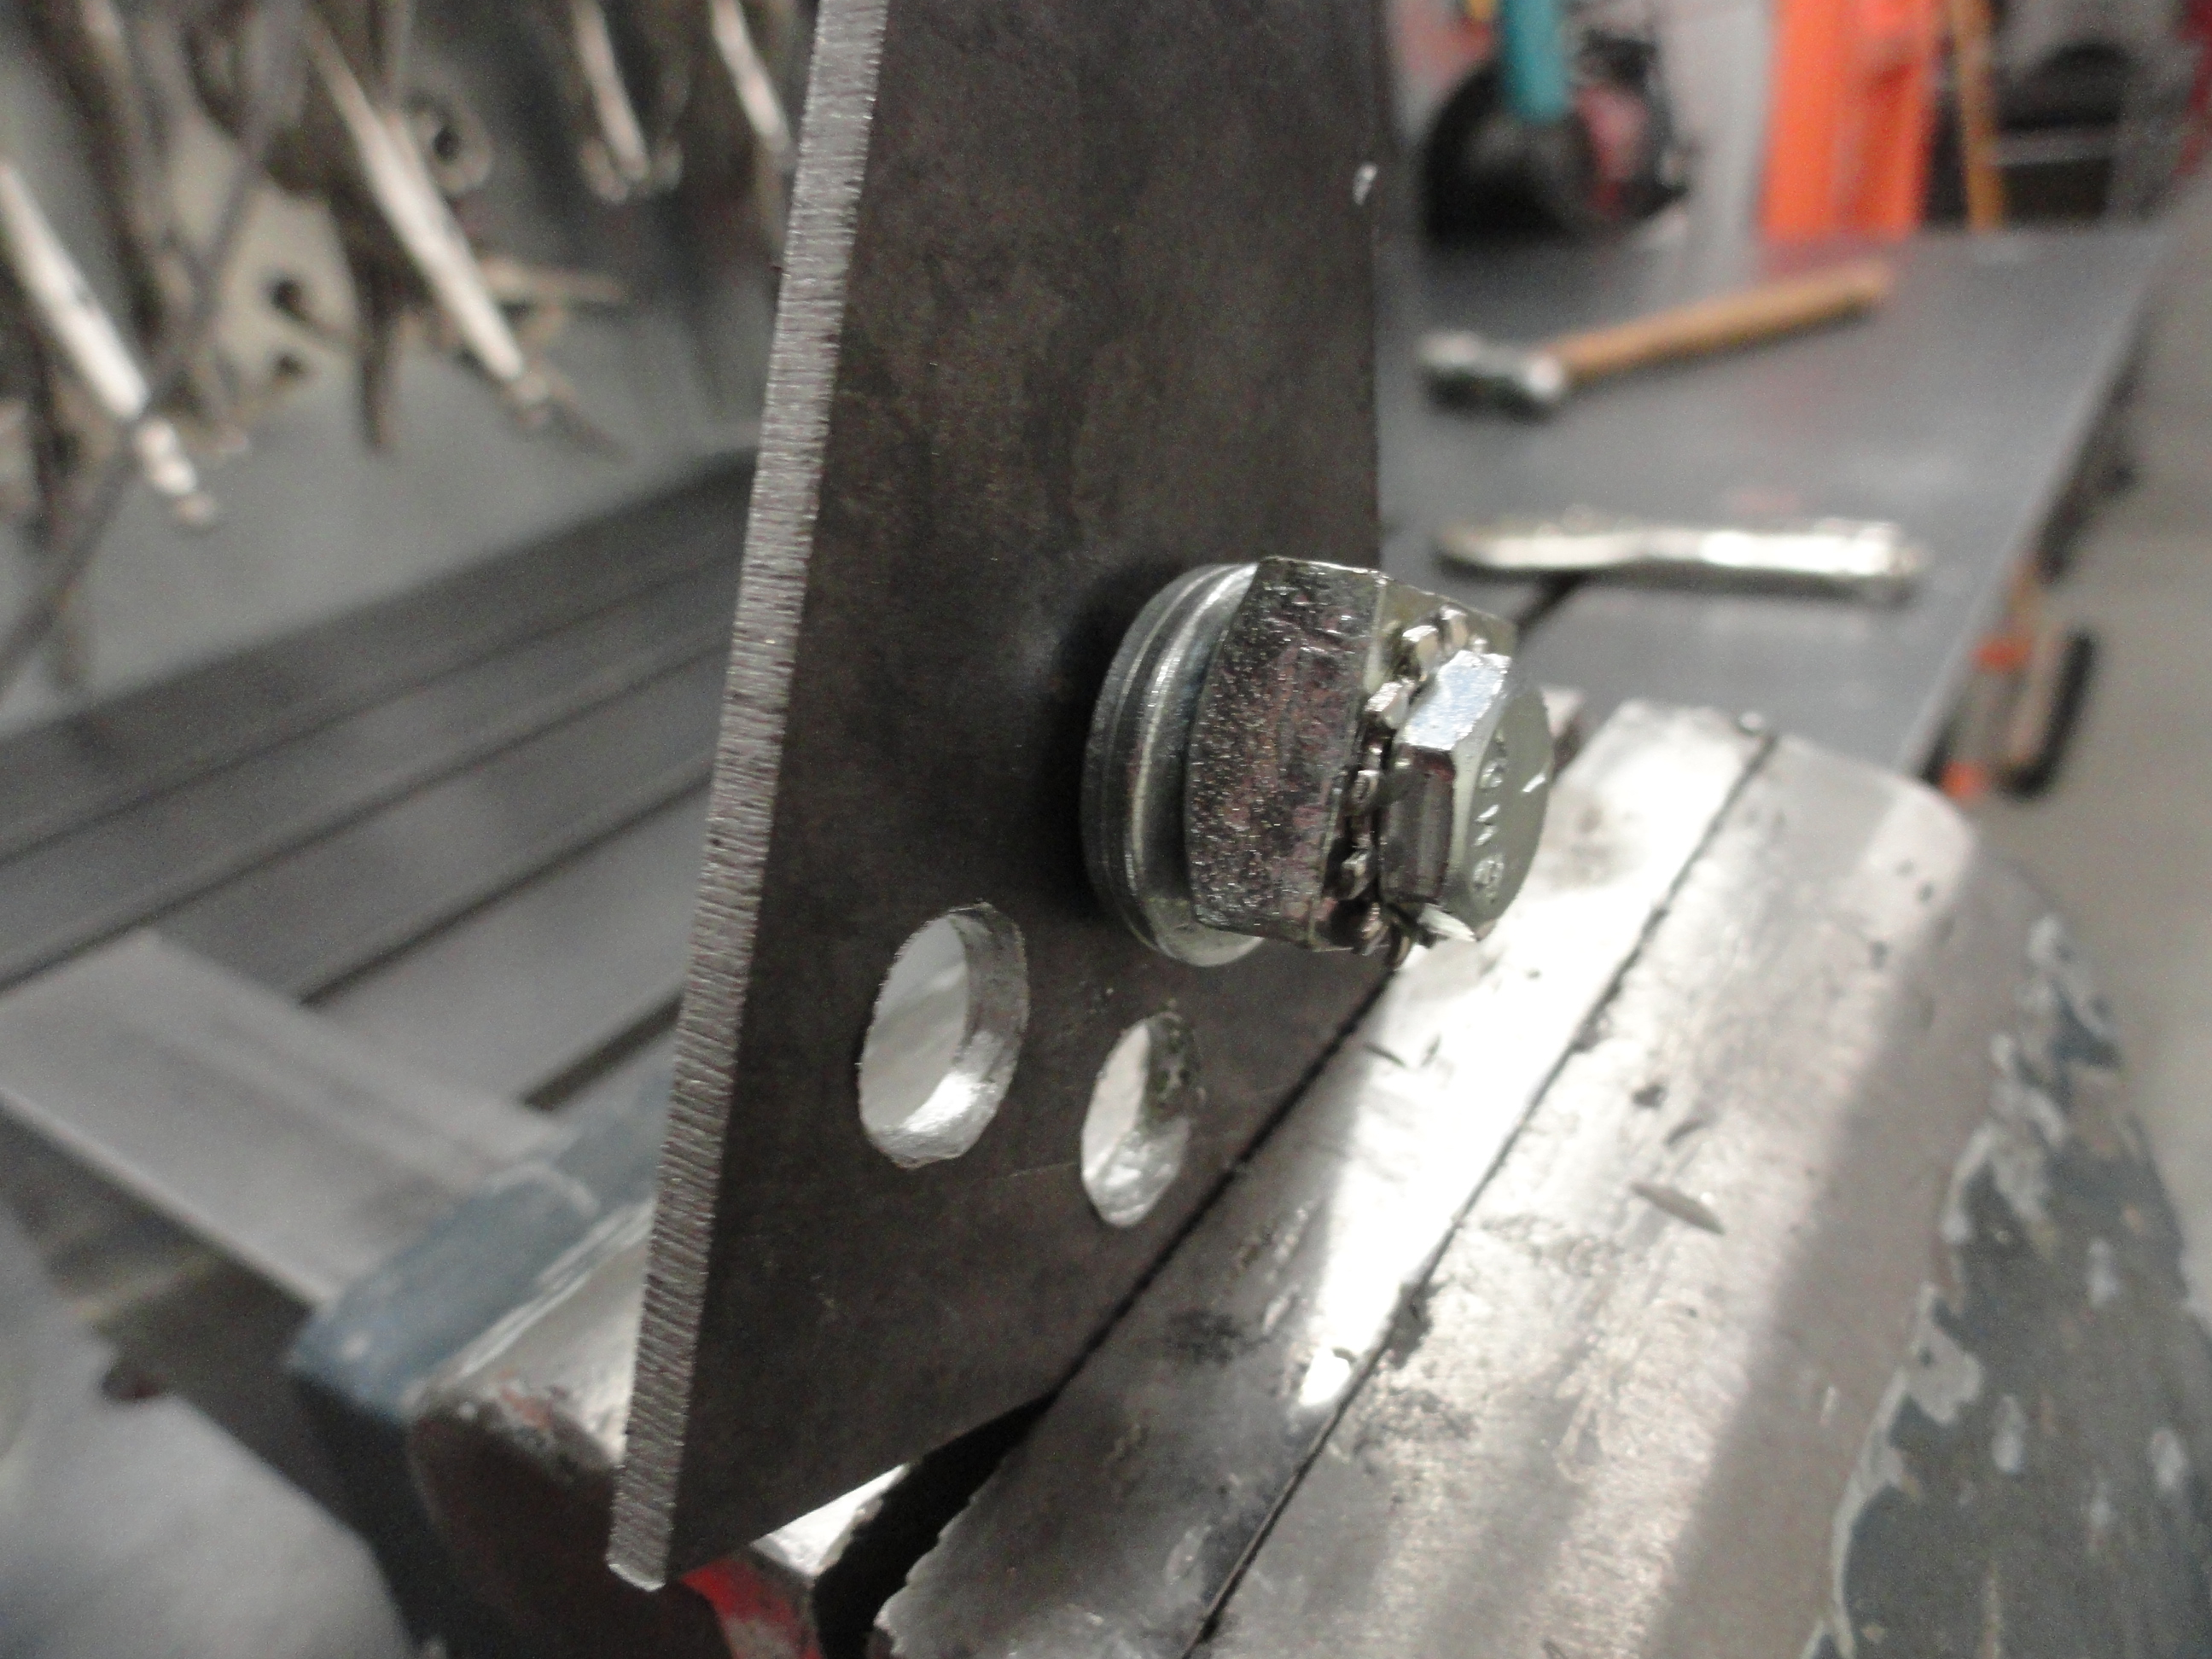
For a 1/4" Nutsert, we drill a 25/64" hole in whatever metal you want a Nutsert in and assemble a long 1/4" screw with a 3/8" square nut and the washers in the sequence above. The idea is for the square nut and washers to provide sufficient gap to grip with the crescent wrench and the lock washers are to keep the nutsert from turning. Once the Nutsert is placed in the hole all the way in, simply ratchet the 1/4" bolt into position holding everything tight against the metal and straight. By cranking the bolt, you are squashing the Nutsert into place. This method works fairly well if you pay attention, however, the professional tool is much easier to use. Also, when you get it sufficiently squashed, you need to stop before you break the bolt off!

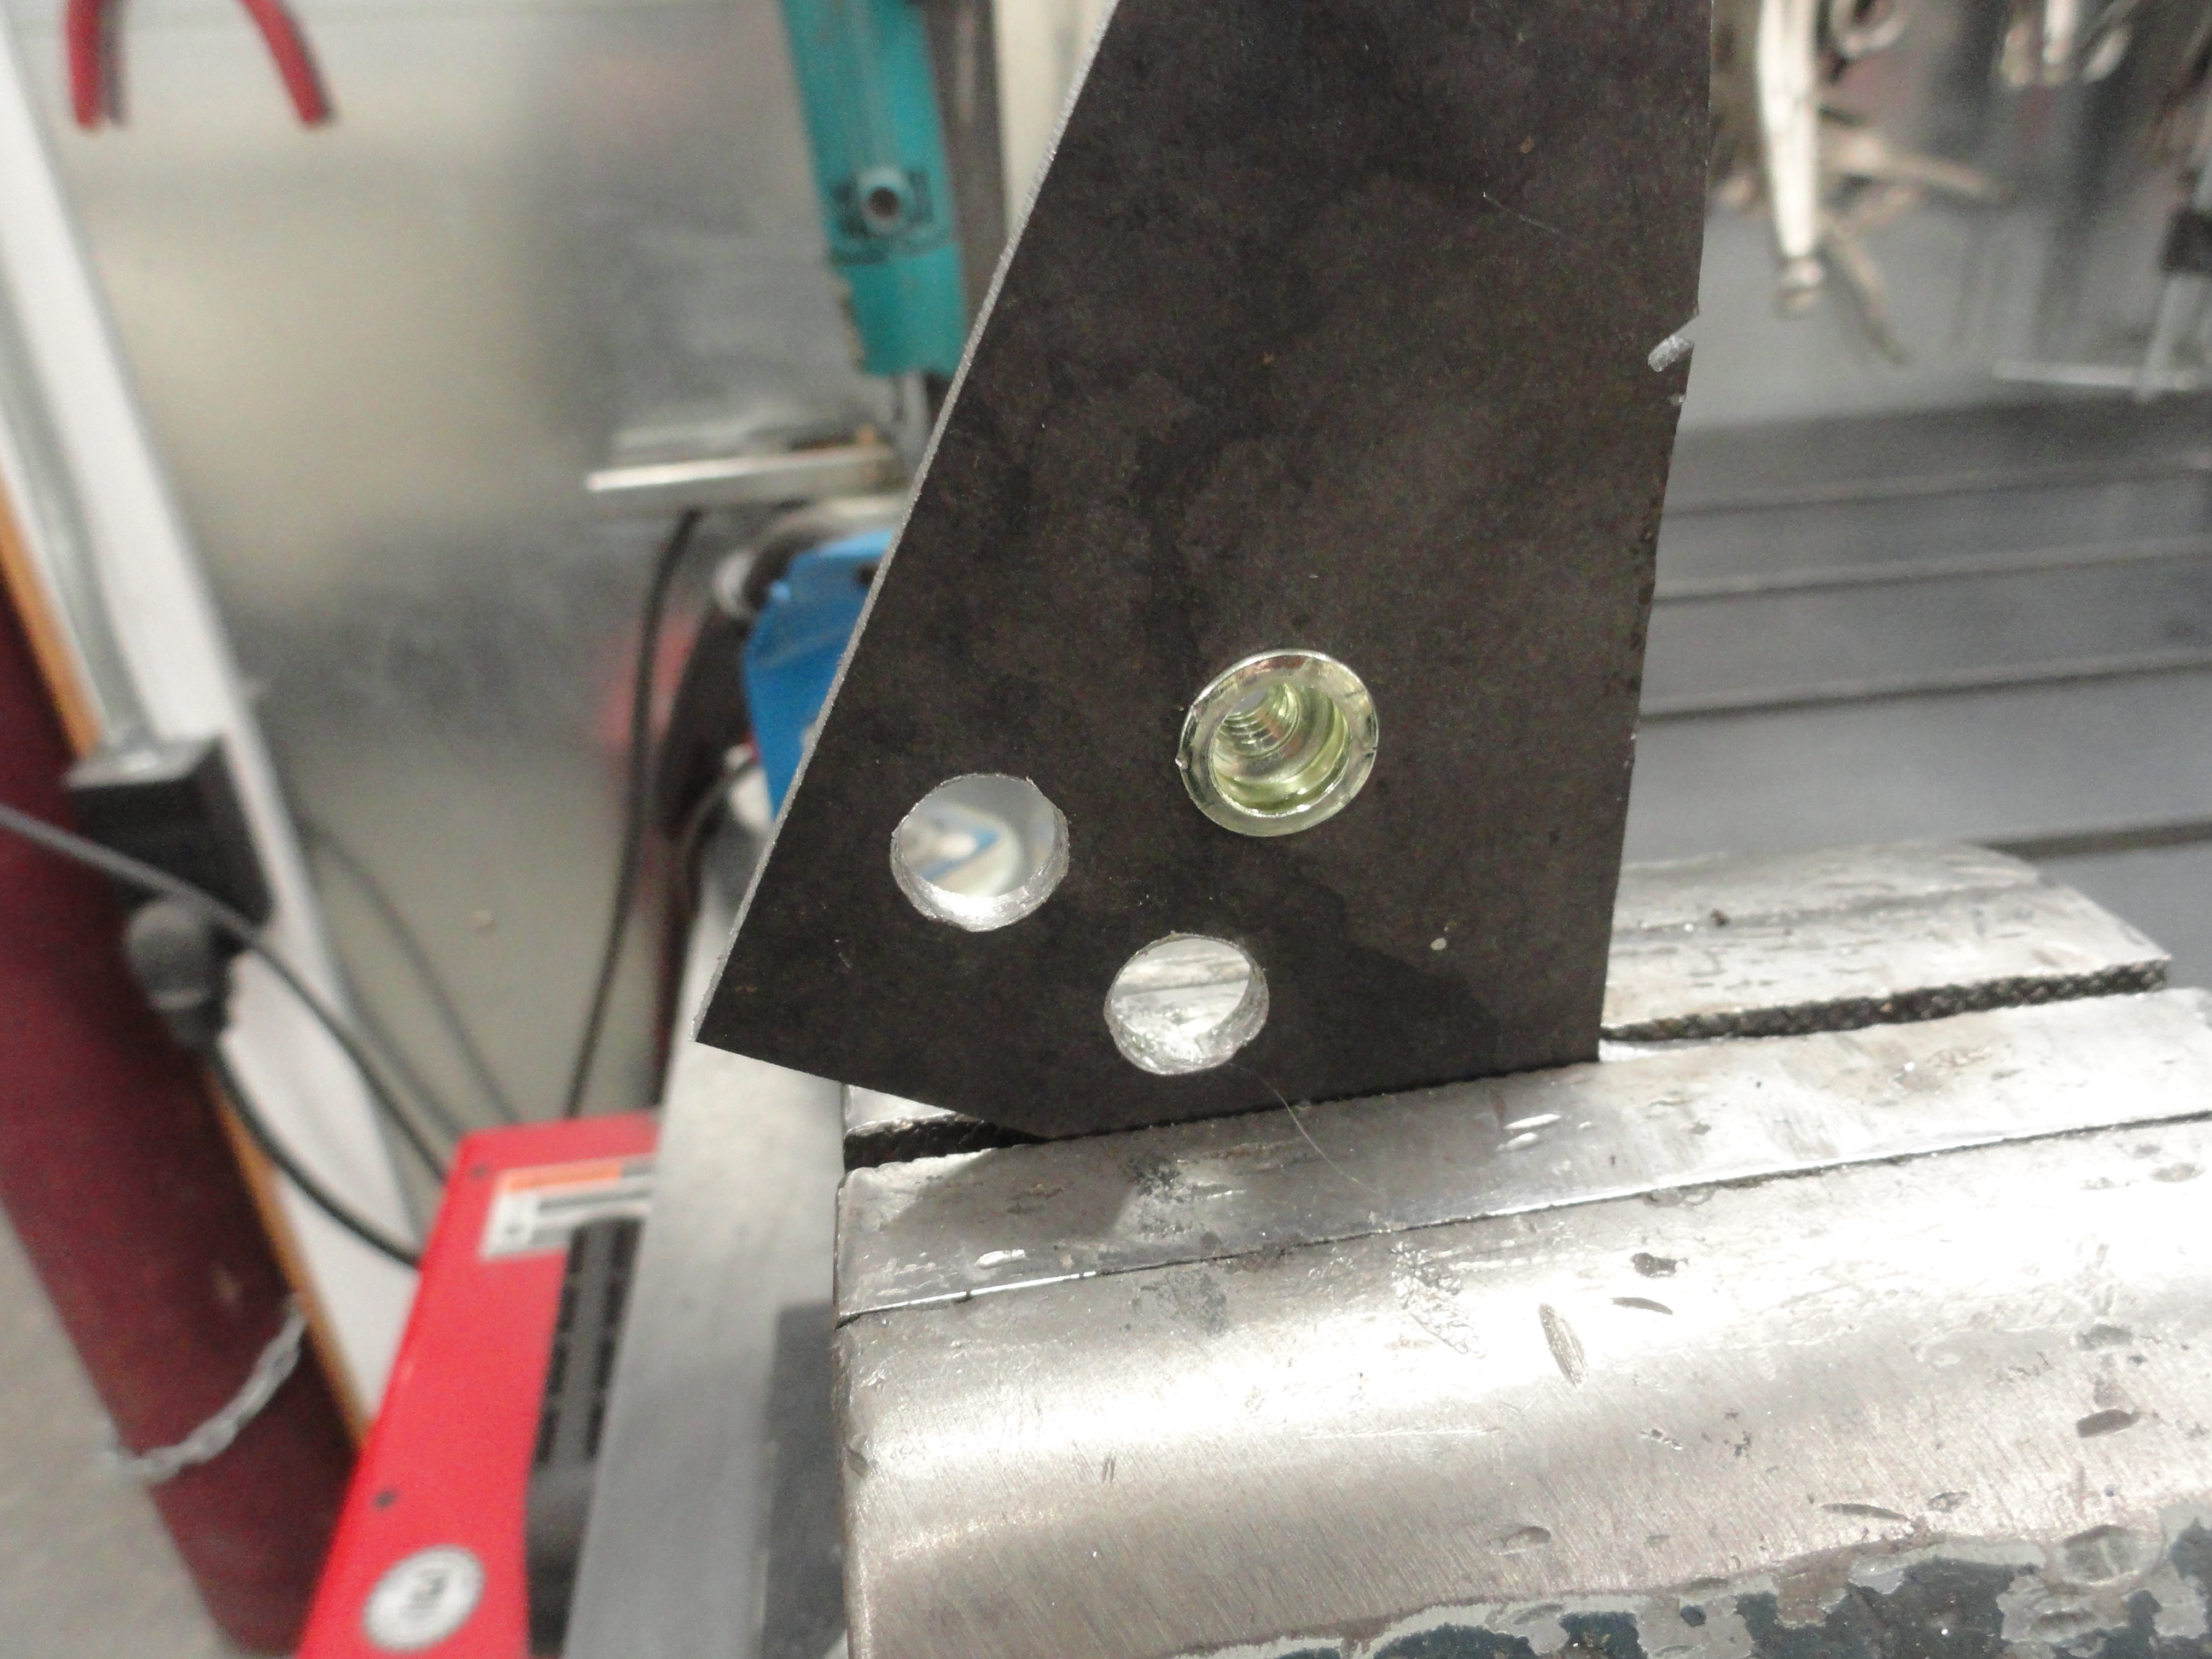
As you can see, there are indentions on the outside of the Nutsert that are made by the lock washer. This is a necessary sacrifice since in this method you are turning the Nutsert tight and with the Professional Model you are simply pulling the Nutsert tight. In both cases the bolt will not spin the Nutsert when it is installed and really showcases the possibilities. An observation that you can make is the Nutsert sticks out and looks ugly on the back side, so strategic placement of these is sort of essential when you are as picky as I am.
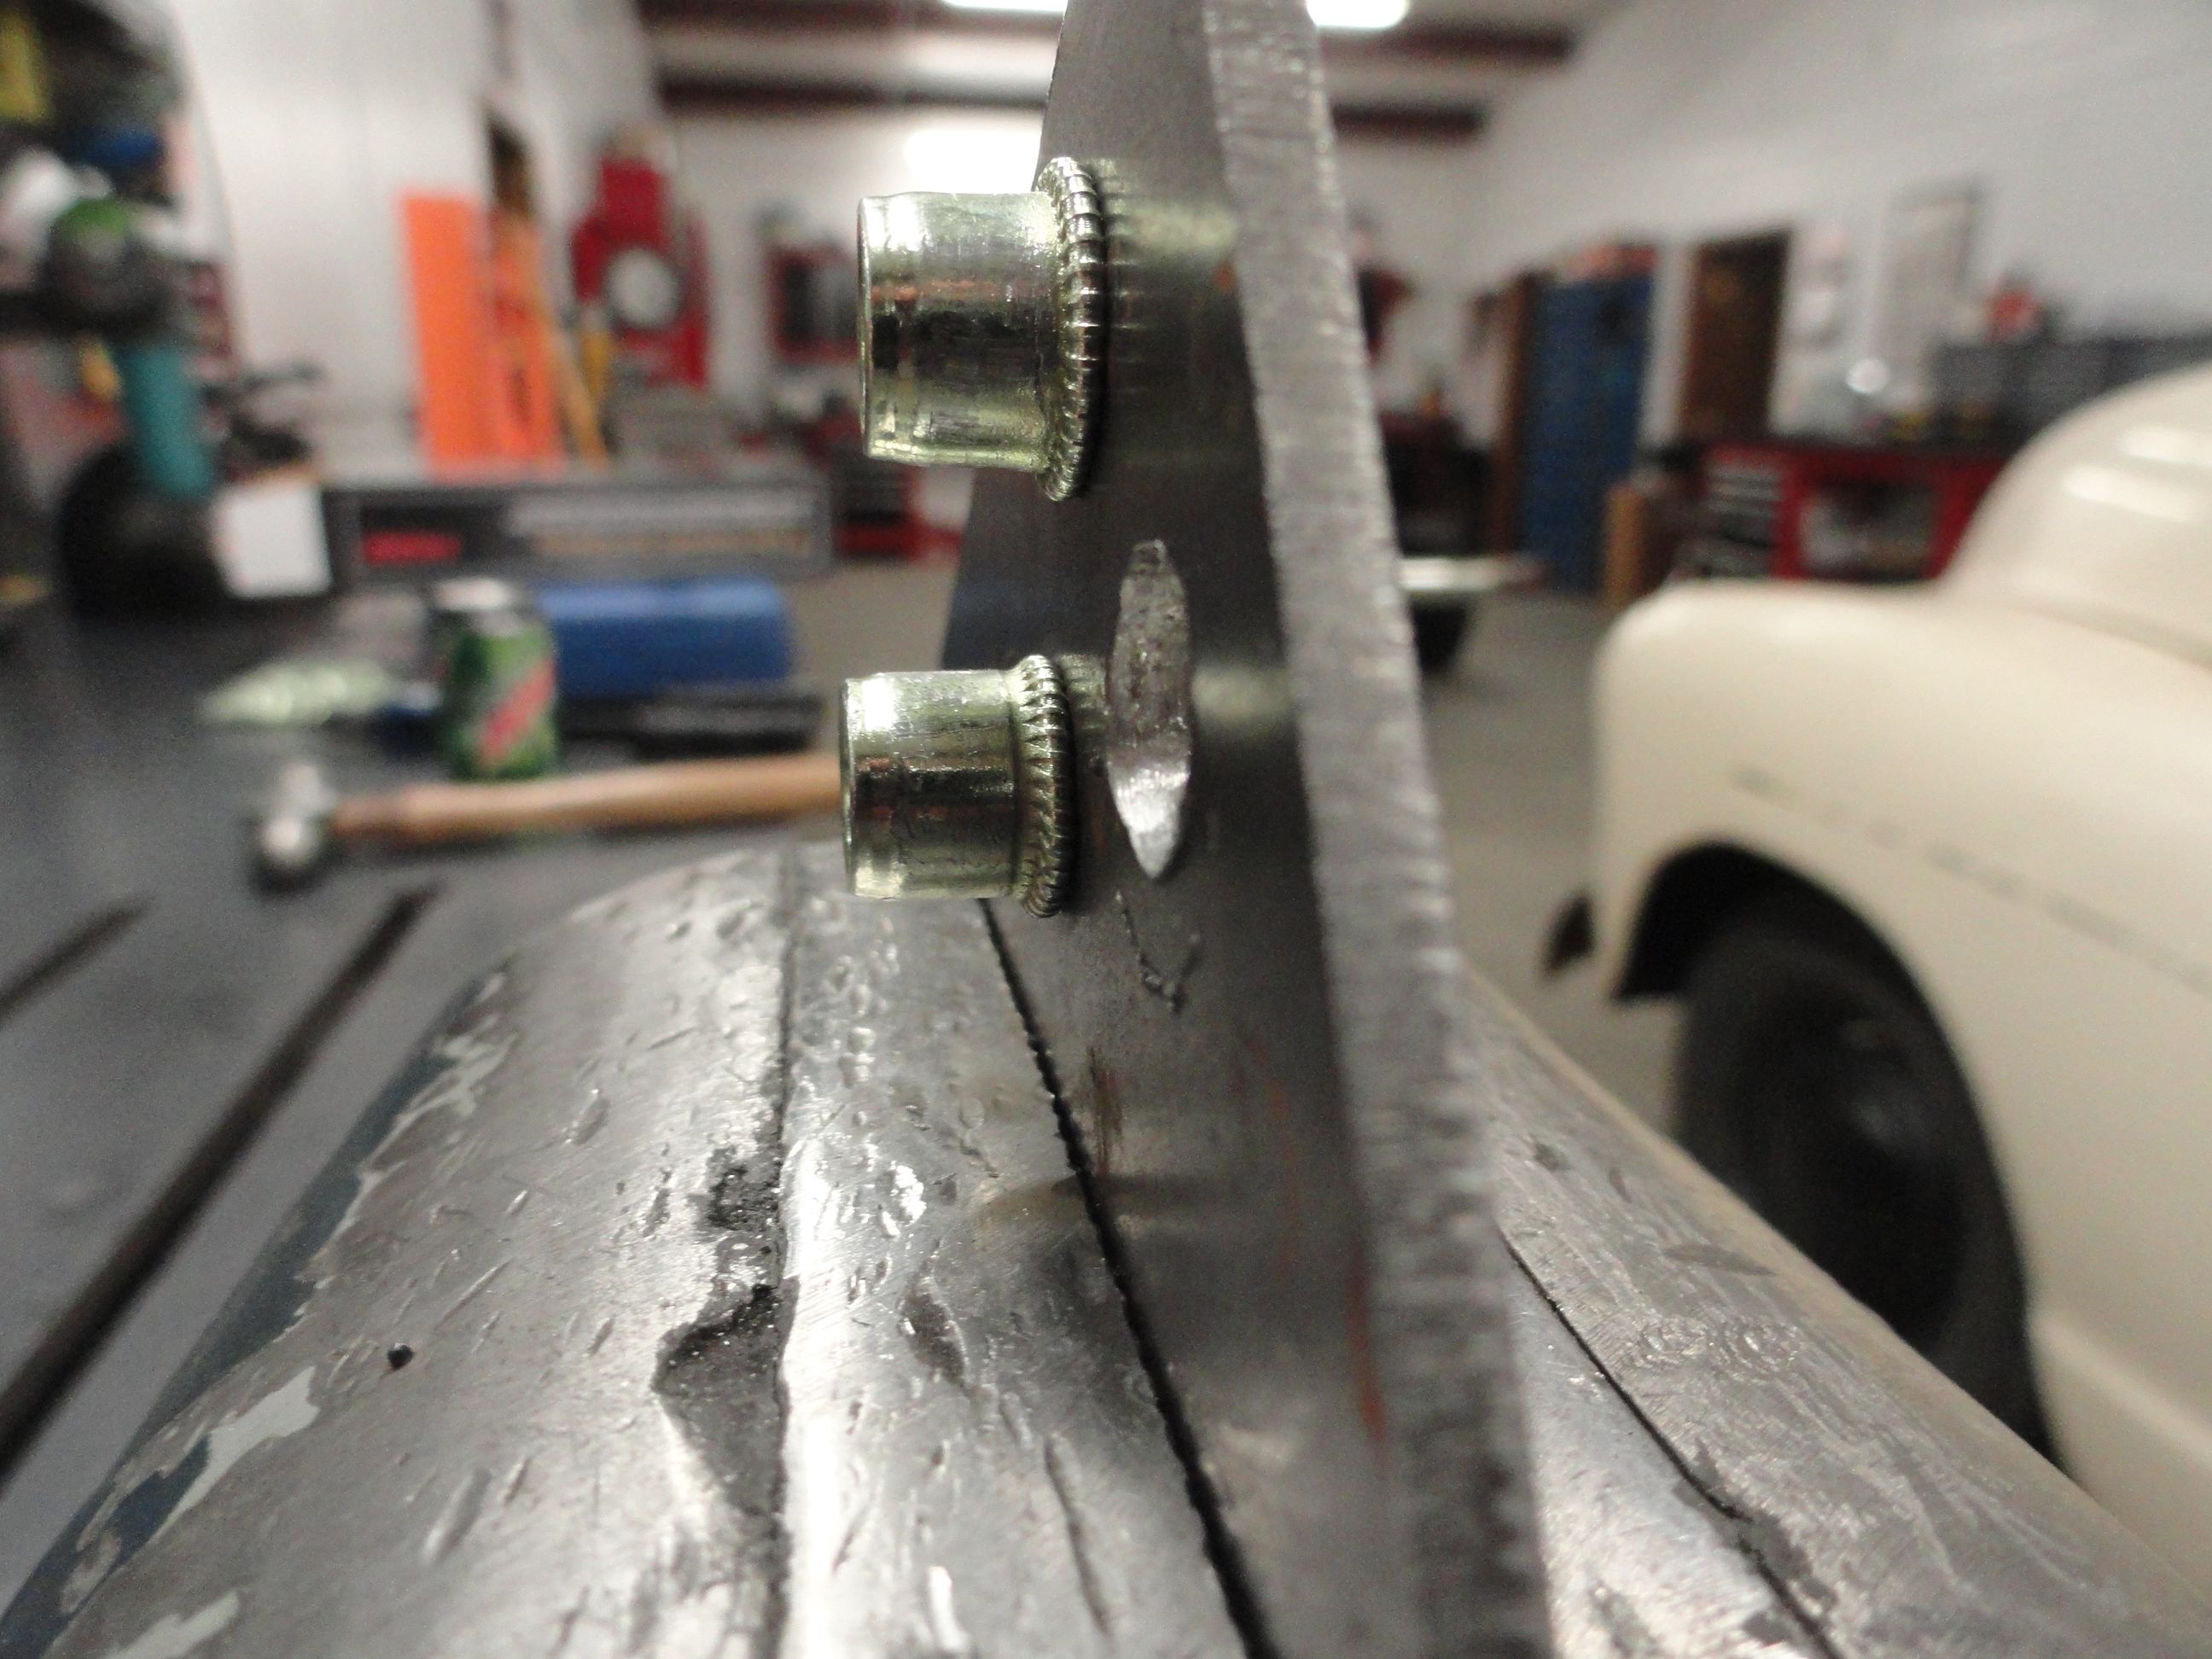
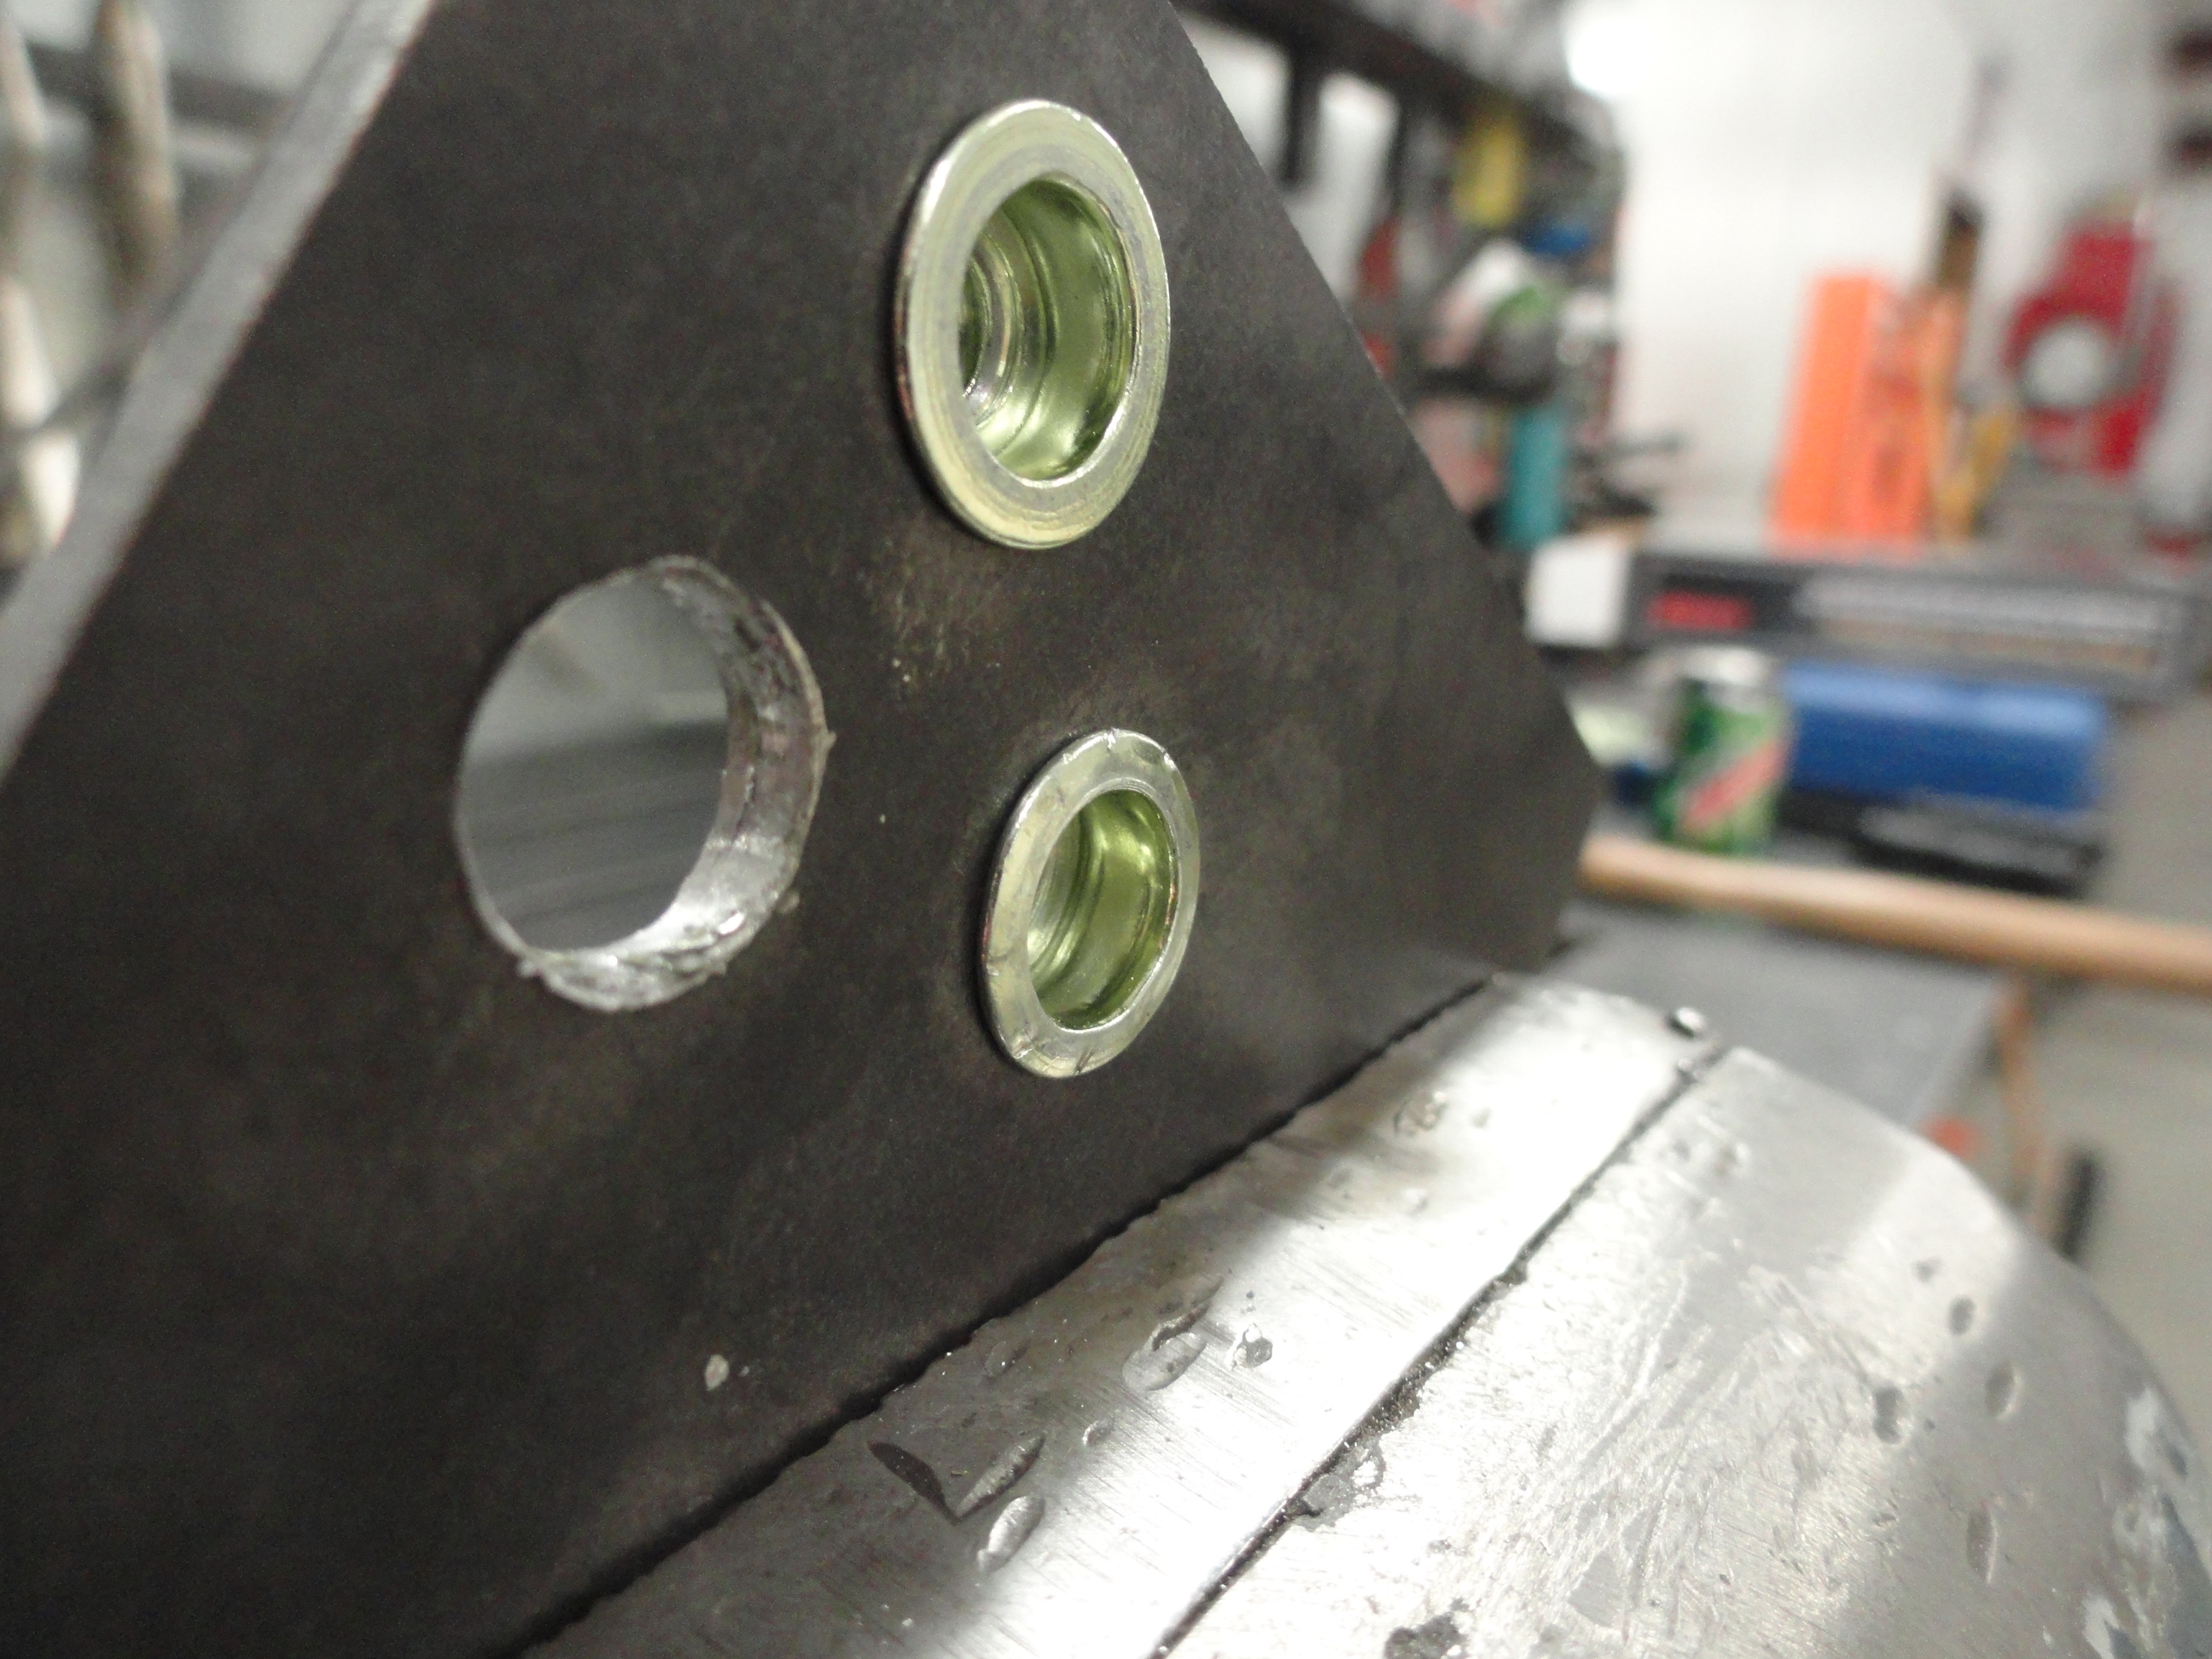
These two are for comparison purposes. You can see the Nutsert on the bottom is not squashed as cleanly as the one on the top. On the other side, you can see the indentions I mentioned before. Clearly the Professional Tool is the better way to go, but again, sometimes you can't get into tight places so the alternate tool is necessary. These Nutserts are also referred to as RivNuts and are available in all of the smaller sizes. The reason for not using them above 5/16" is because of overall strength issues. Anything below that however, and these Rivserts are really the way to go!
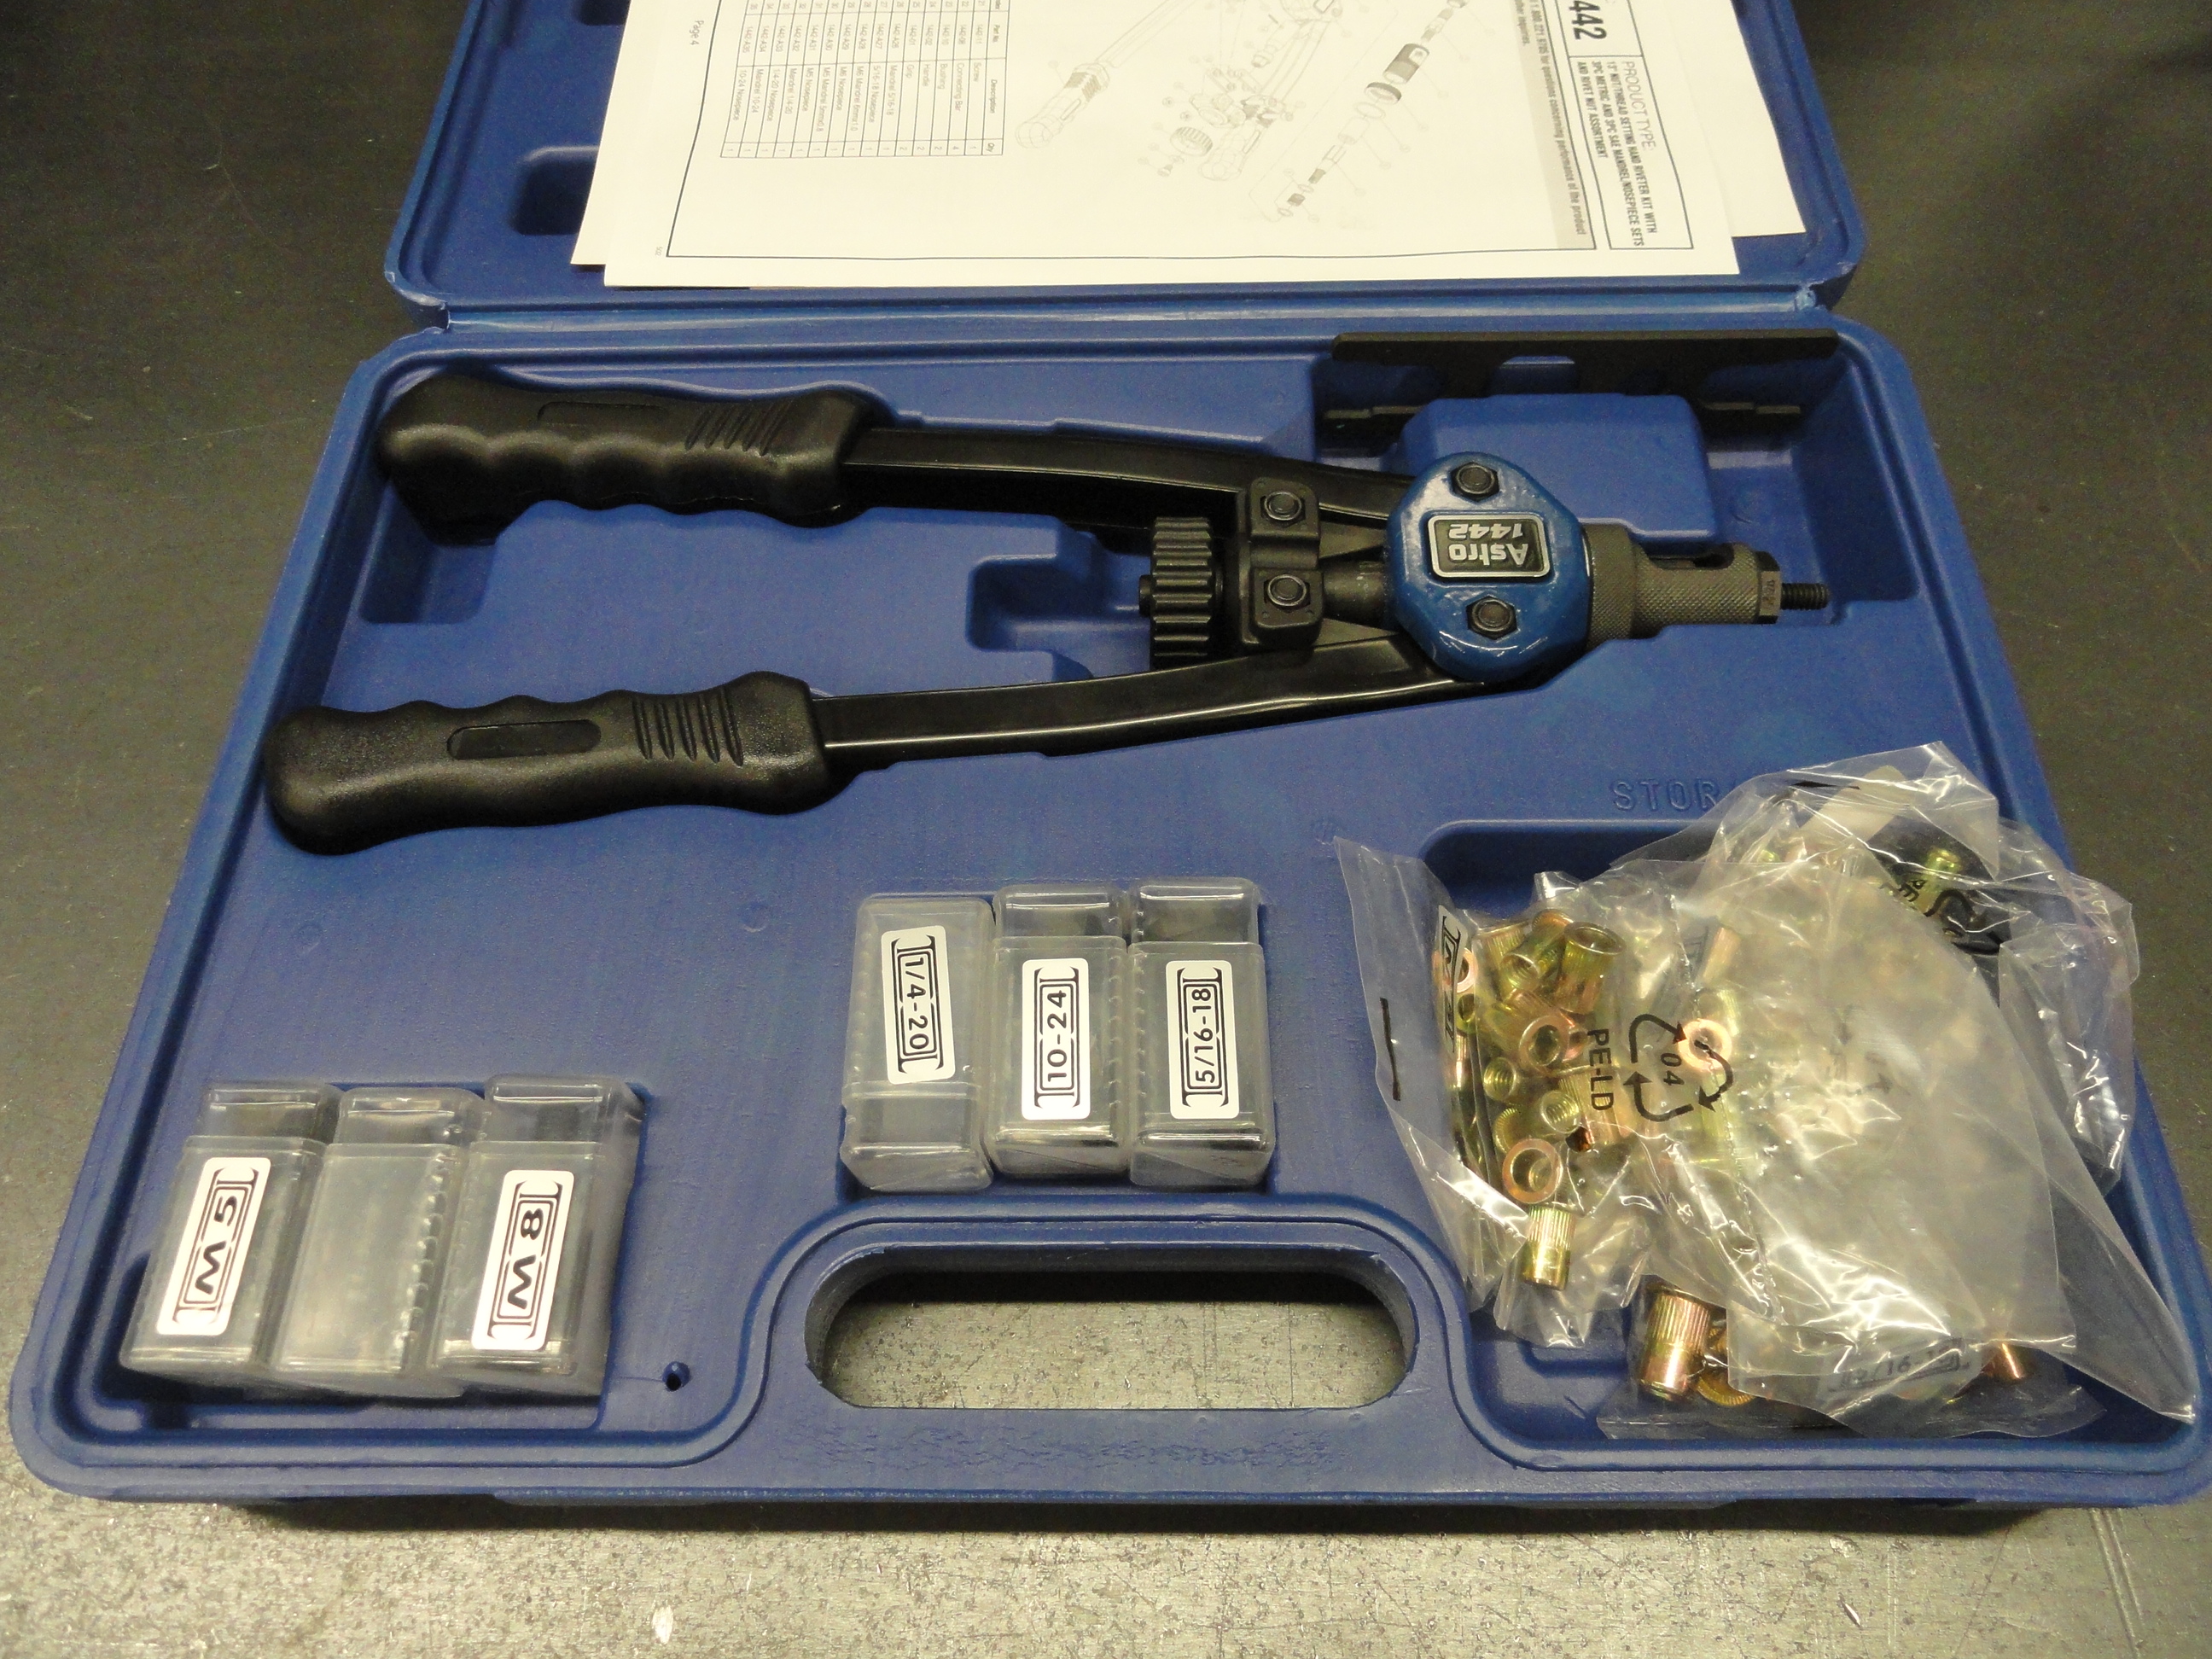
I purchased the tool shown here on Ebay and it seems to work very nicely. This is not a tool that will be used all that often, but when you need it, it will be nice knowing it is ready for action. Everyone have a Happy Thanksgiving and Seeya Next Week!
Comment